
DIY Onboard Air System for Overlanding under £200
Converting our T-Max Compressor into a multi-use setup
If you spend any time travelling off-road, especially on longer overland trips, onboard air quickly becomes one of the most useful systems on your vehicle. Whether you’re driving through sand in the Sahara, rocky mountain tracks, or long gravel roads, adjusting tyre pressure is essential. Lower pressures improve traction and comfort off-road, while higher pressures are needed again for safe driving on tarmac. But tyres are only part of the story.
Onboard air is also incredibly useful for cleaning dust and sand from your vehicle, maintaining gear and equipment, and handling small repairs on the road.
From the beginning, we knew we wanted something relatively small, easy to use, and hassle-free. We are not fans of having lots of gear stored in many different pouches and bags, and having to unpack it and connect it every time we want to use it. We like when things are hardwired / connected in their own place, and ready to use with just one or two moves.
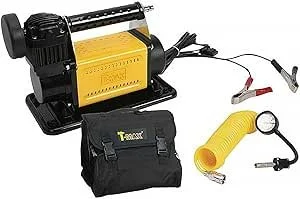
We started with a standard T-Max compressor, mainly for tyre inflation. It did the job, but it wasn’t the most convenient setup. Taking it out, connecting it with a terrible screw-on connector, running it manually (turning it on and off), packing it away again… it worked, but it wasn’t ideal - especially when you’re adjusting tyre pressures multiple times a day.
Why we chose DIY over commercial systems
There are plenty of ready-made solutions available, such as the twin compressors or “portable” compressors in plastic cases, which then take valuable space in the car. Some of them are reliable, powerful, and widely used in the overlanding community. But they are heavy, bulky, and expensive. For us, the DIY route made more sense.
We are not obsessed with speed. Many influencers and YouTubers are mentioning those heavy (8kg!!) twin compressors, huge inside diameter hoses, and dual or even four hose connections to each wheel for “faster” inflating, as if it’s a “must-have”. Acting like the most important parameter is SPEED. But is it? We are on a trip/holiday, not in a race. Will it make such a difference if we inflate each tyre in two minutes instead of one? On top of that, how much time does it take to unpack the pouch with 4 hoses, connect them to each wheel, to be able to pump all 4 wheels at once? Also, the huge air flow from the compressor is now split into 4 tyres. And when finished, unplug all four hoses from the tyres and pack those big hoses back into the pouch and somewhere in the car.
I can comfortably say that before getting this type of system ready for all four tyres, I would have already refilled one wheel and moved to the second one with our system, and at the end we might finish at the same time or with just a small difference.
But it is not about speed. During inflating each wheel, I like to have a look in the wheel well and under the car, check if there is something loose, any visible leaks, and look at the brake discs/pads. It is not about saving time, but using it effectively.
We wanted:
a system tailored to our exact needs
something reasonably light (less than 3kg vs more than 8kg)
and a more cost-effective solution (less than £200 vs £850) *prices in 2023
Building the System
The idea was simple: take our existing compressor and expand it into a small onboard air system by adding an air tank, pressure switch, and multiple outputs.
Simple in theory - but as always, it required a bit of planning and measuring to get everything working the way we wanted.
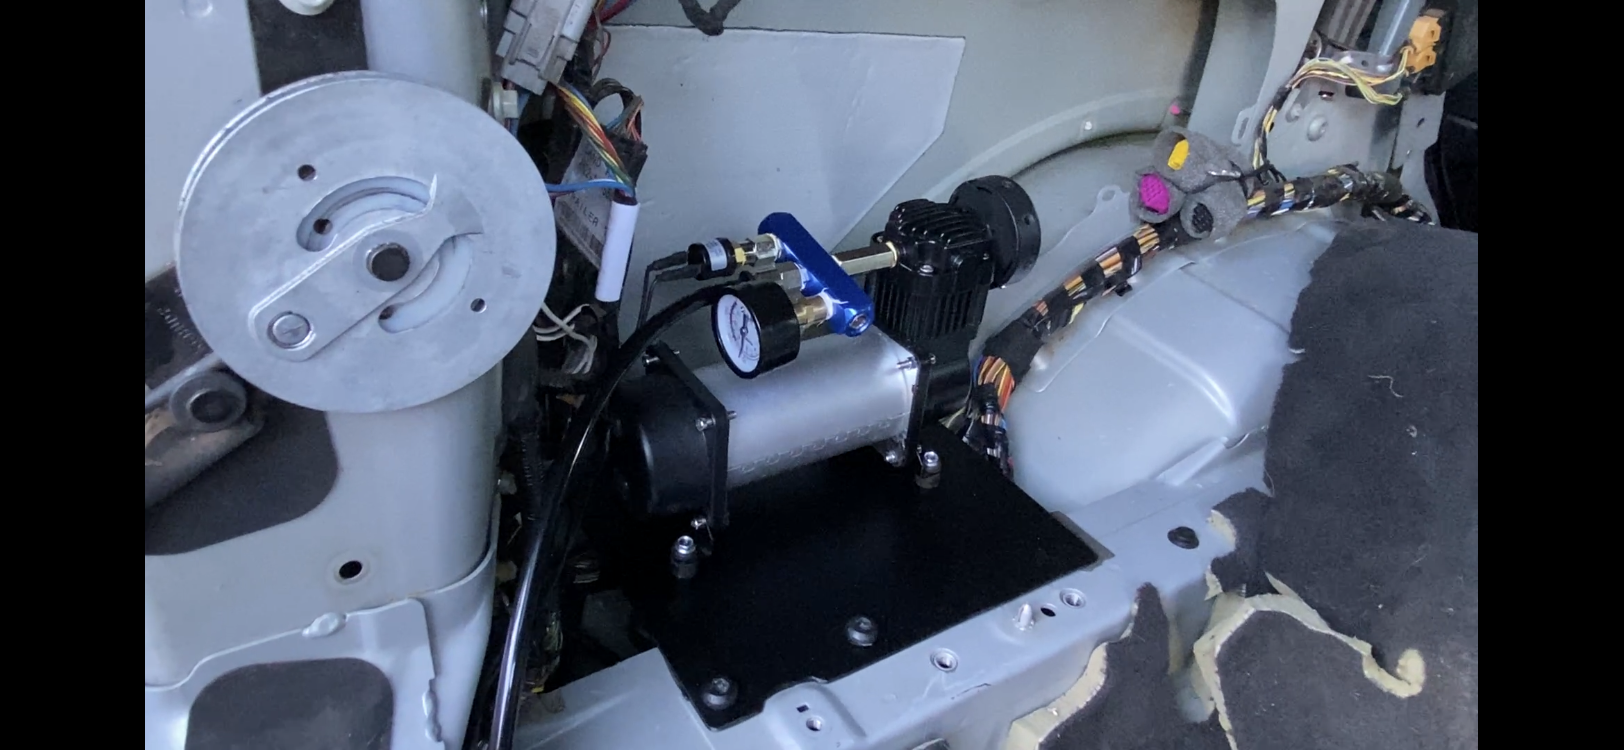
We started with removing the base plate from the compressor and the yellow metal cover for better ventilation. We also drilled some holes into the filter housing for better airflow in the intake. Then we removed the handle and unscrewed the pipe running inside of it. We opened the back plastic cover with the switch to access the wiring (which was done very badly, and we recommend tidying it up even if you want to use this compressor as is).
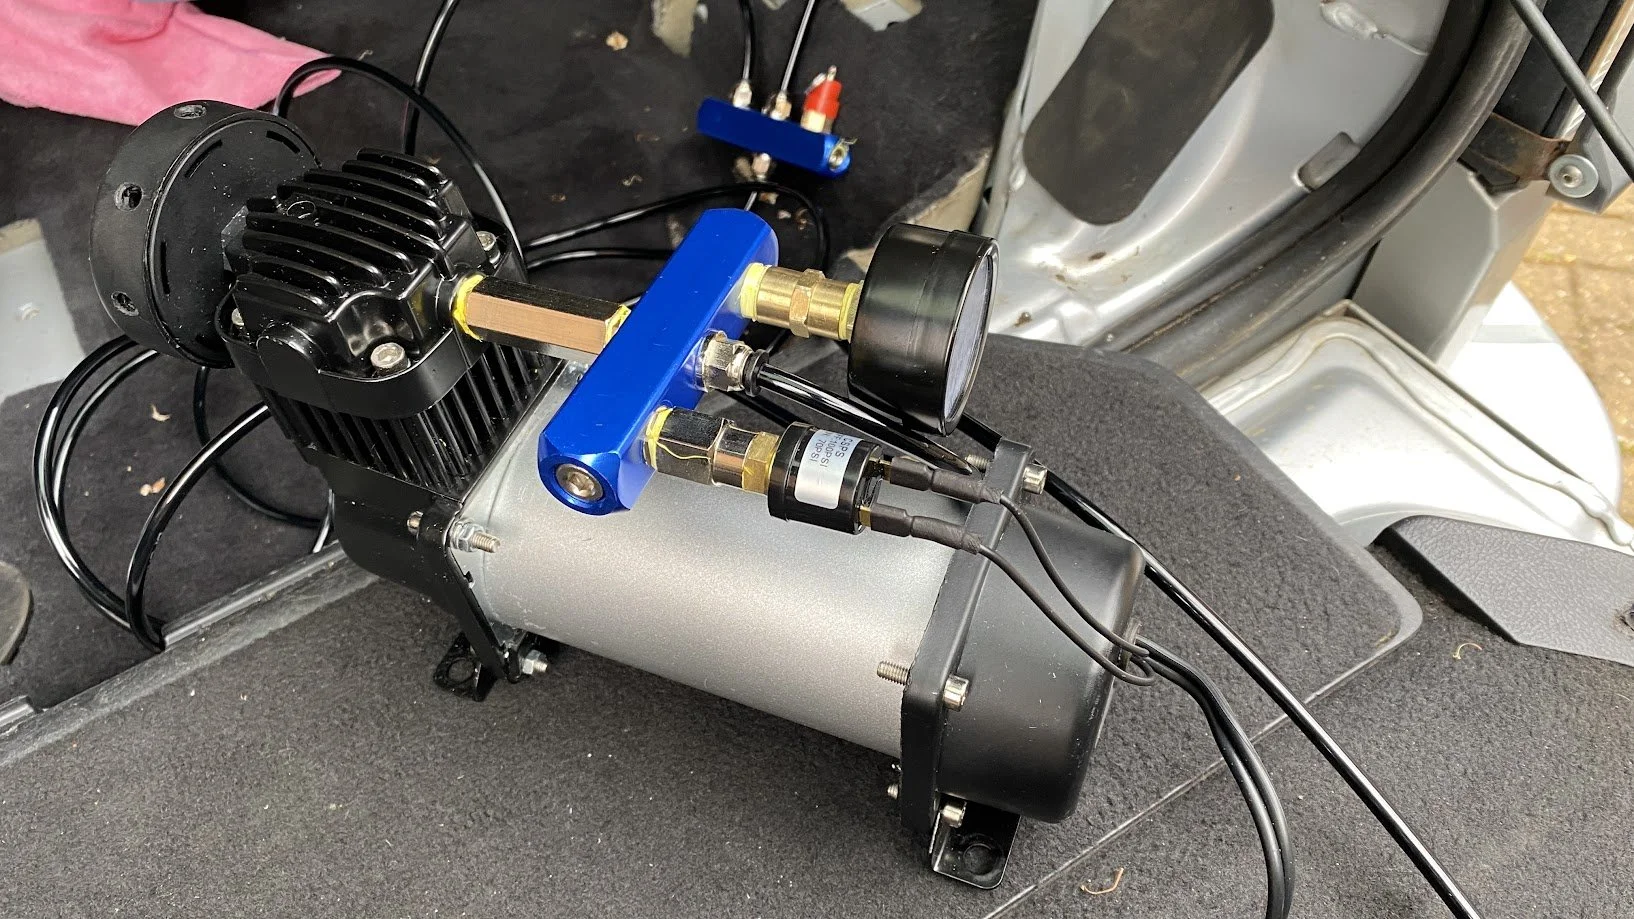
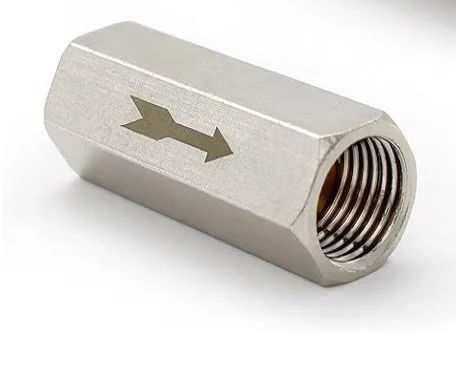
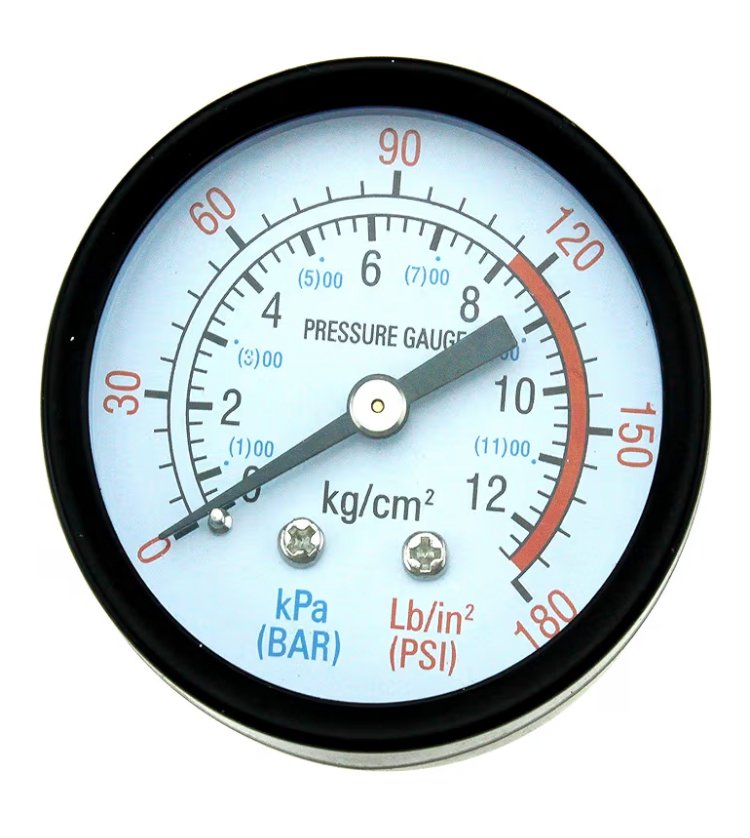
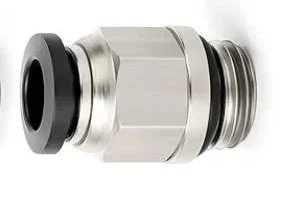
Now it was just a matter of connecting all parts together - from the compressor through a one-way valve (check valve) to the first manifold with a mounted pressure gauge and pressure switch, and one push-fit connector for the hose. The pressure switch is wired to the compressor via a switch and fuse on our control panel in the back of the car. The compressor is installed in the side cavity in the boot on a homemade bracket using bolts from the towbar storage.
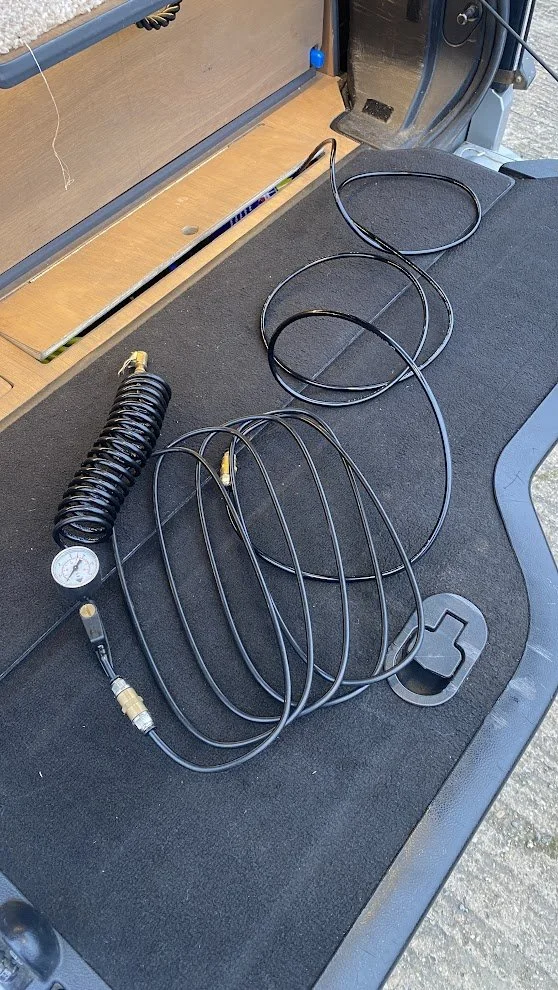
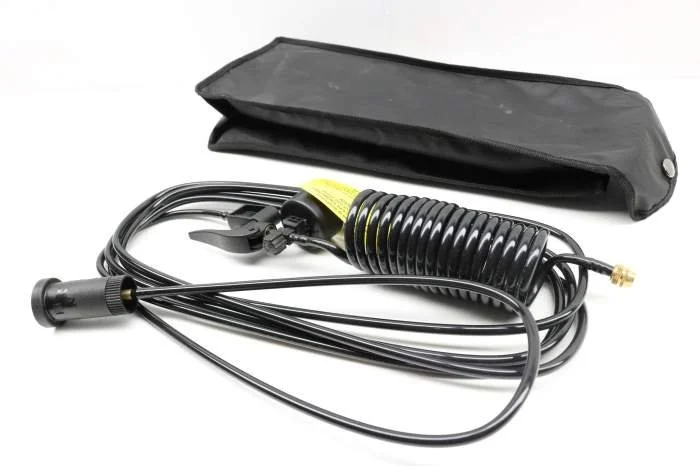
Through the hose, we go to the other side of the car, where it enters another manifold. This holds a safety release valve, and splits into 3 ways - to the tank (mounted inside the other side cavity) via a 6mm hose, another hose to the blow gun, and a longer hose connected to the tyre inflator with gauge, where we replaced the screw-on connection with a metal tyre inflator air chuck. It is long enough that we can reach all around the car or other cars parked next to us when we are helping others.
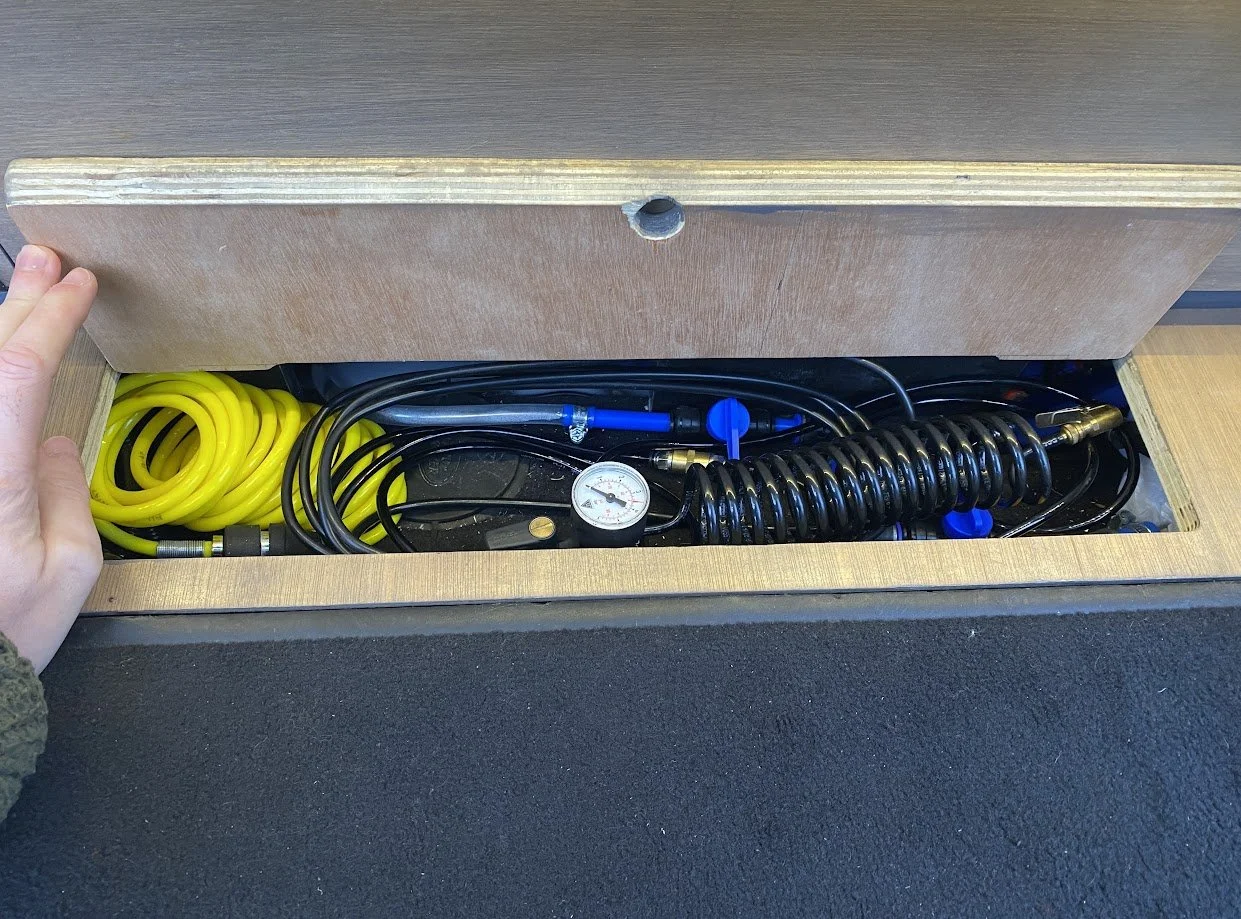
At the end, everything is nicely tucked out of sight, but still accessible in case it will need some service. The tyre inflator with a long hose is constantly connected and stored under the hatch below the false floor in the boot and easily accessible.
How does it work? After turning on the air compressor switch on the panel, and if the pressure in the system is below 70 PSI, the compressor starts running and filling the tank until it reaches 100PSI and turns itself off. In the meantime, we can open the hatch and take the inflator to the wheel and start inflating. As the pressure drops below 70 PSI, it starts again.
The advantage is that between moving from wheel to wheel, it will fill the tank again, and there is no need for turning the compressor on and off manually like with an unmodified system. Another advantage is that, with the tank, there is enough pressure for using a blow gun for dusting/cleaning etc.
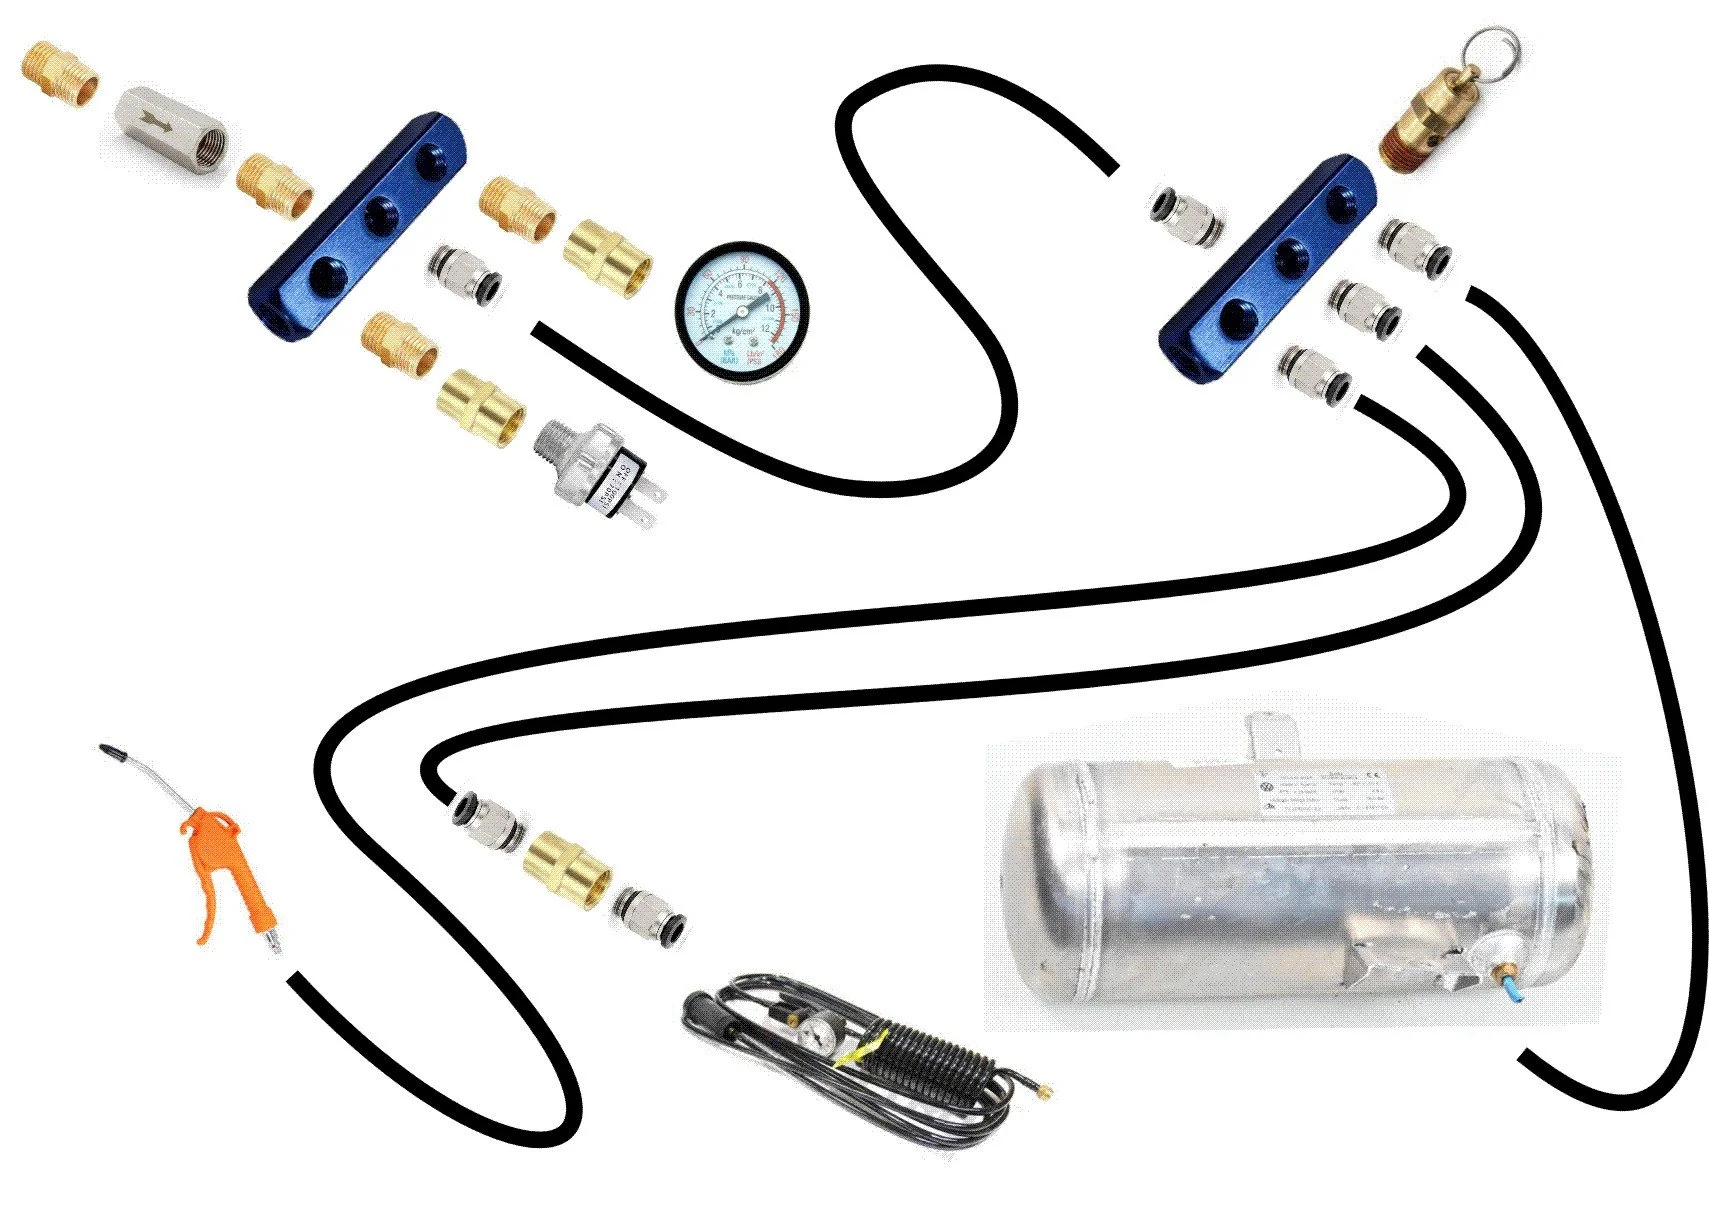


What We Used
T-Max 72l compressor
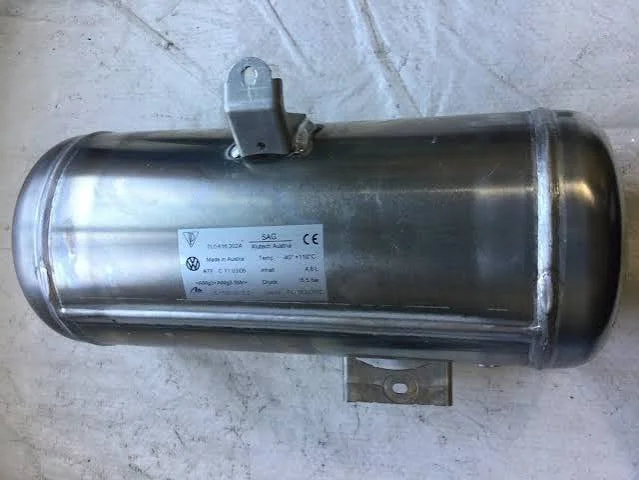
Air tank – (aluminium 4.8-litre air tank from VW Touareg)
Pressure switch – (70/100 PSI)
Pressure relief valve – (130 PSI)
Check valve
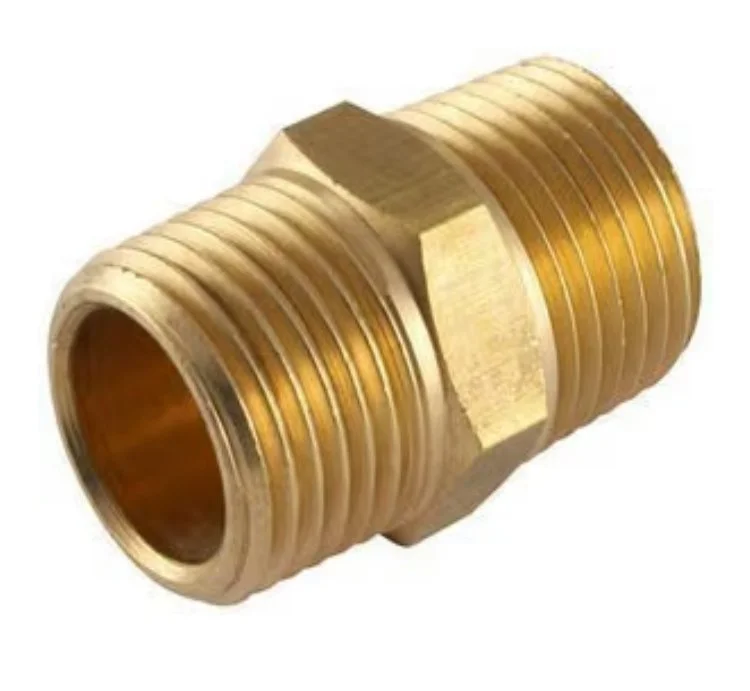
Distribution block – aluminium manifolds / 3 and 4 - way splitter
Couplings – various fittings and push-fit connectors
Air hoses – 10mm and 6mm air hoses
Tyre inflator with gauge – from VW Touareg spare tyre inflator
Air blow gun
Cleaning
One of the best additions turned out to be the simplest - a blow gun.
In dusty environments, this is a game-changer.
We use it to:
clean the interior
blow out the air filter
remove sand from storage and gear
keep the vehicle liveable during long trips
handy for cleaning parts during maintenance/service
After using it, we wouldn’t build a system without it.