Our electrical system
When planning the electrical system for our vehicle build, we approached it the same way we did every other part of the project: first, we defined what we actually need.
We need to charge our devices, power water pump for the plumbing and shower, run an air compressor, have lighting on the roofrack as well as inside the vehicle, use USB and 12V power outlets, and of course reliably power the fridge. We also decided not to have/use an inverter, as we don´t use any 240V appliances, and using 240V just for charging devices like laptops, cameras and phones is uneffective due to unnecessary energy losses when converting voltage from 12V to 240V and back to lower voltages. (instead we use 12v chargers for each device as they are commonly available, and very often smaller and lighter than 240V chargers).
With this in mind, we decided that the simplest and most efficient solution would be a lithium battery combined with DC-DC charging directly from the vehicle’s alternator. Since we usually move from place to place and don’t stay in one location for very long, we don’t need a huge battery capacity or solar panels. We can easily recharge the battery while driving. This keeps the system clean and simple, consisting only of a charger, a battery, fuses, a control center, and switches.
Fully separate system
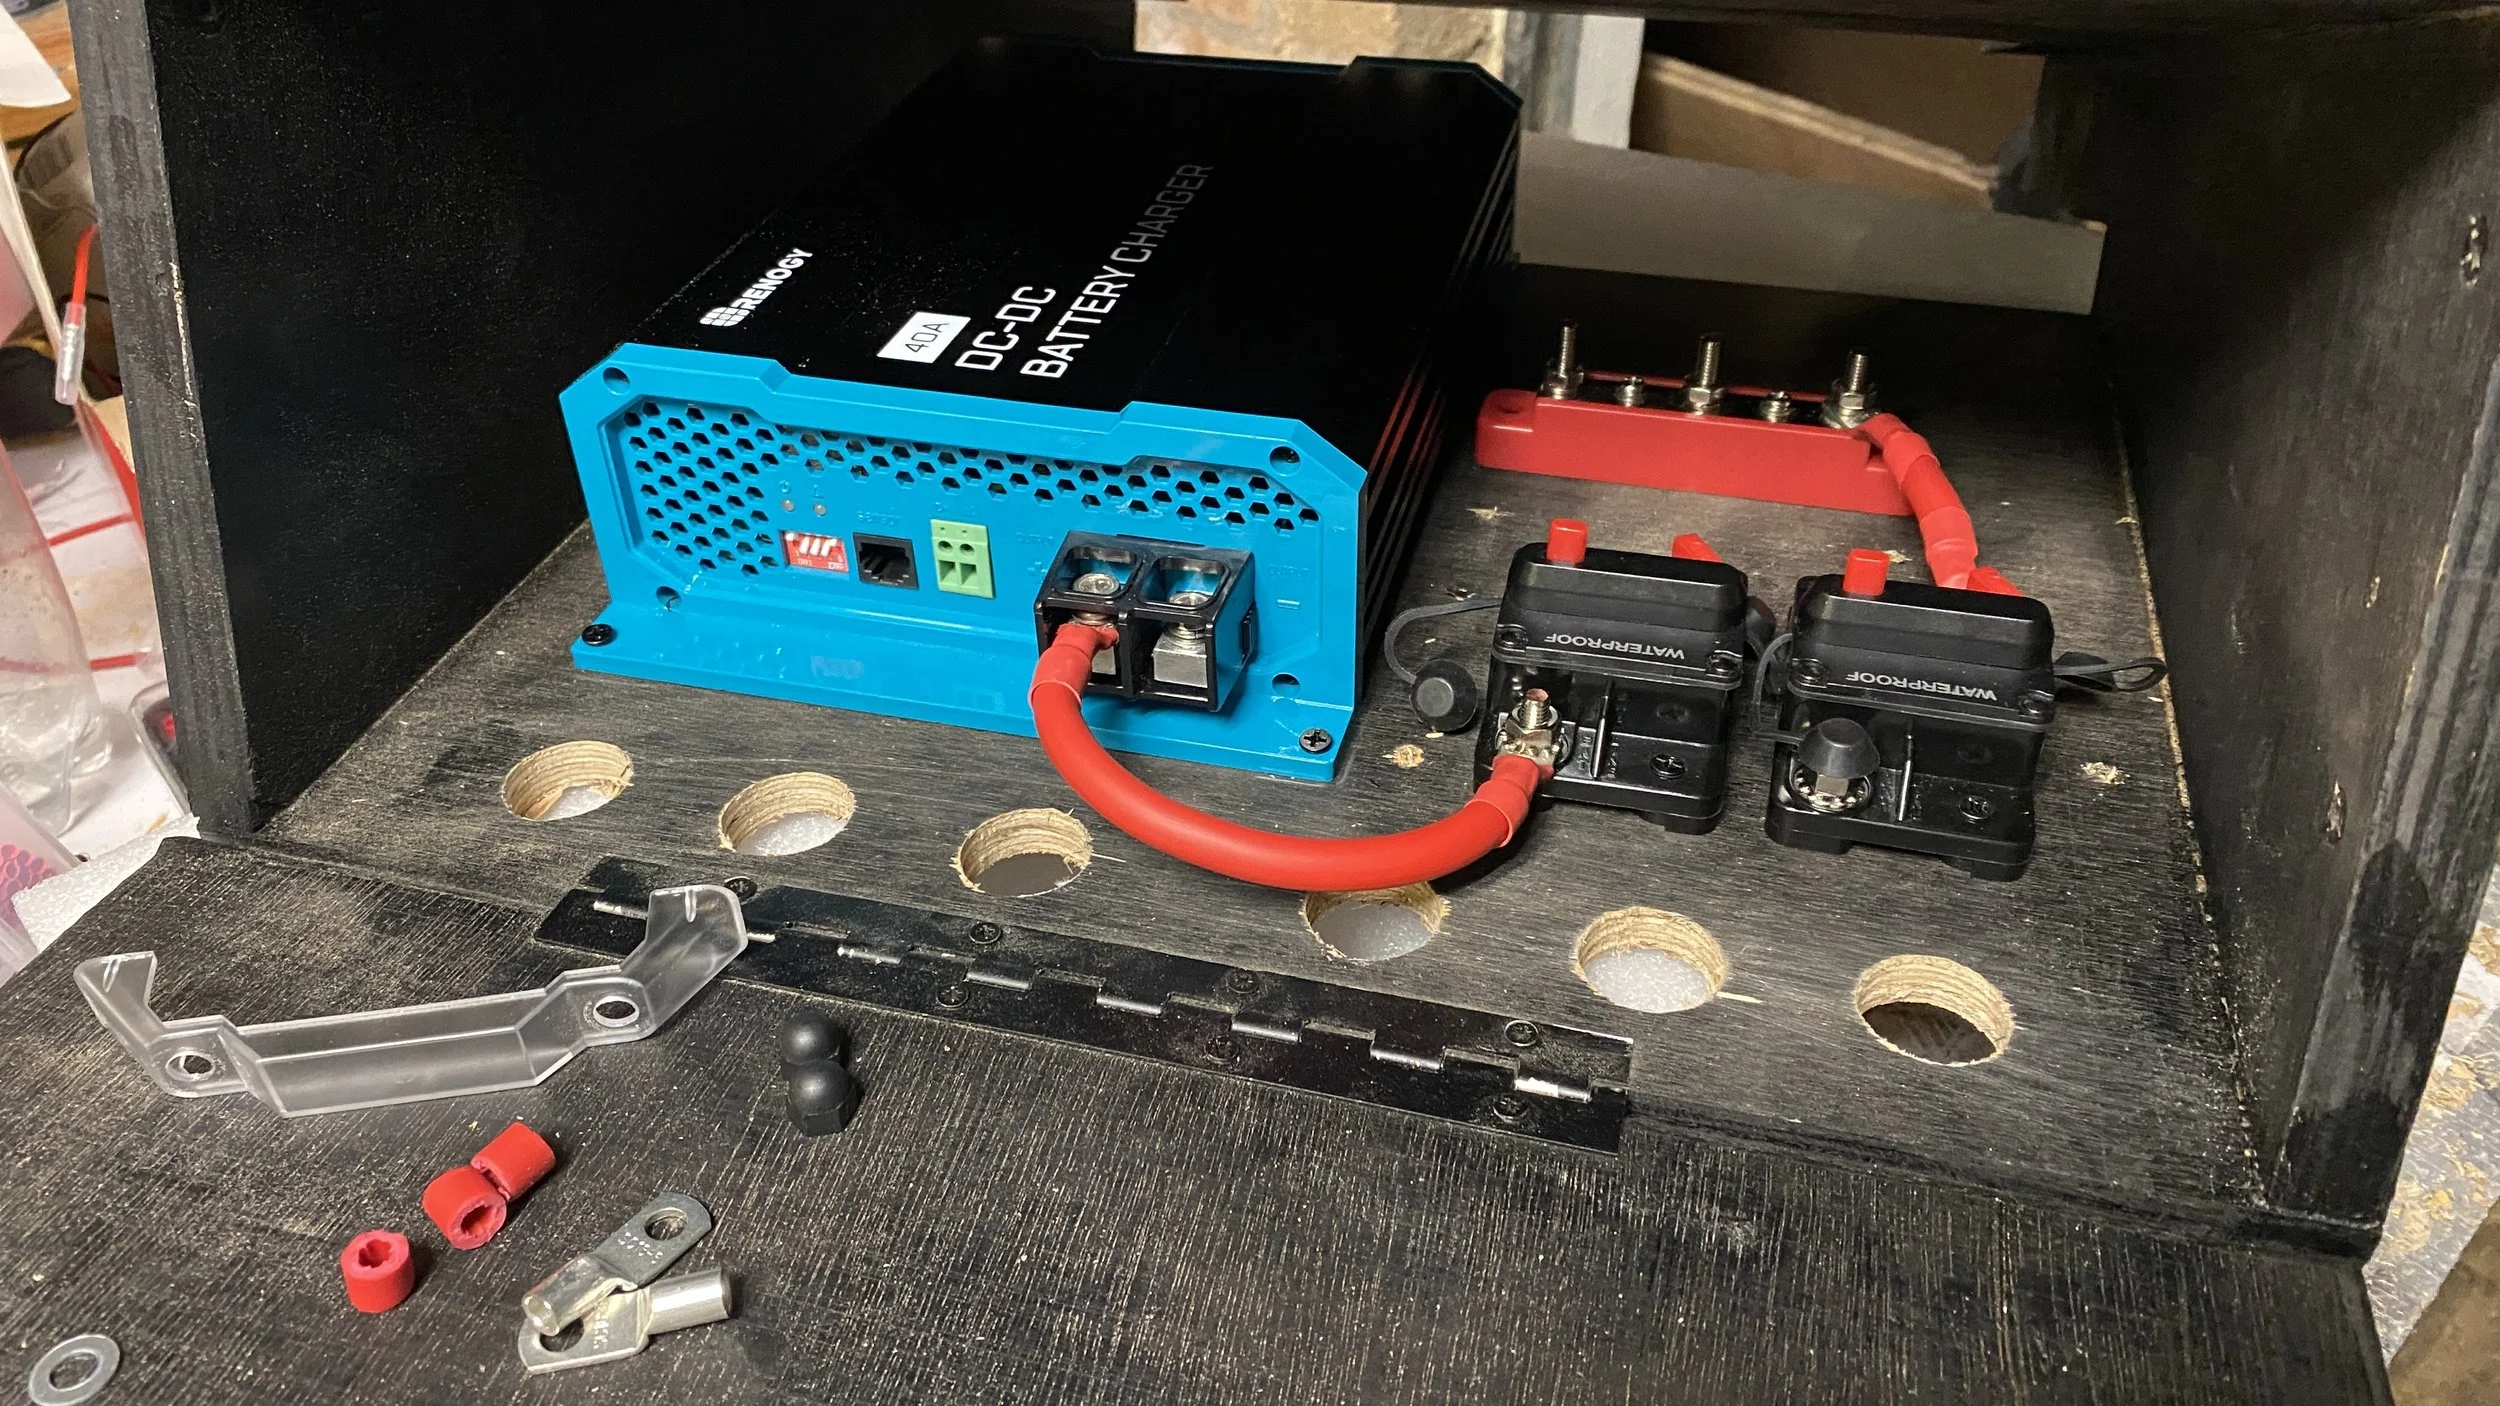
Because we wanted to interfere with the vehicle’s original electrical system as little as possible, the entire secondary system is completely autonomous. The only connection to the car is a positive and negative cable taken from the main vehicle battery, routed through a fuse and into the DC-DC charger. For easier installation and seamless communication between components, we decided to use all components from one brand - Renogy throughout the system.
Our setup includes:
Renogy DC-DC Charger (20A / 40A)
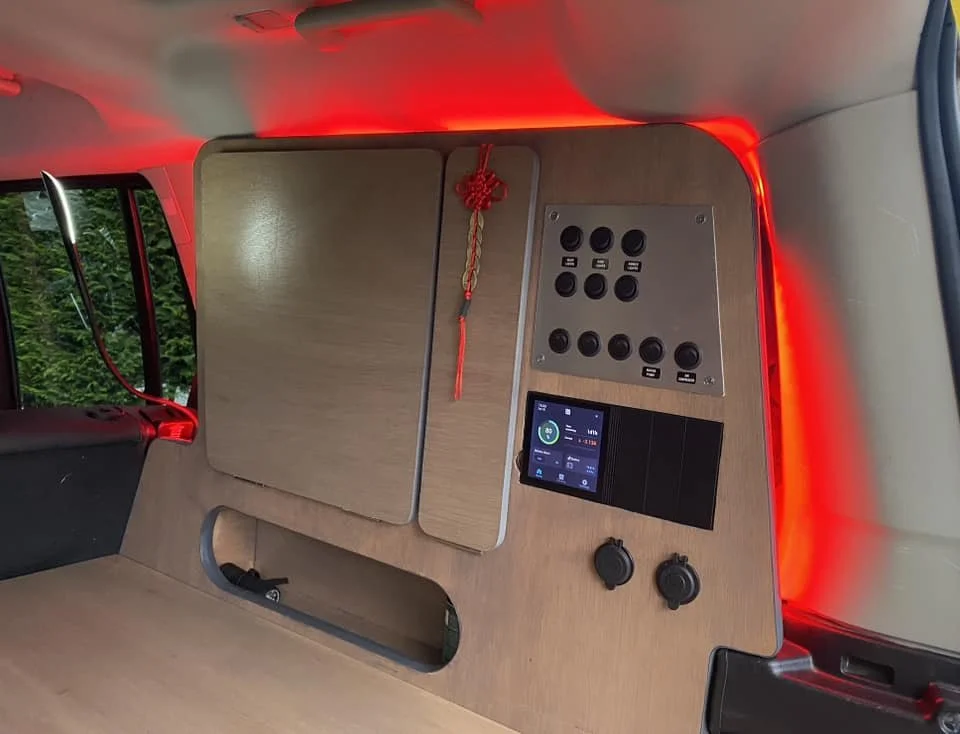
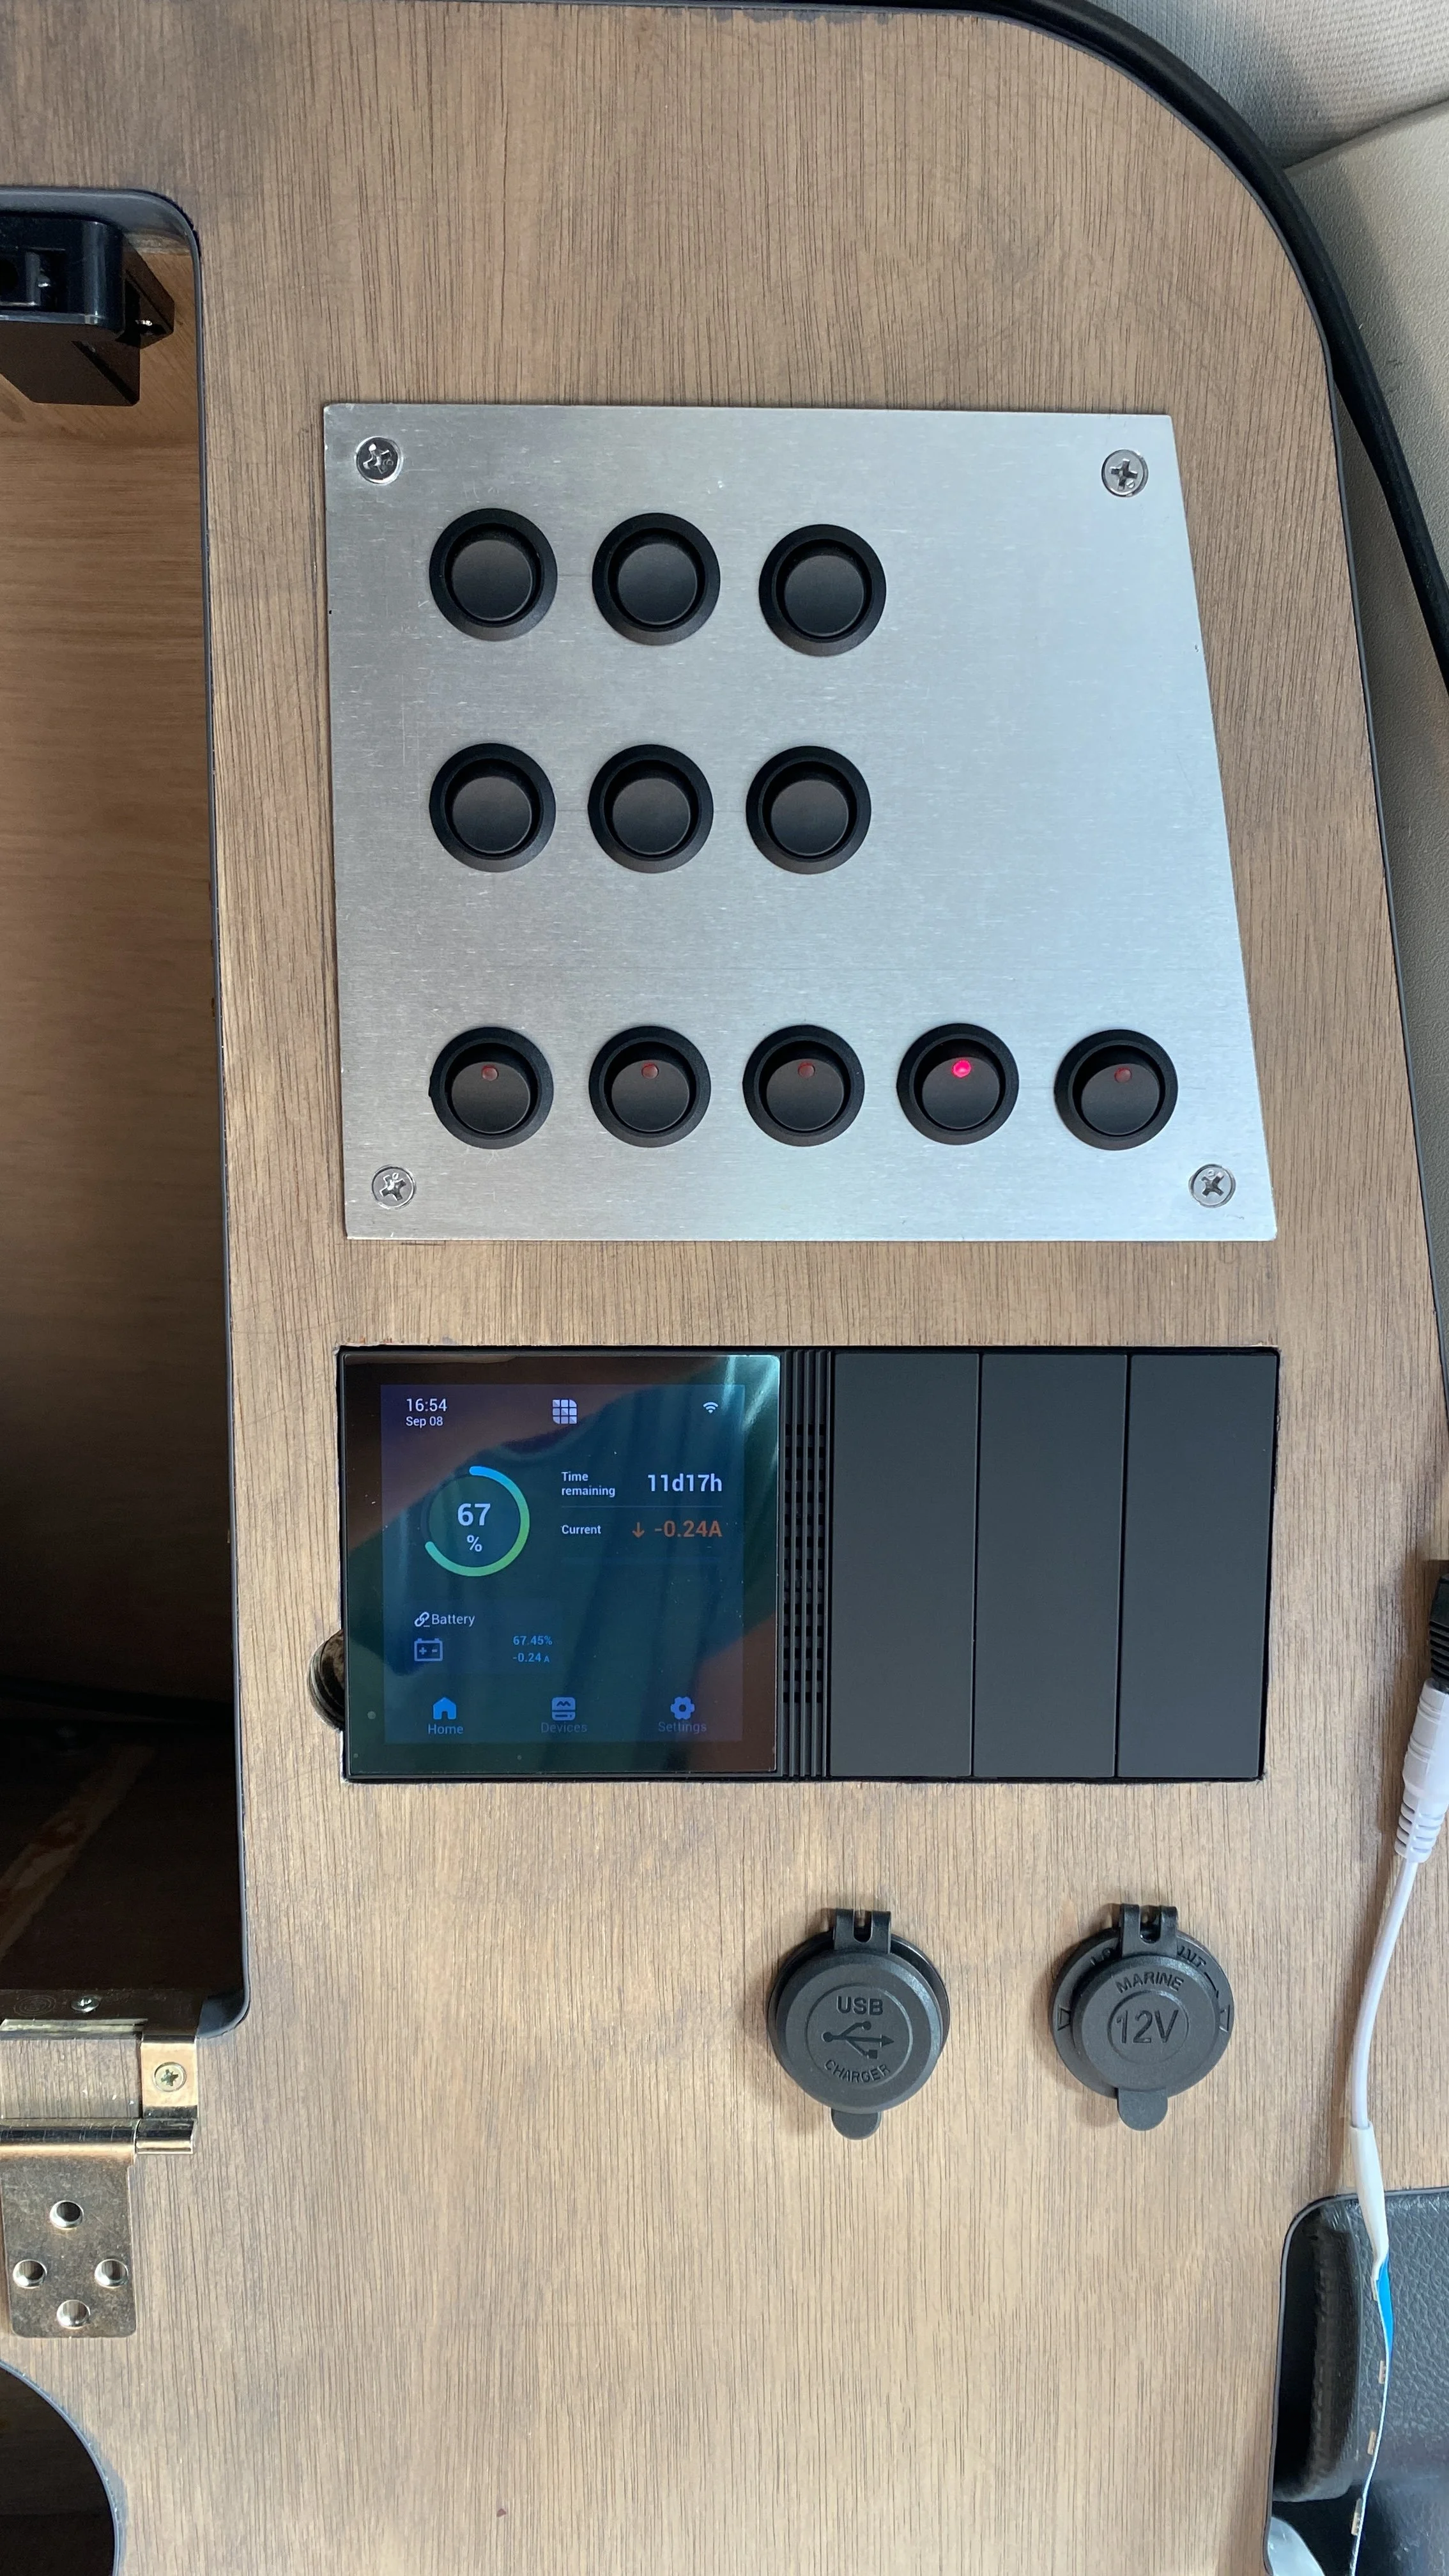
Renogy One M1 Control Center
Renogy 100Ah Lithium Battery (we will install another 100Ah soon to allow us running diesel heater for longer periods in Arctic)
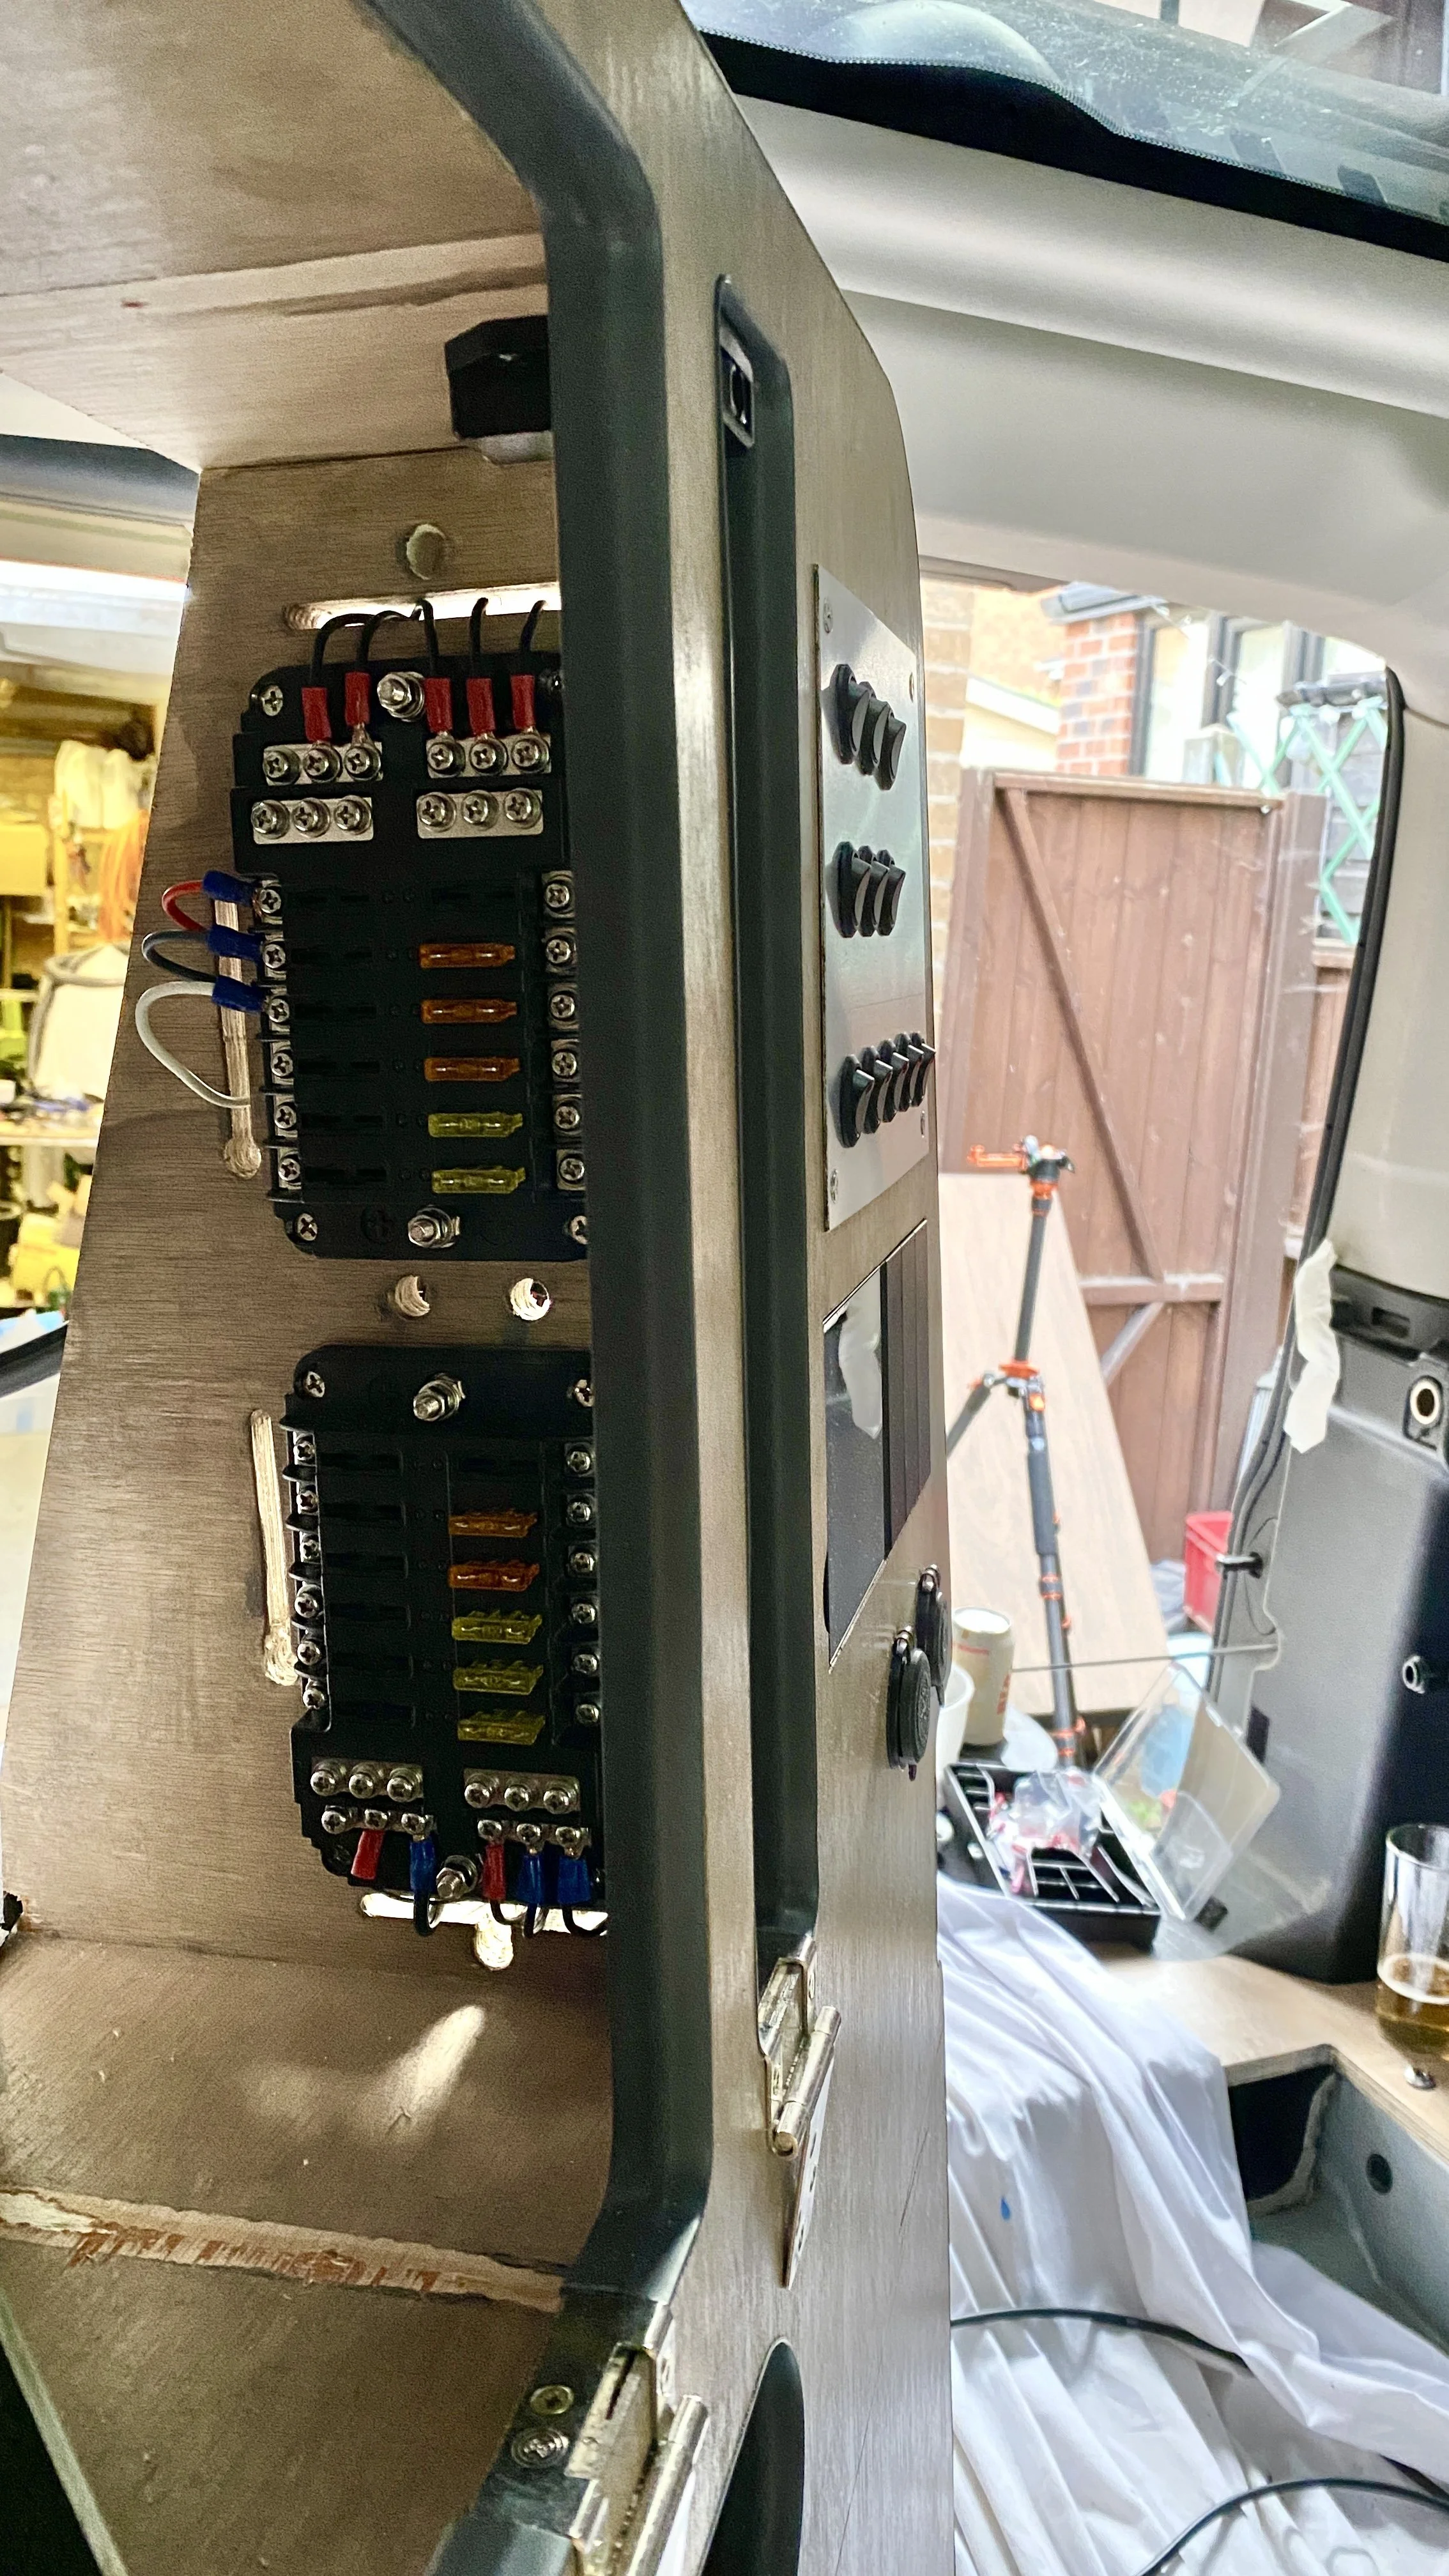
cables, fuses, bus bars, switches, 12V power outlets and USBs
The Renogy DC-DC charger allows selecting a charging current of either 20 amps or 40 amps. Normally, this selection is done using a jumper cable, which means the charging current is set permanently. Instead, we chose to wire this function through a switch, allowing us to manually select whether we want to charge at 20A or 40A, depending on our needs and driving conditions. We also decided not to use the standard ignition+ trigger. Instead, the charger is again controlled by a manual switch located on overhead panel. This gives us full control over when the charger is active. For example, we don’t enable charging while sitting in long traffic jams or driving in demanding off-road terrain, which helps reduce unnecessary load on the vehicle’s alternator.
We use a 100Ah Renogy lithium battery, which means that with the 40A DC-DC charger, we can recharge it from empty to 100% in 2.5 hours. This is more than sufficient for our use, as we usually travel for longer time on driving days and during our travels it never dropped below 30% (using camp lights, charging all our gear, and running fridge in desert +45 degrees. The battery charge status can be monitored either on the Renogy M1 control center or via the app on our phone.
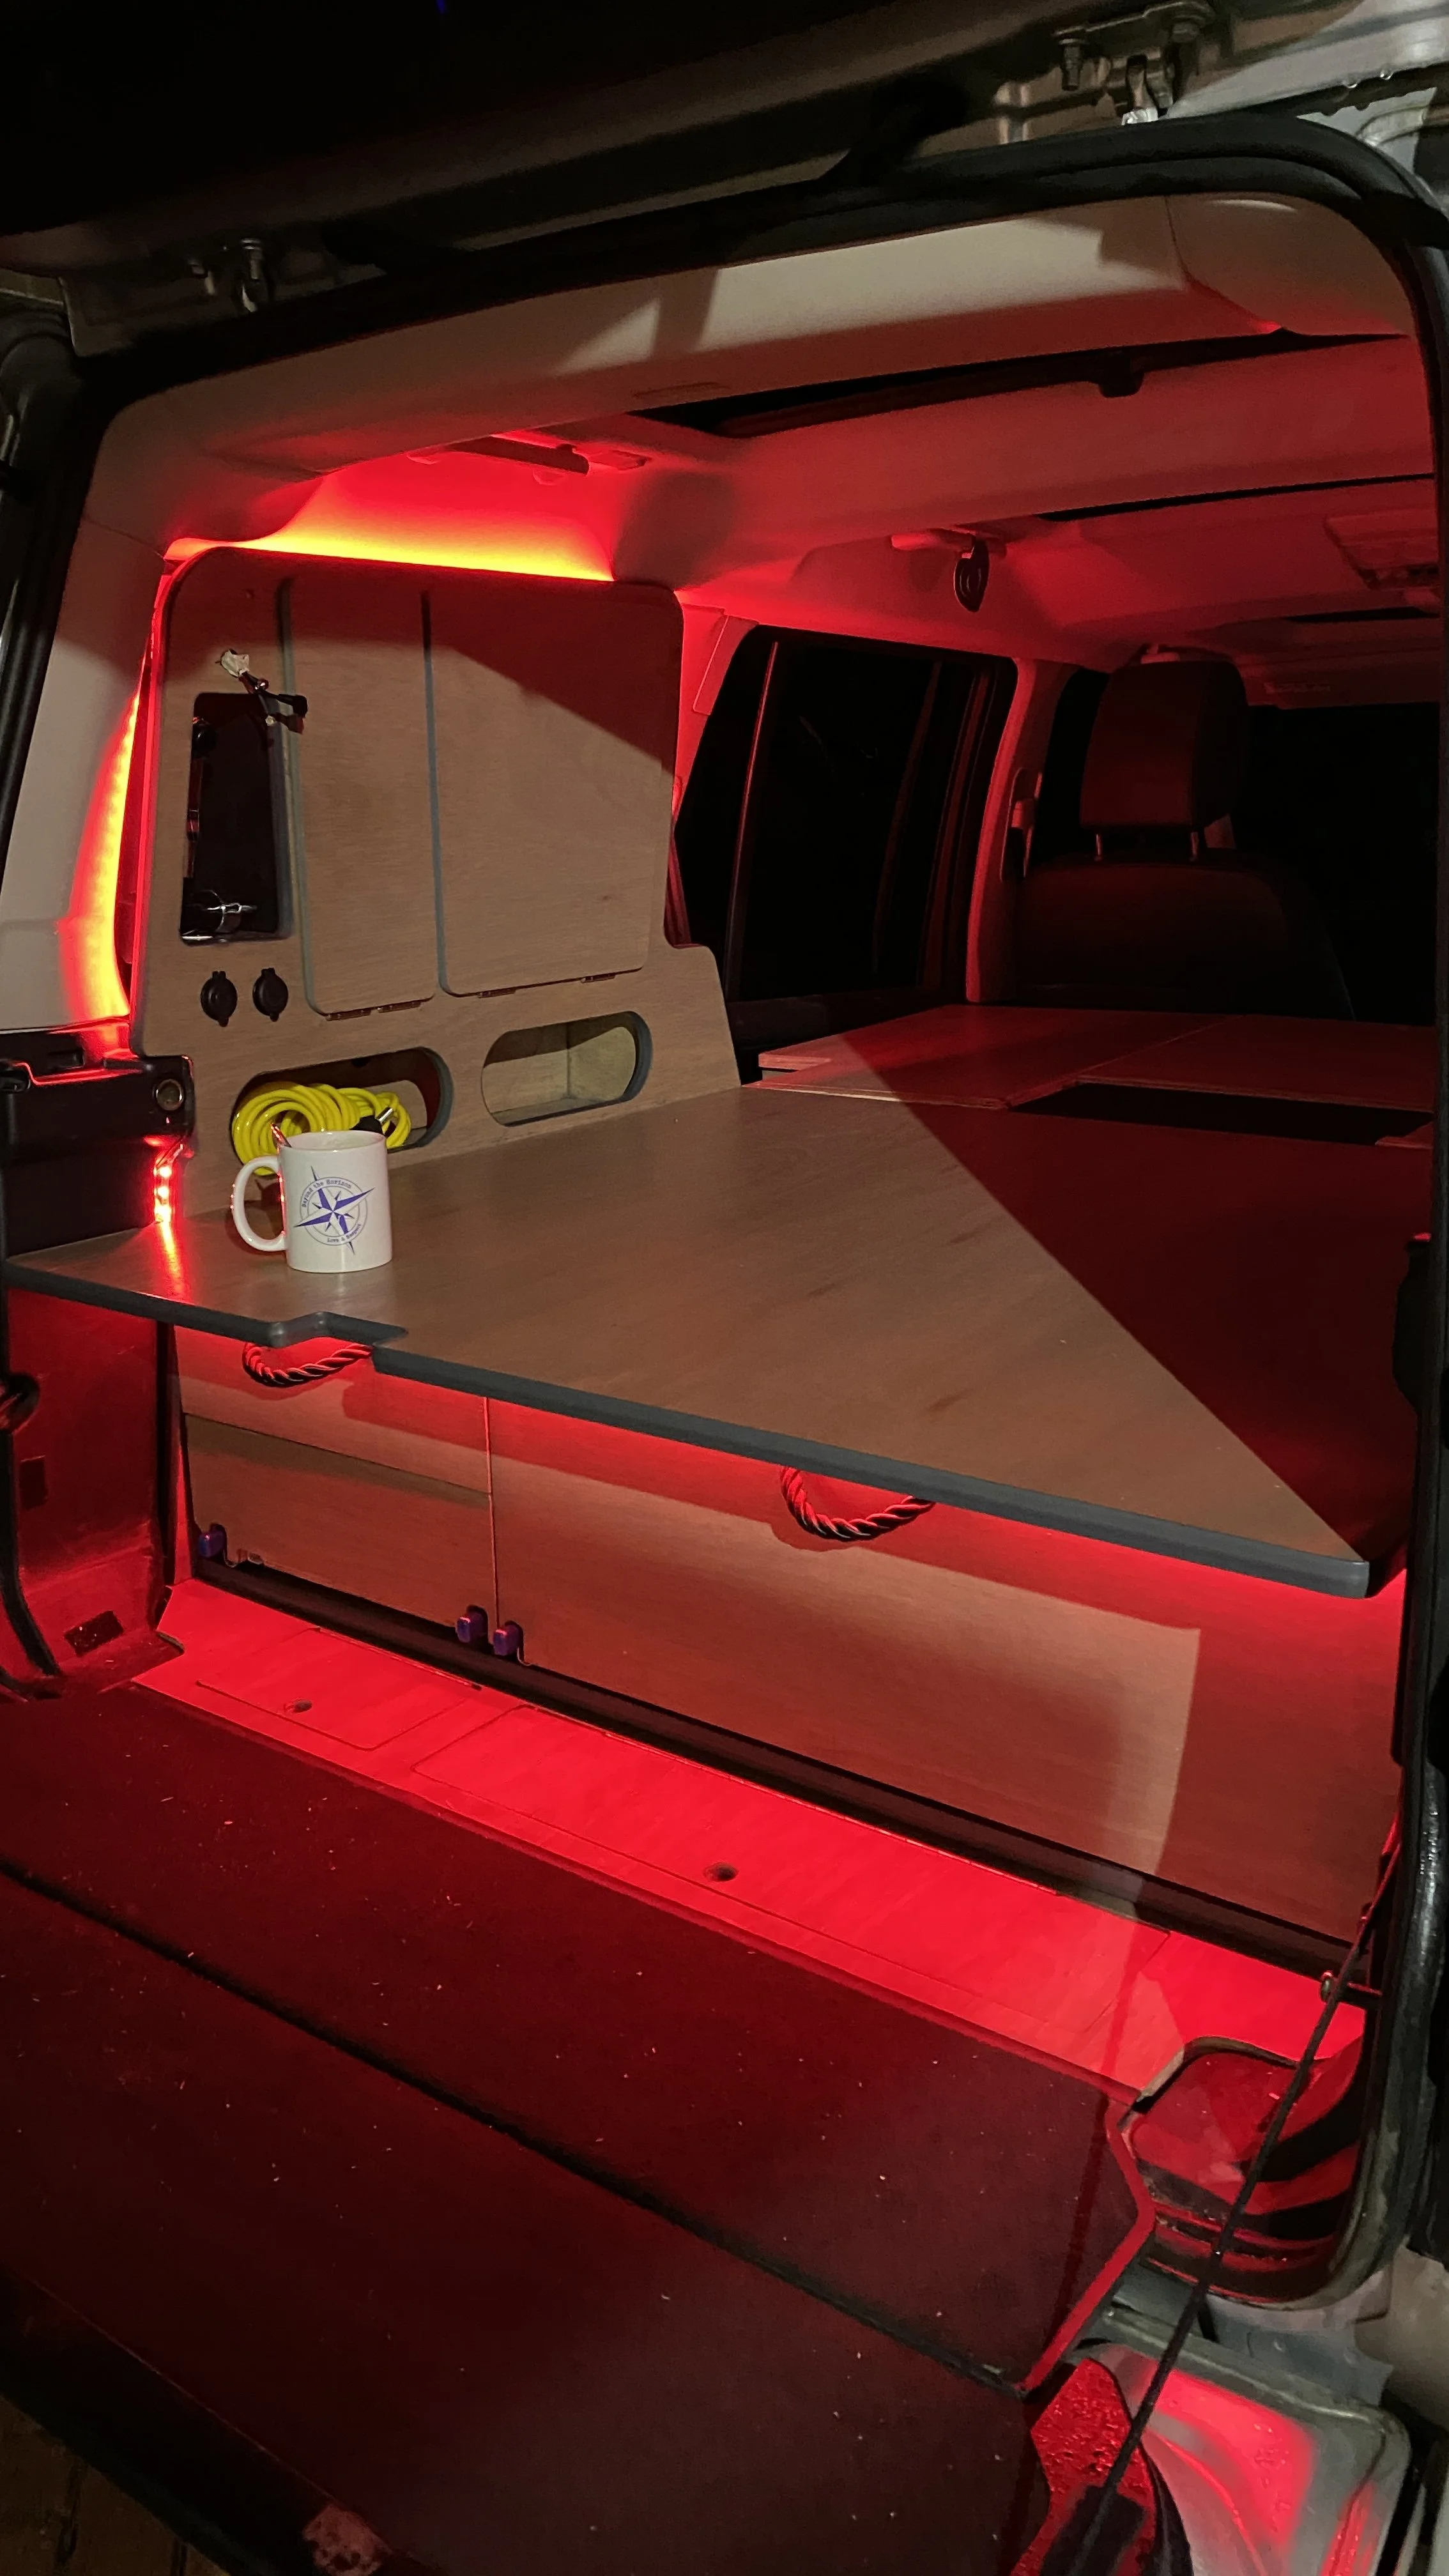
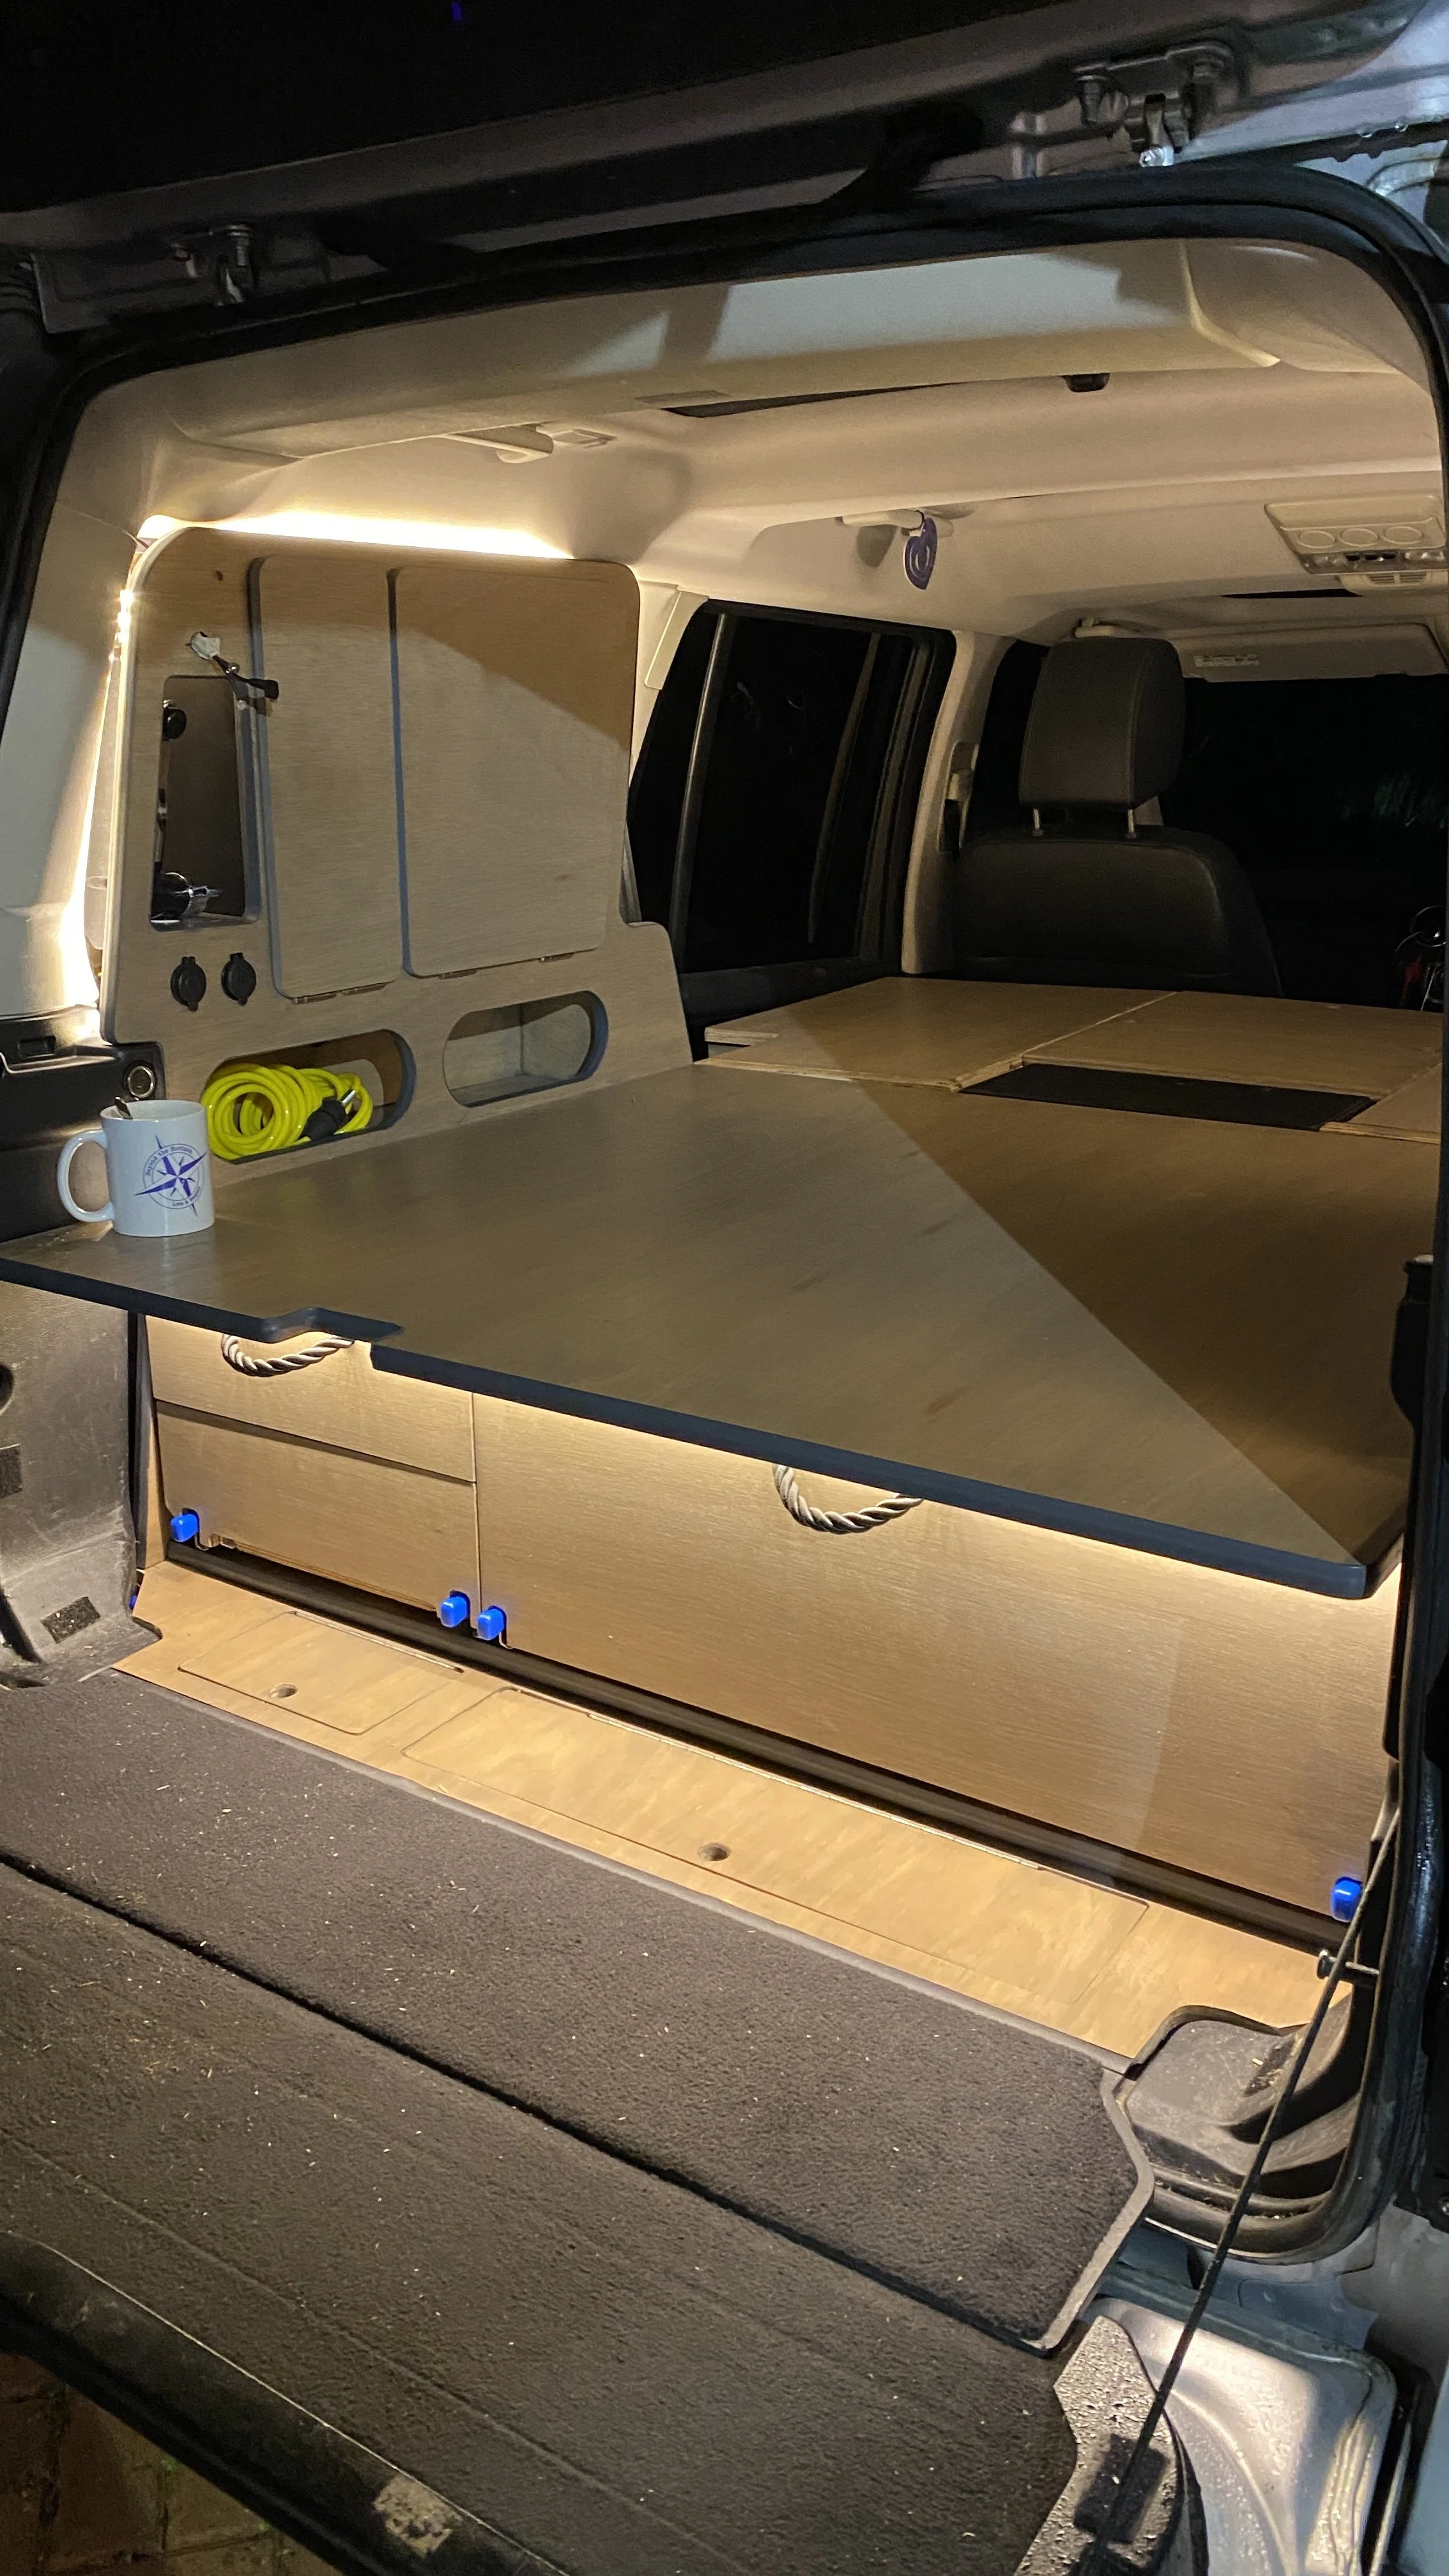
The battery monitor and most of the switches are located in the rear part of our build, making them easily accessible through opened tailgate and also when we’re lying in bed.
Lighting control and wiring
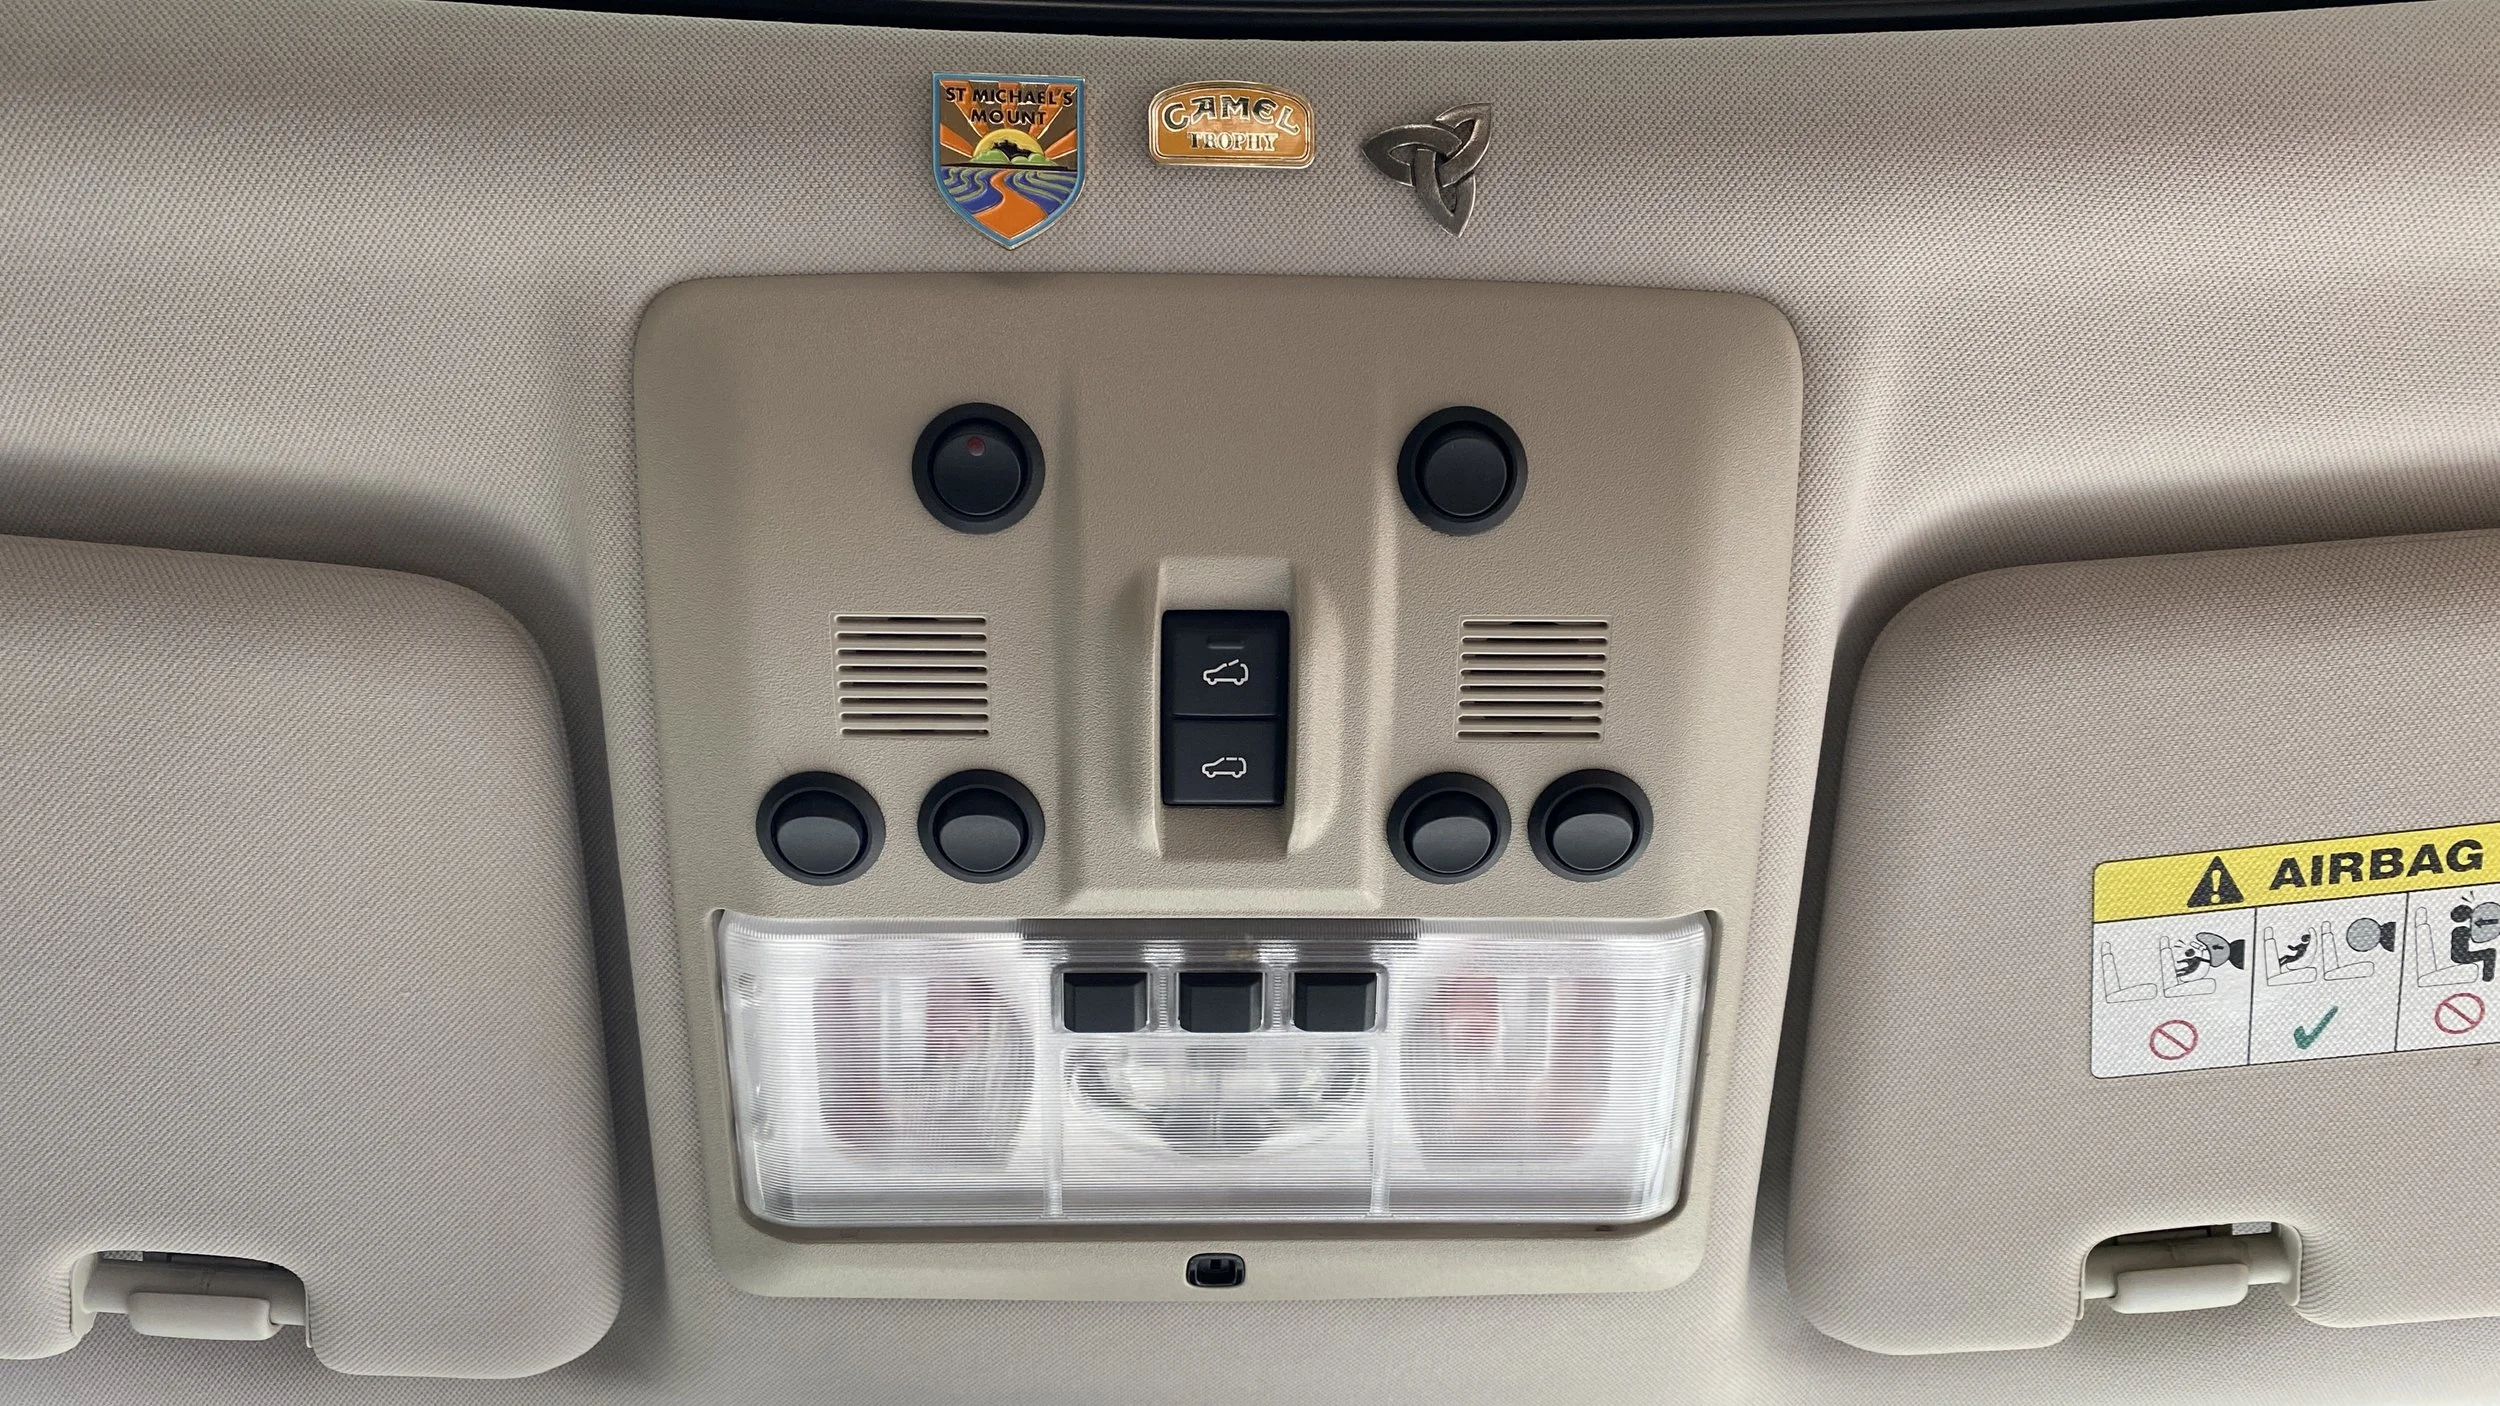
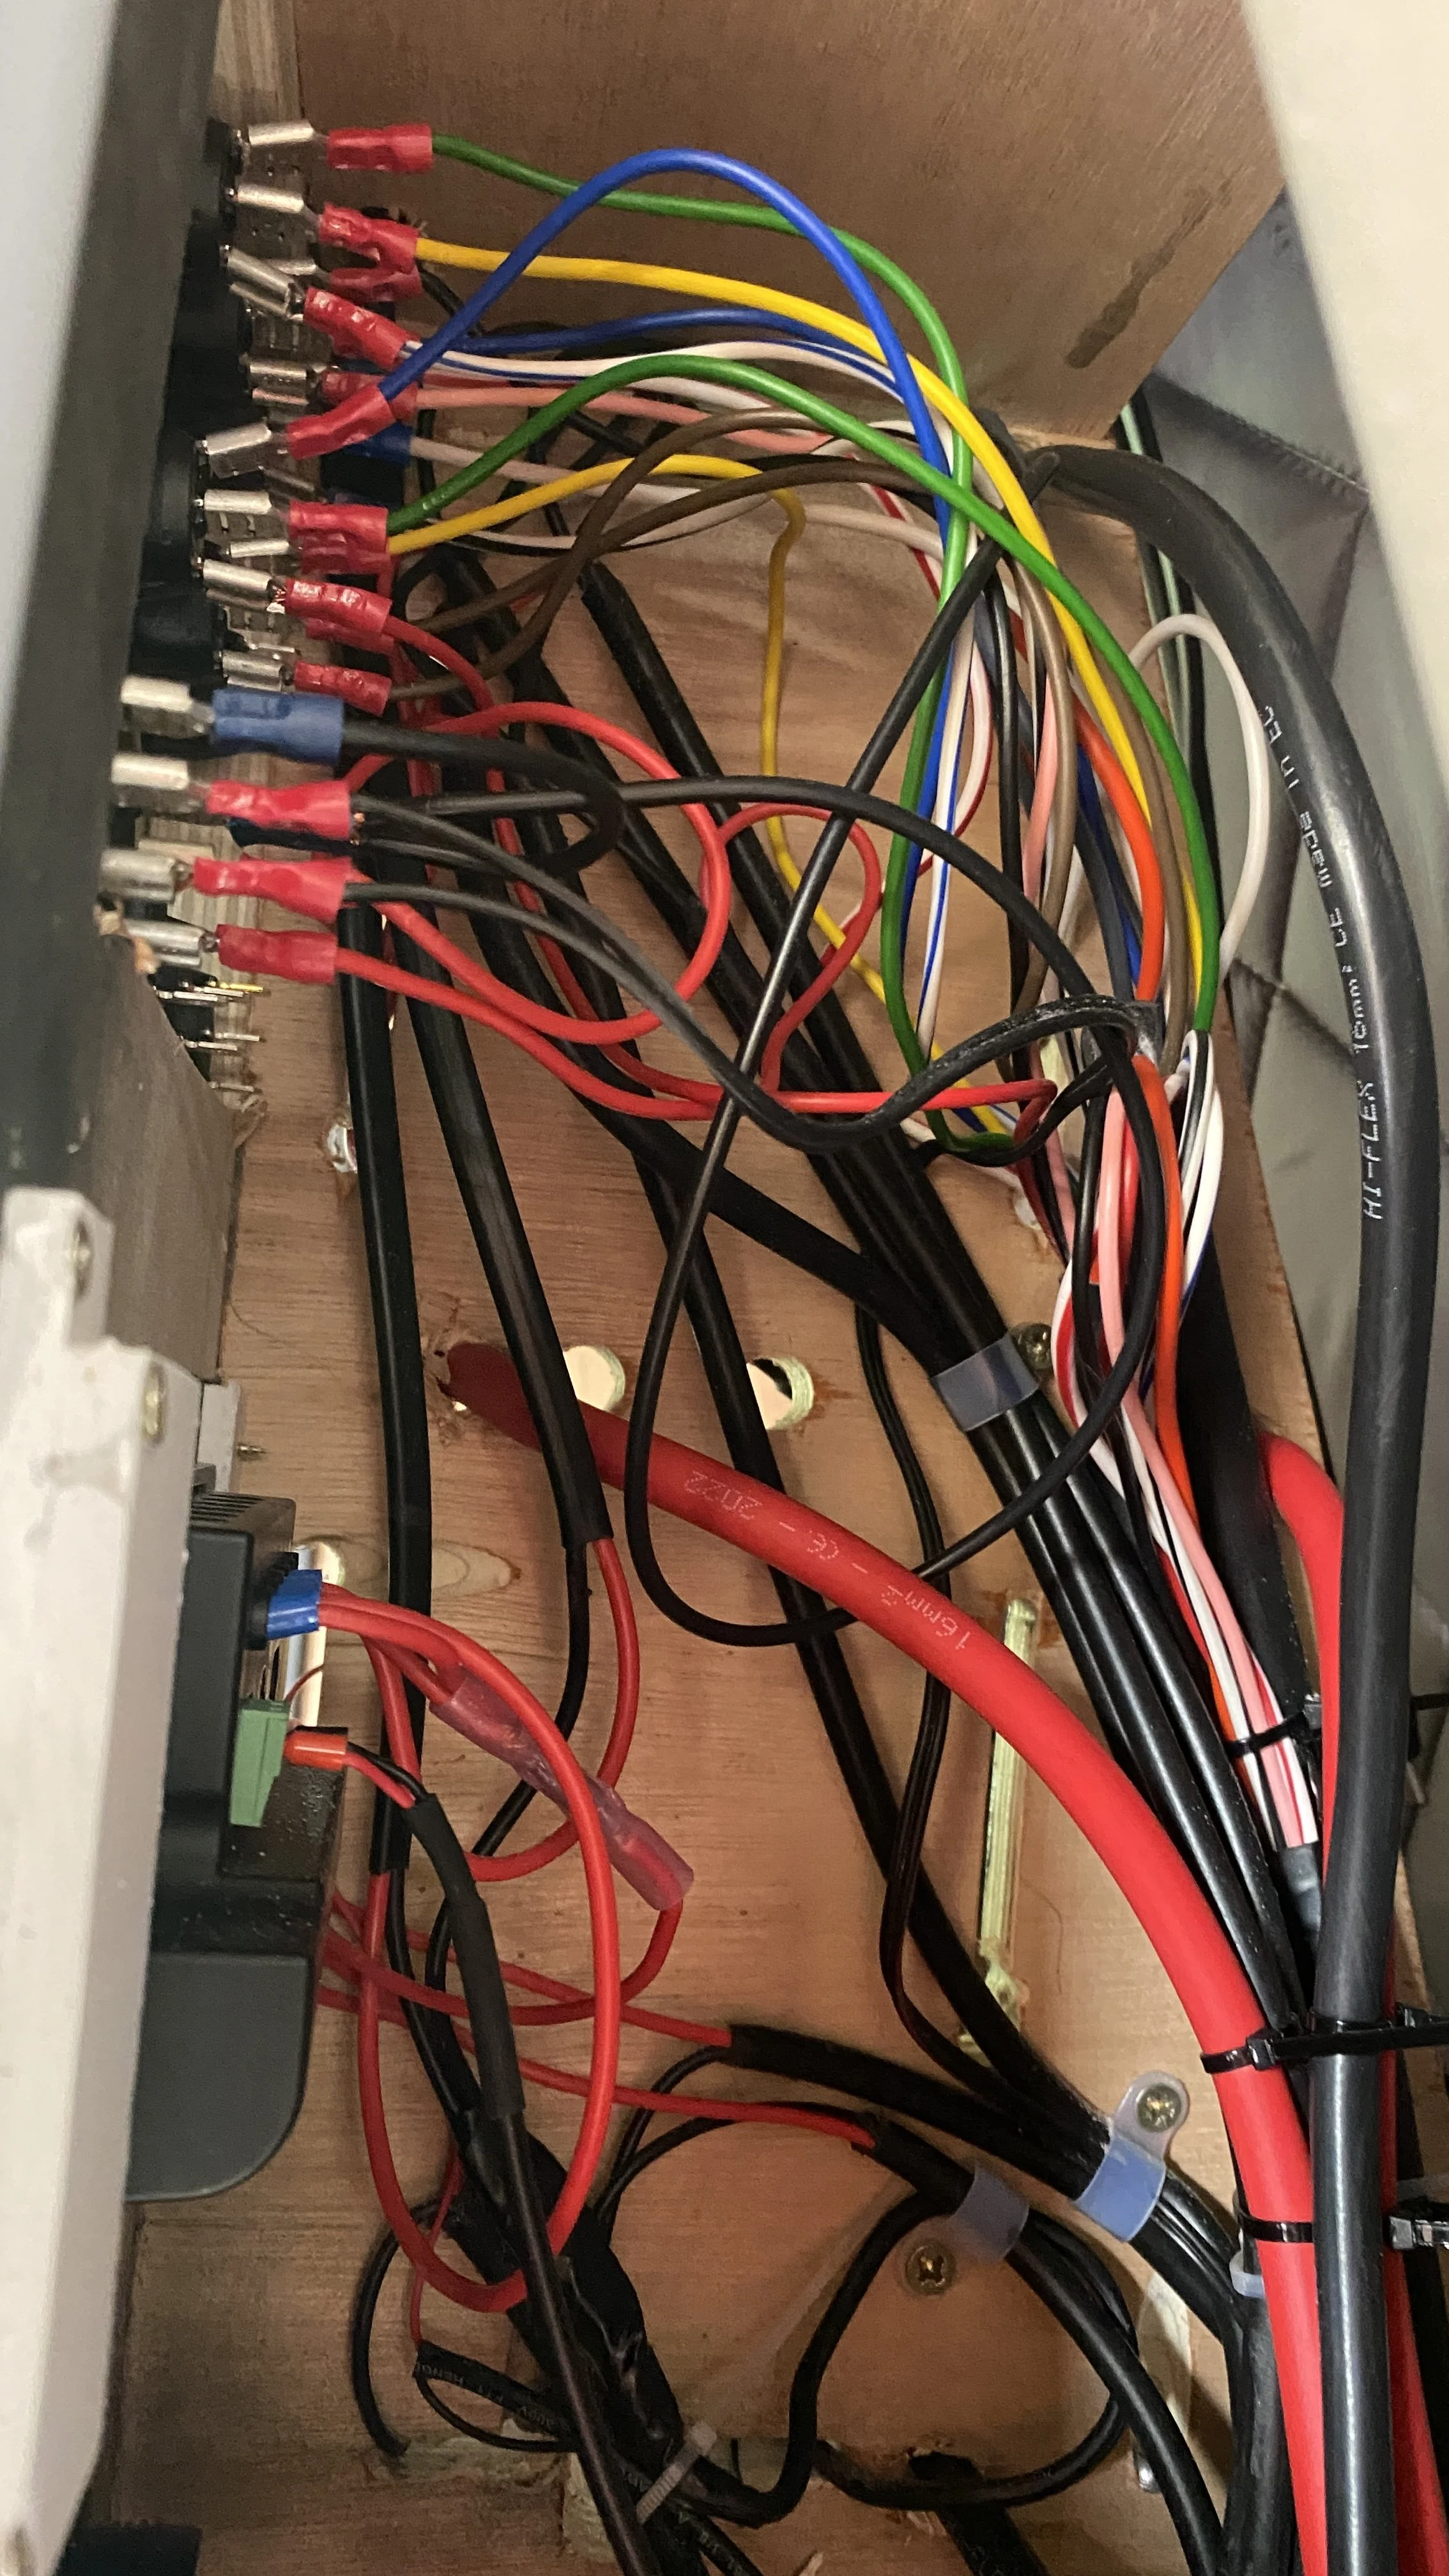
For some devices and the roofrack lights we wanted the ability to control them both from our bed and from the driver’s/passenger’s seats. To achieve this, we ran a multi-core cable from the rear of the vehicle to the driver’s area and used single-pole, double-throw switches, also known as staircase switches. This setup allows the lights to be switched on or off independently from either location. (it was also much cheaper than any multi gang switch panels available on the market)
To power our Starlink and the rooftop lights, we again used a multi-core cable, routed through an existing rubber grommet behind the tail-light and then along the door frame up to the roofrack. This keeps the installation clean and tidy, with no drilling required. On the roof rack, the cable terminates in a junction box, where the individual lights and the Starlink are connected.
The Renogy M1 control center also includes three built-in switches, which can be controlled either manually or remotely via the phone app. We use these switches for our interior lighting, connecting LED strips that run along the side cabinets and under the sleeping platform to illuminate the drawers and tailgate. The lighting is available in two colors: white and red. White provides bright, practical light when needed, while red creates a more intimate atmosphere and is less attractive to insects like mosquitoes. The third built-in switch controls the light mounted on the inside of the tailgate (iluminating interior when closed or kitchen area when opened), again with both white and red light options. All of these lights are connected through dimmers, allowing us to adjust the brightness as needed.
Additional switches on our control panel are used to operate the water pump, the air compressor for inflating tires, and our diesel heater, which is mounted on the exterior of the vehicle in removable plastic case.
We intentionally used multicore cables and larger fuse boxes, so we still have unused fuses and cable connections around the vehicle and on the roofrack in case we want to add anything in the future. This way, we can simply connect a new device without the need to run new cables, etc.
More pictures in our vehicle build gallery