
The plan & The result
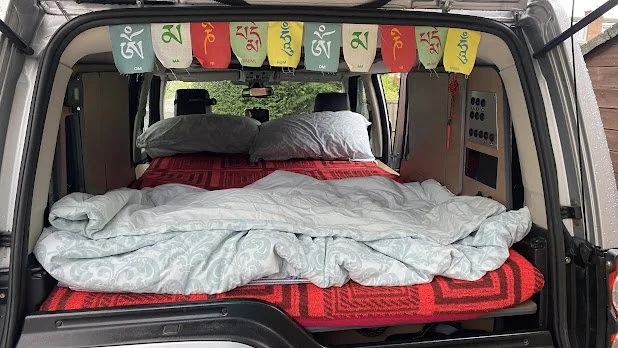
Before completing the full build, we were already using our Discovery for traveling and camping. Our setup was simple - we folded down the rear seats, added a mattress topper, and packed a few plastic boxes with our kitchen and camping essentials. Despite its simplicity, those trips gave us some unforgettable memories, just like our earlier adventures with the VW Touareg and its similar no-build setup.
It was quick and easy, but not exactly comfortable. Constantly rearranging everything just to make a bed was tiring, and space management quickly became a challenge.
We decided not to rush the process. Instead, on each trip we observed, tested, and refined our ideas - thinking about what should go where, how much space each item required, which gear we used most often, and how much unnecessary stuff we were bringing along.
From all that experience, we developed a clear vision of what we wanted to build. As mentioned before, we’re not fans of rooftop tents and prefer sleeping inside the vehicle. We also wanted flexibility - a setup that could serve as a practical 4-seater for everyday use, and easily convert into a 2-seater with a sleeping platform and organized storage for travel.
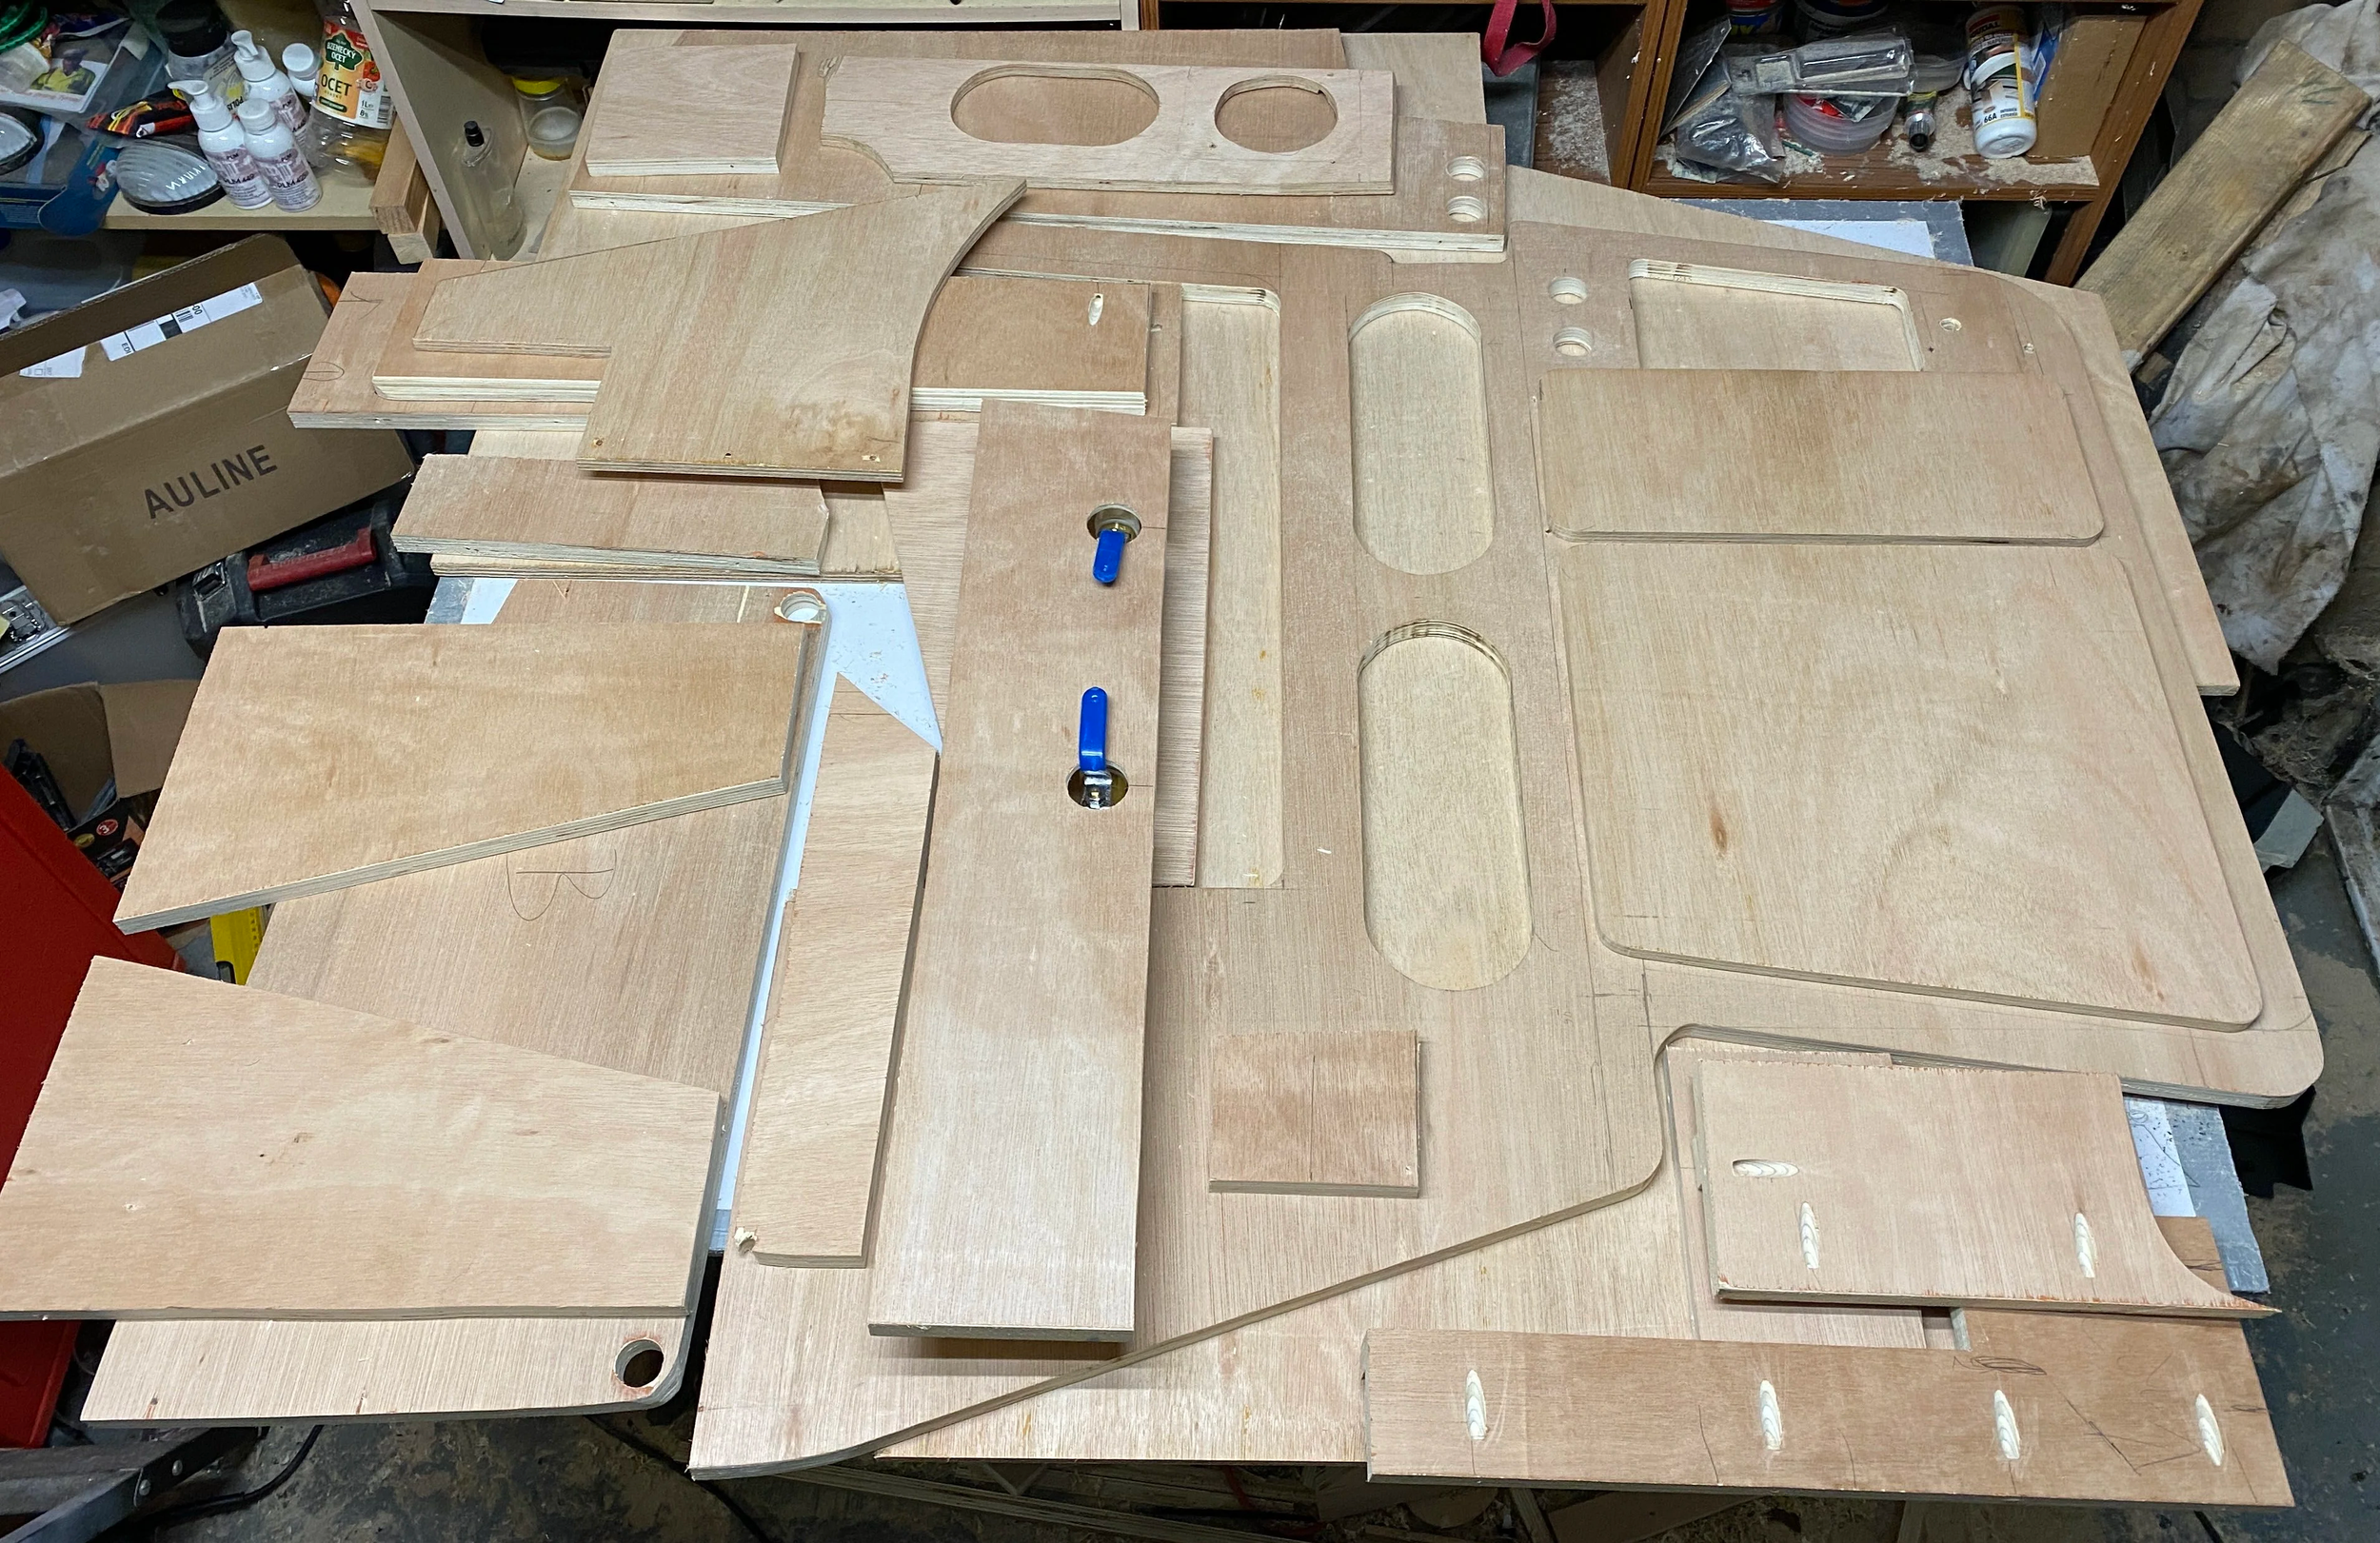
Here’s what we planned - and below what we ultimately created.
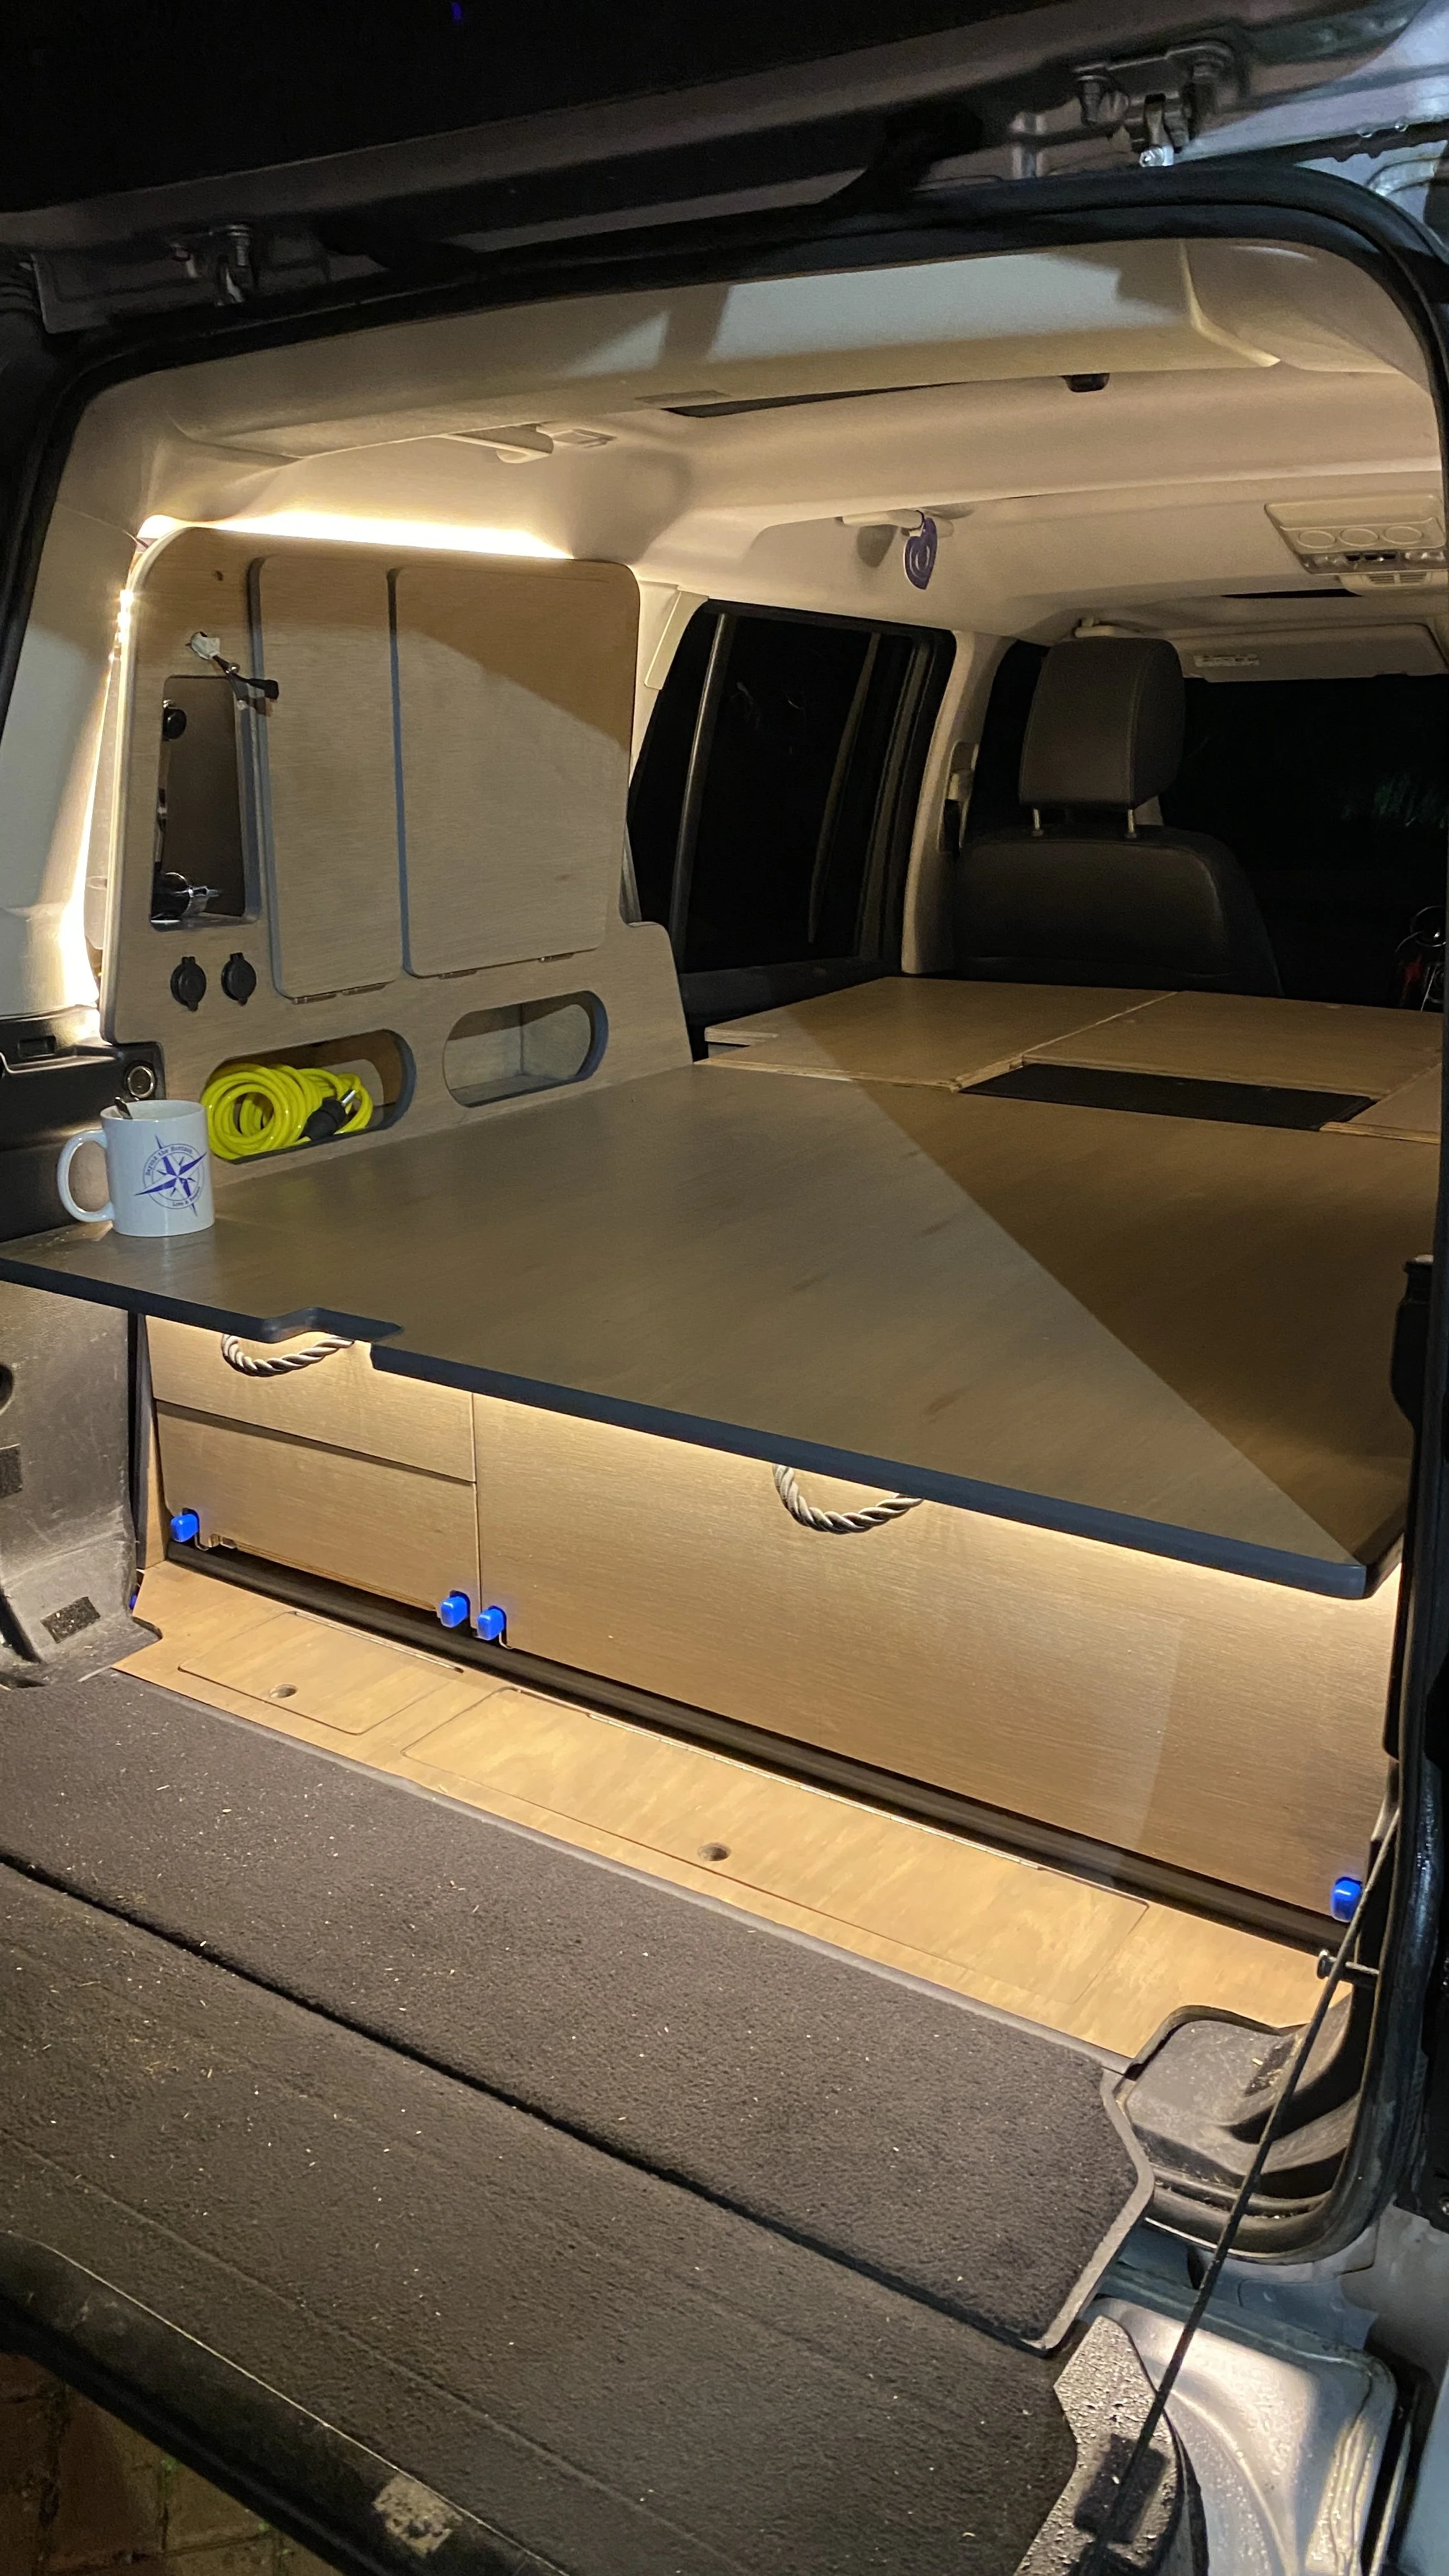
Sleeping Platform - Designed for two people, with enough space to move around comfortably, sit up, get dressed, relax, or even do a bit of work.
Simple Kitchen - A compact yet functional setup featuring a two-burner gas stove, storage for cutlery, plates, and other kitchen essentials, plus a small pantry and a fridge/freezer for longer trips.
Running Water - A straightforward system with a water tank, pump, and tap - and ideally, an option for a hot shower. Nothing too complex, just reliable and easy to maintain.
Electrics - Basic but practical: interior lights, multiple USB charging points, a secondary battery, and charging capability to keep everything powered while off-grid.
Air System - An air compressor with a small air tank, useful for adjusting tyre pressure, making minor repairs, and even cleaning gear after a dusty day on the road.
Storage Space - Dedicated compartments for clothing, camera equipment, camping gear, tools, and other essentials - all organized and easily accessible.
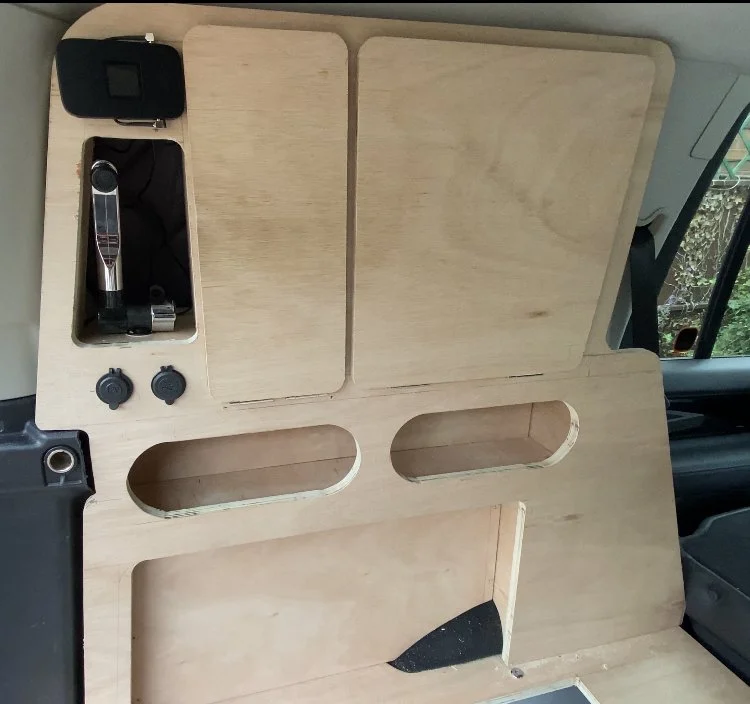
The Bar 🍸 - Believe it or not, this was actually our very first idea - a small box built into the rear side window area, just big enough to hold a few bottles and glasses. Because every adventure deserves a proper toast at the end of the day.

With all these ideas in mind, we started planning how to fit everything into the car — making sure it would remain easily accessible and serviceable, while still providing enough comfort and living space both inside and outside the vehicle.
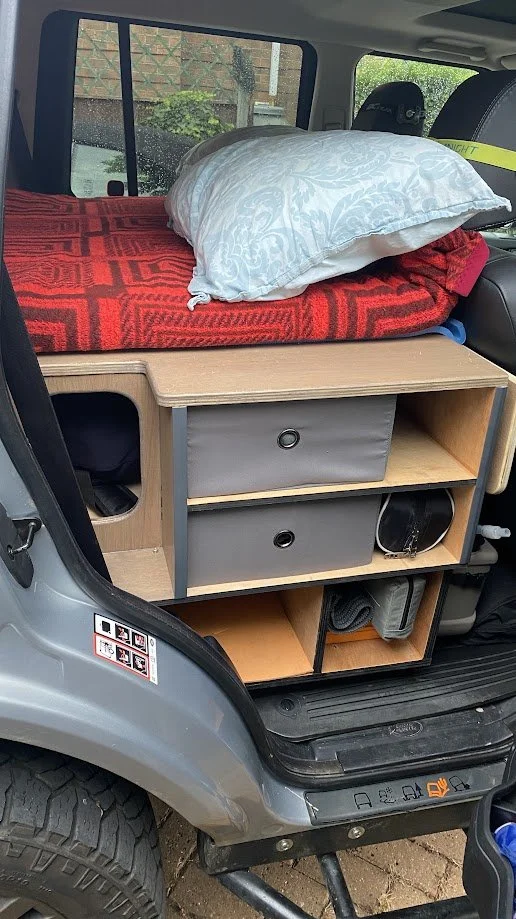
Our concept was to create two side units, a set of drawers, and the fridge in the middle between the two rear seats - all permanently mounted and wired. The rest of the storage would remain modular and removable. Each front side storage system was designed in two sections, allowing flexibility:
- For short trips, we can simply fold down the second-row seats and place the upper storage sections on top.
- For longer journeys, we remove the seats completely and add both upper and lower sections for maximum space.
- We can also configure one side for travel (both cupboards installed) while keeping the seat on the other side available for a guide or occasional passenger.
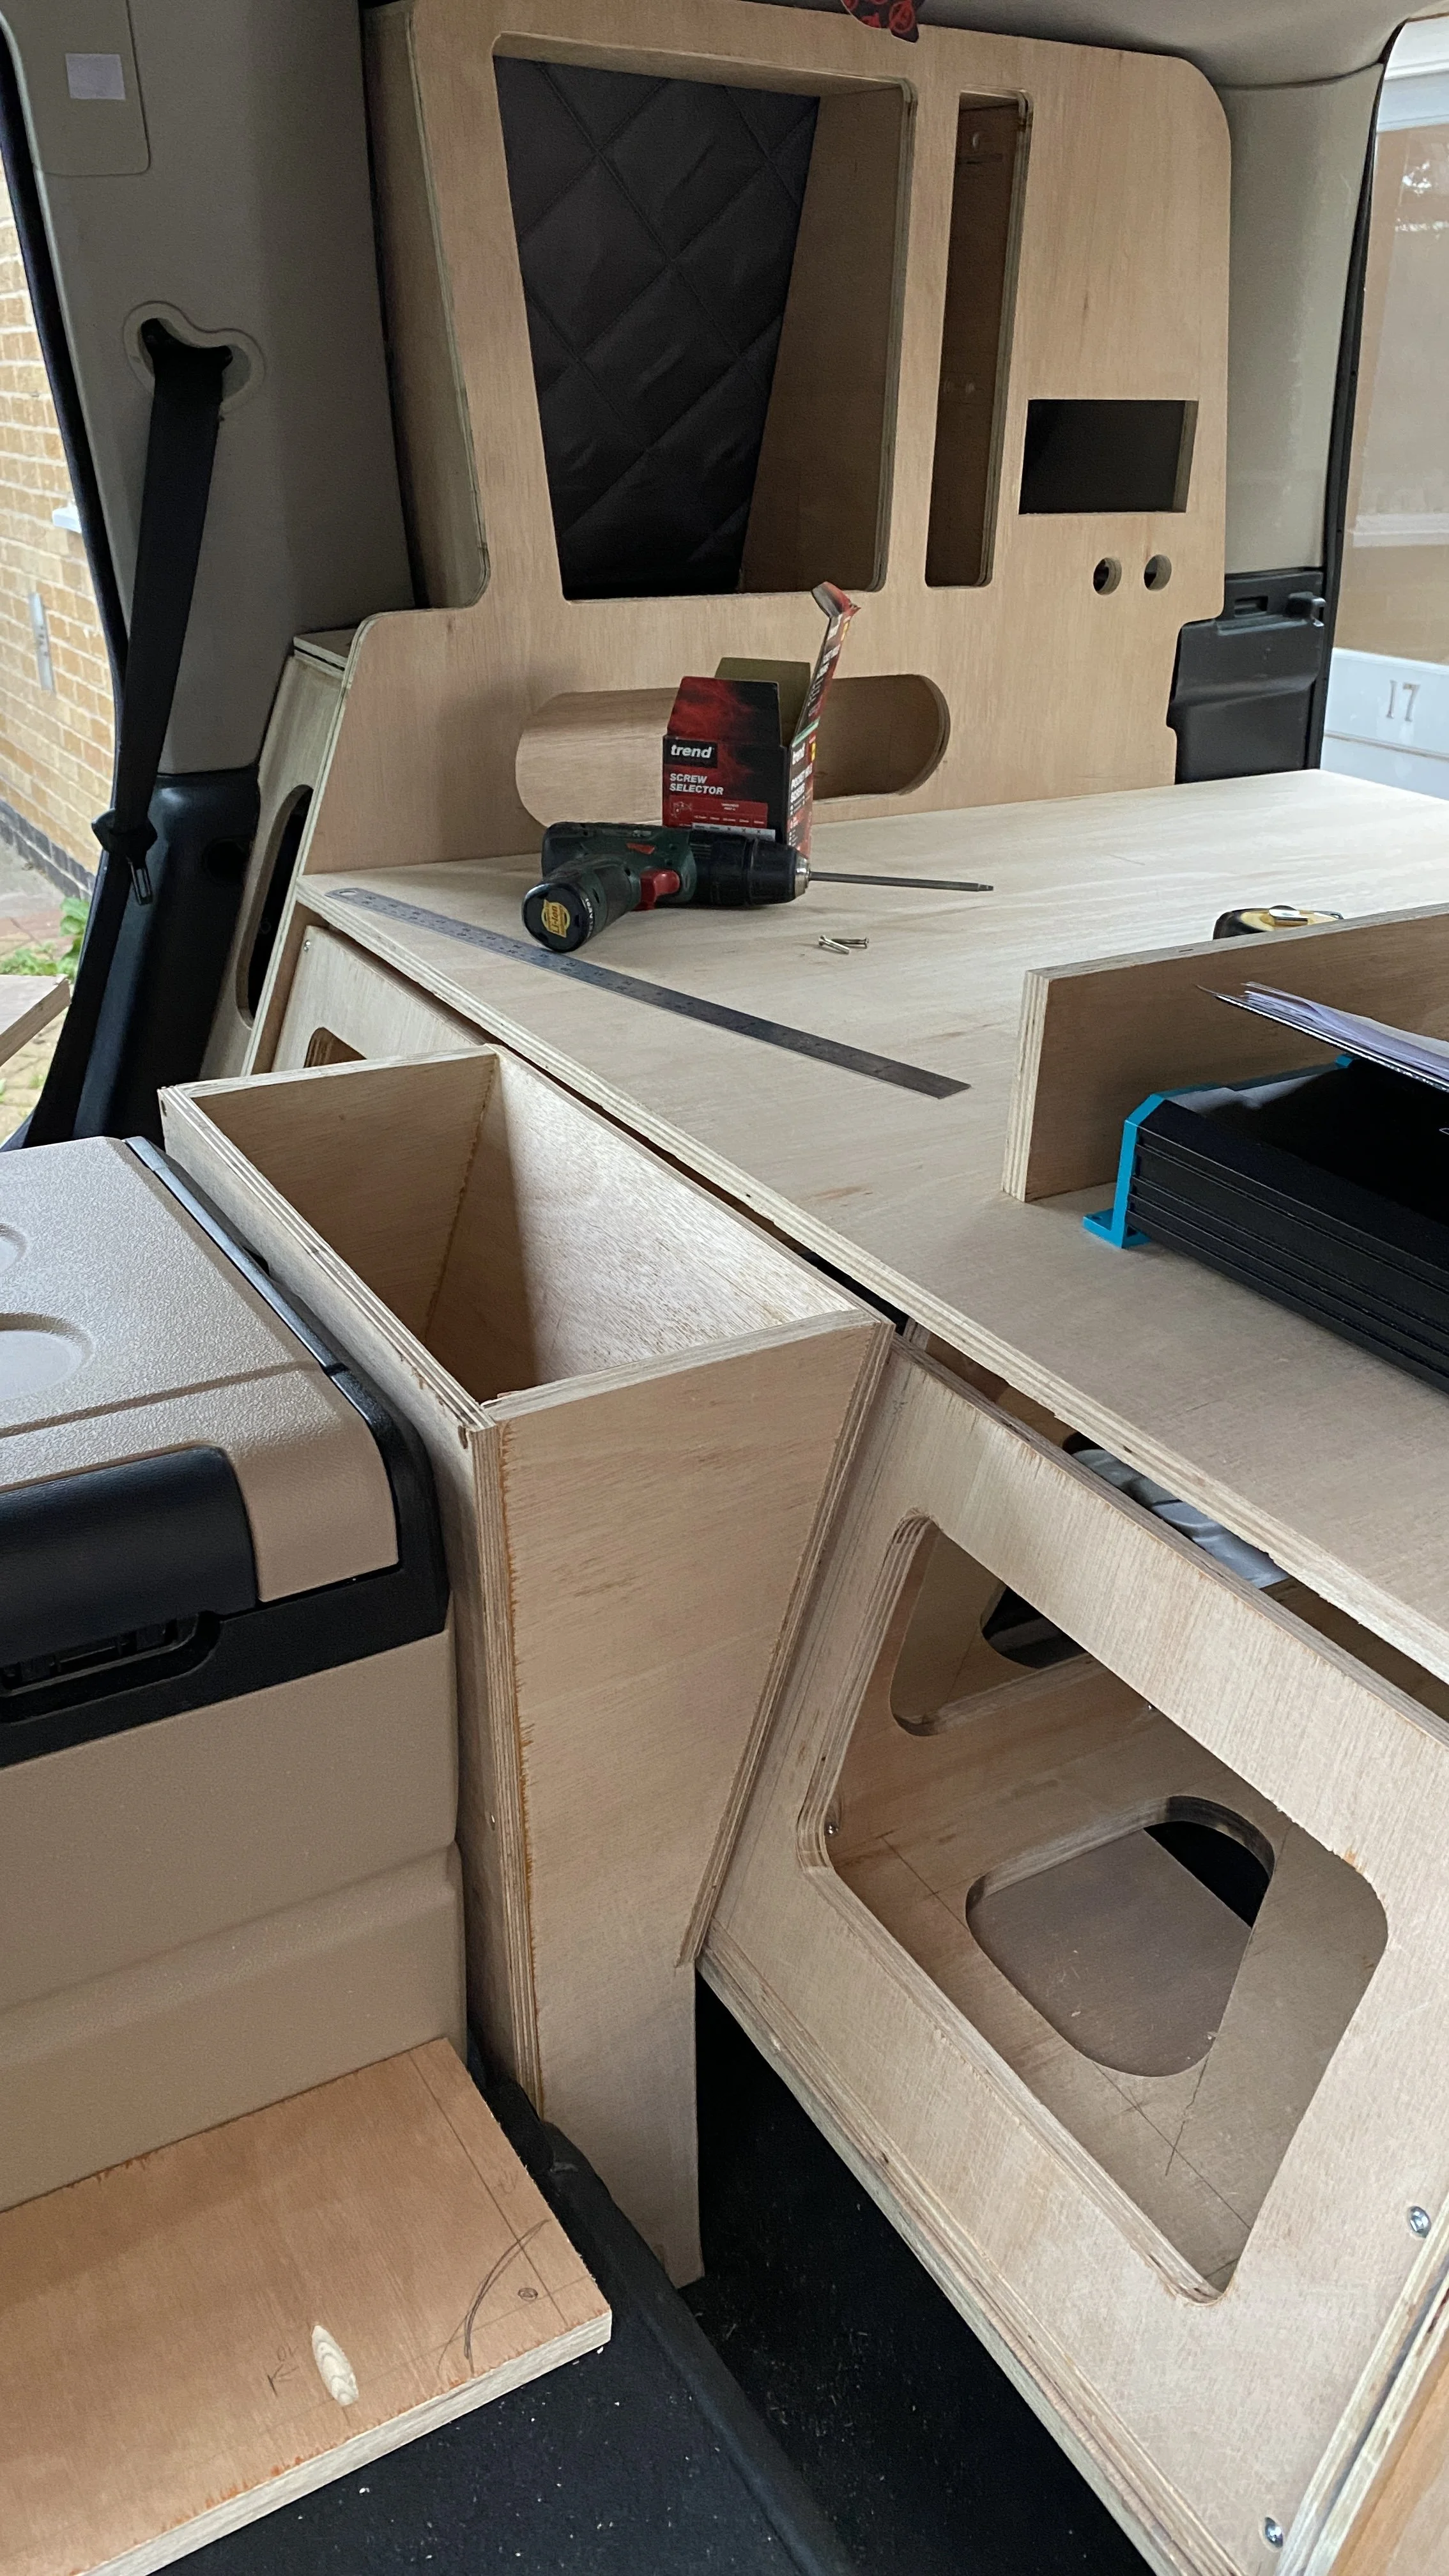
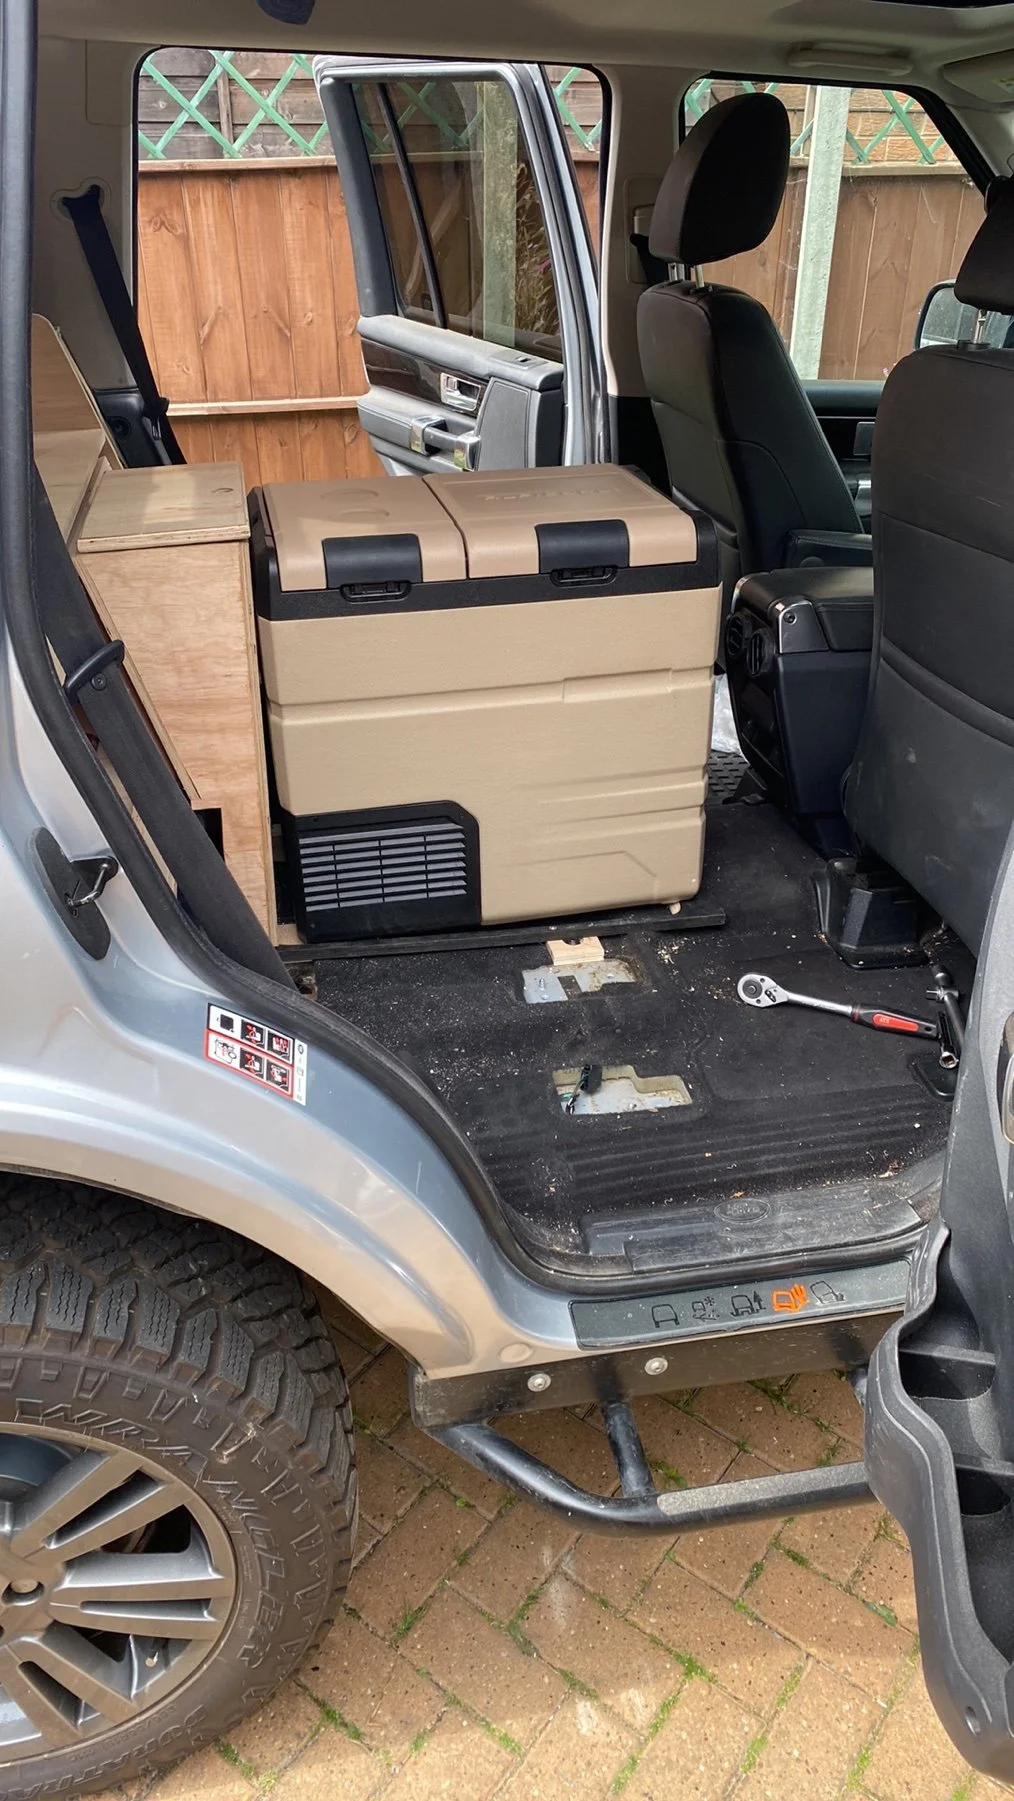
The first major decision was about the fridge and its size (Alpicool 55liter fridge freezer dual compartment). We knew it had to fit where the middle seat usually is, and it couldn’t be higher than the sleeping platform. The fridge is secured in place and also supported at the front by panel with rails holding our folding table which we can easily slide out and tilt forward between drivers and passenger seat - extra handy for quick snacks in bad weather. The height of the sleeping platform was determined by testing the minimum space we needed for sitting, sleeping, and changing clothes. That’s one of the reasons we chose the Discovery with a panoramic roof — the glass above provides a few extra centimeters of headroom compared to the full-length roof lining.
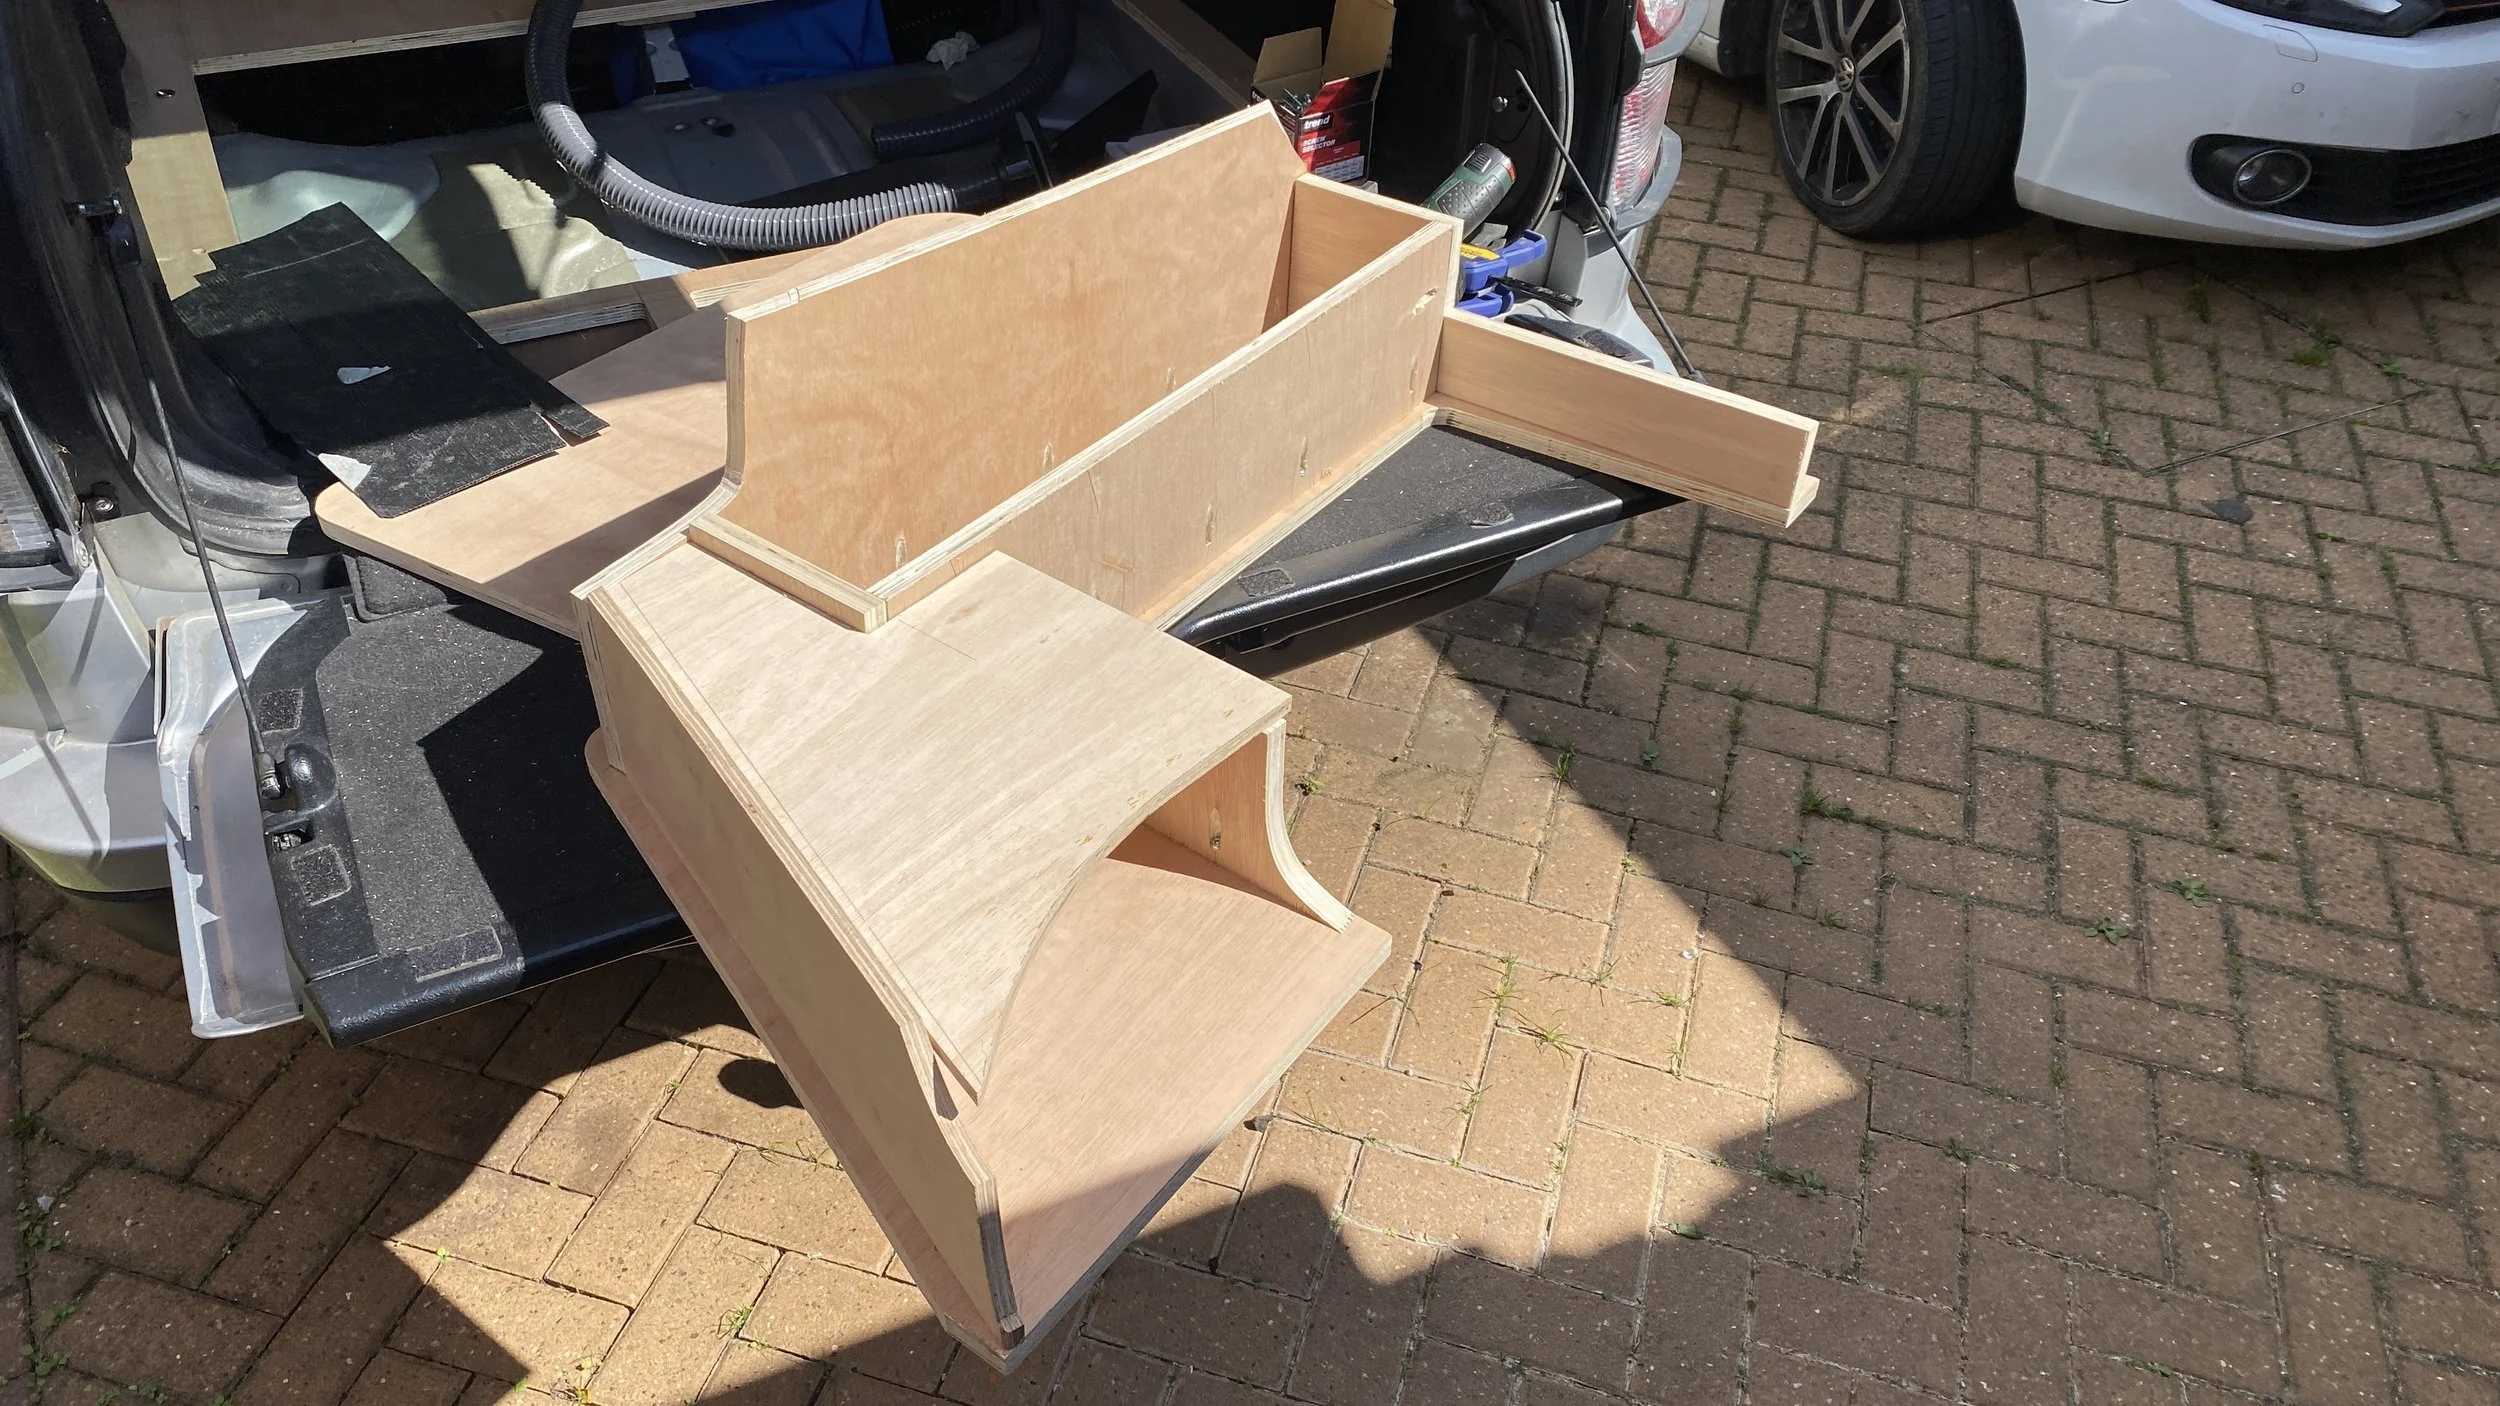
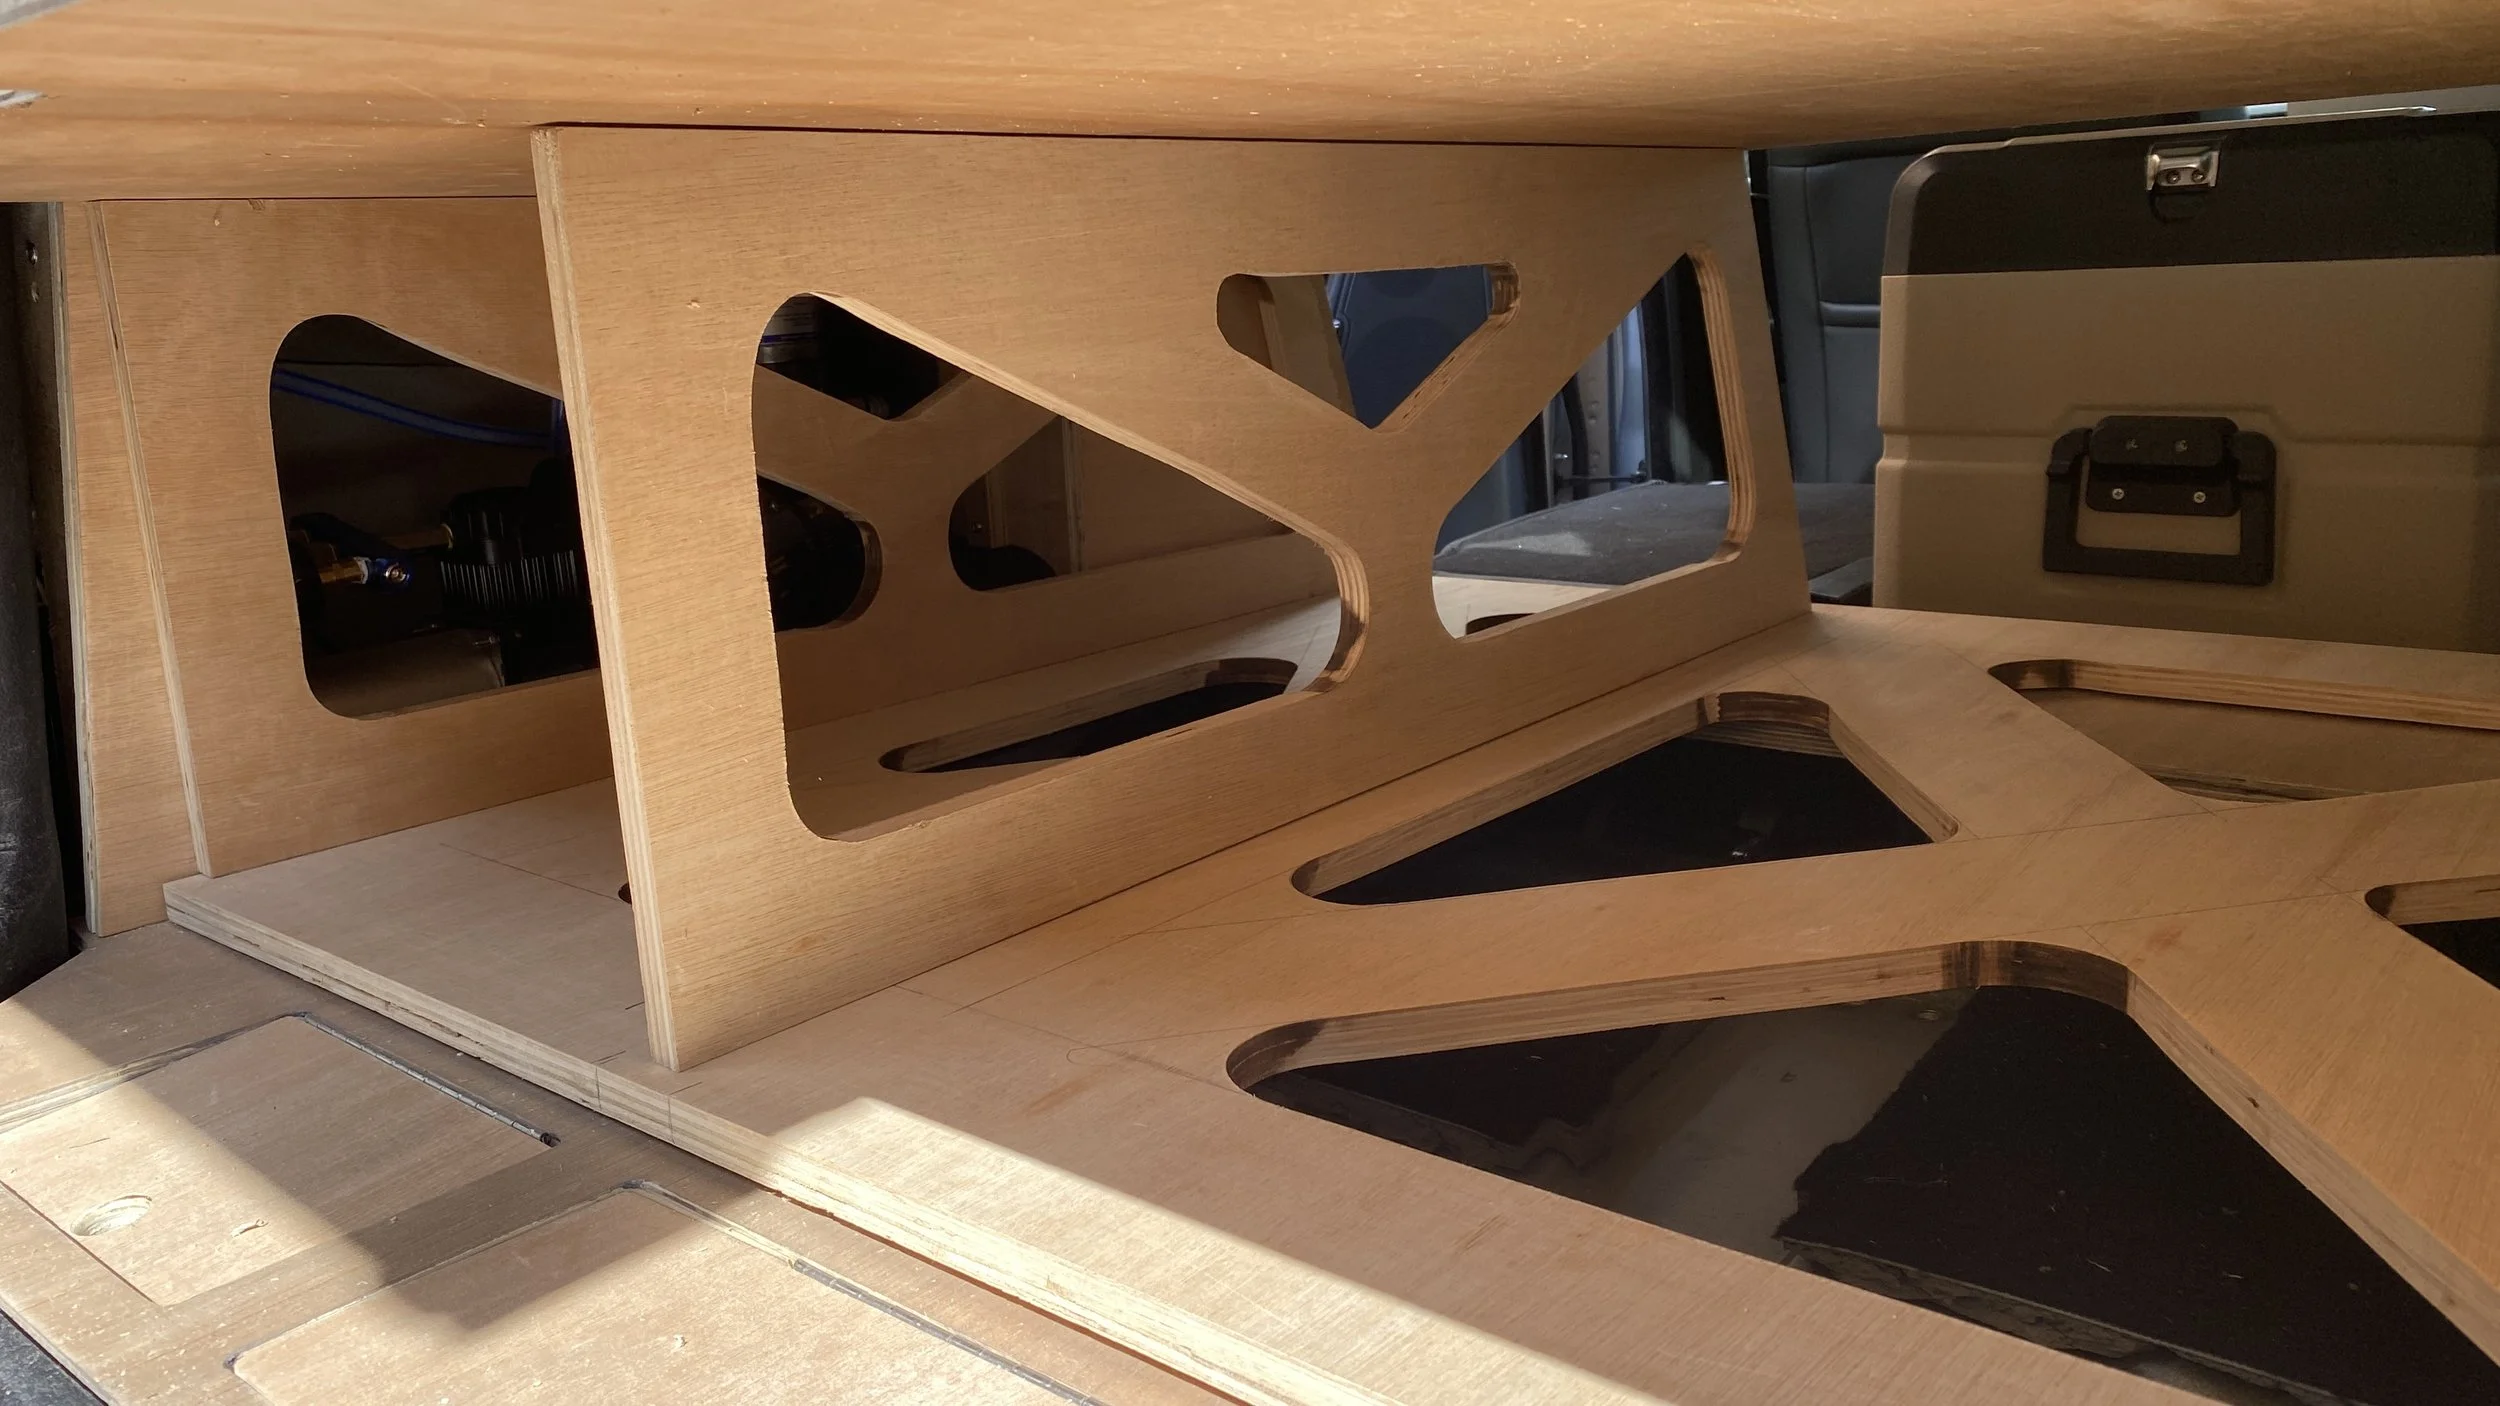
Below the platform, there had to be enough space for two drawers. First one for kitchen - housing the gas stove and gas bottle close to each other as we didn’t want long gas hoses running around the boot and risking kinks or pinches. And thanks to that whole kitchen draw can me easily taken out and used as kitchen elsewhere. It houses 2 gas burners, and slide out draw with spices and utensils and from under the kitchen unit we can slide another small table. Second drawer is used as a pantry and more storage. The kitchen drawer also couldn’t be too tall — when pulled out for cooking, we wanted to be able to close the upper tailgate to prevent cooking vapors and smells from entering the car, and to keep warmth inside during winter.
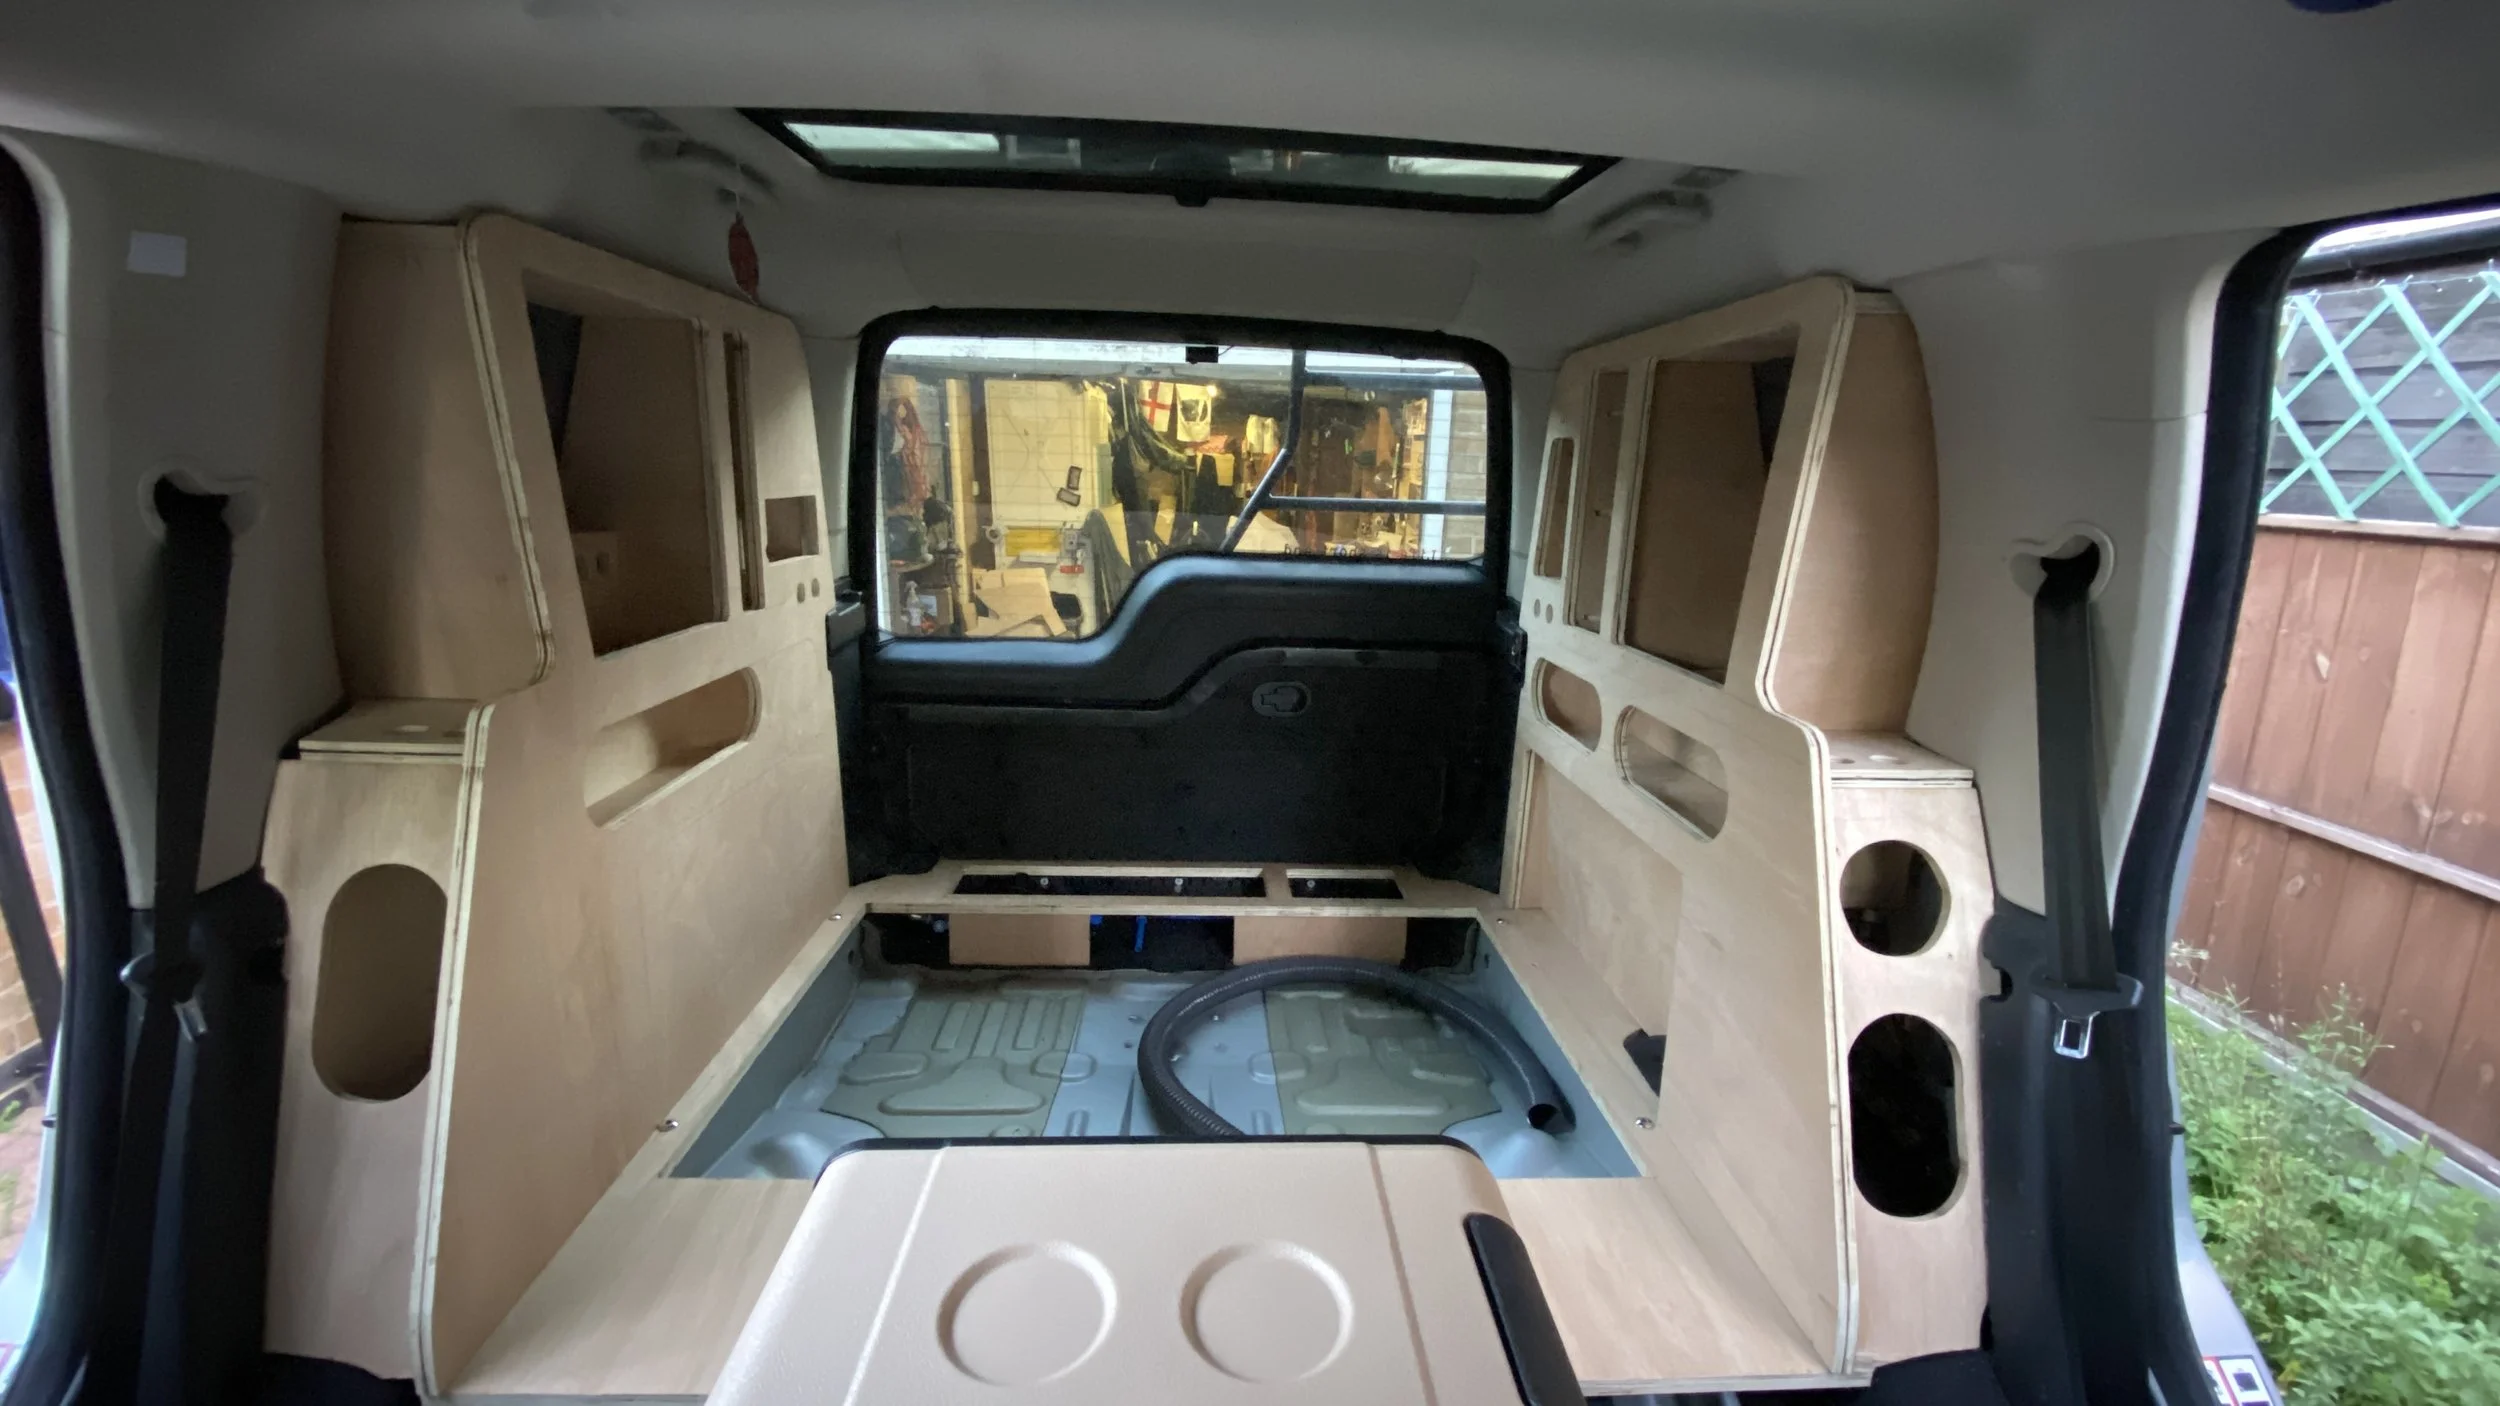
We removed the third-row seats to remove some weight and to free up room for the water tank (we used marine 100l flexible tank and use around 65-70l), which sits low and directly above the rear axle - a great position for balance and weight distribution.
The width and shape of the drawers were dictated by the tailgate opening. We angled the rear sections of drawers to use all the available space behind the second-row seats, but made them slightly shorter to leave a small gap between the drawers and the closed tailgate. This created a handy spot for quick shopping bags, smaller items, and two access hatches under the false floor - one for reaching the water tank and plumbing & storing some essentials like WD40, small ratchet straps and bits and bobs, and another hatch for storing the shower hose and air hose connected to the compressor. This way, we could use them anytime without unpacking or connecting anything. There’s also easy access to the spare wheel winch, so the drawers don’t need to be removed for wheel change. In short, we aimed to make use of every possible space and cavity.
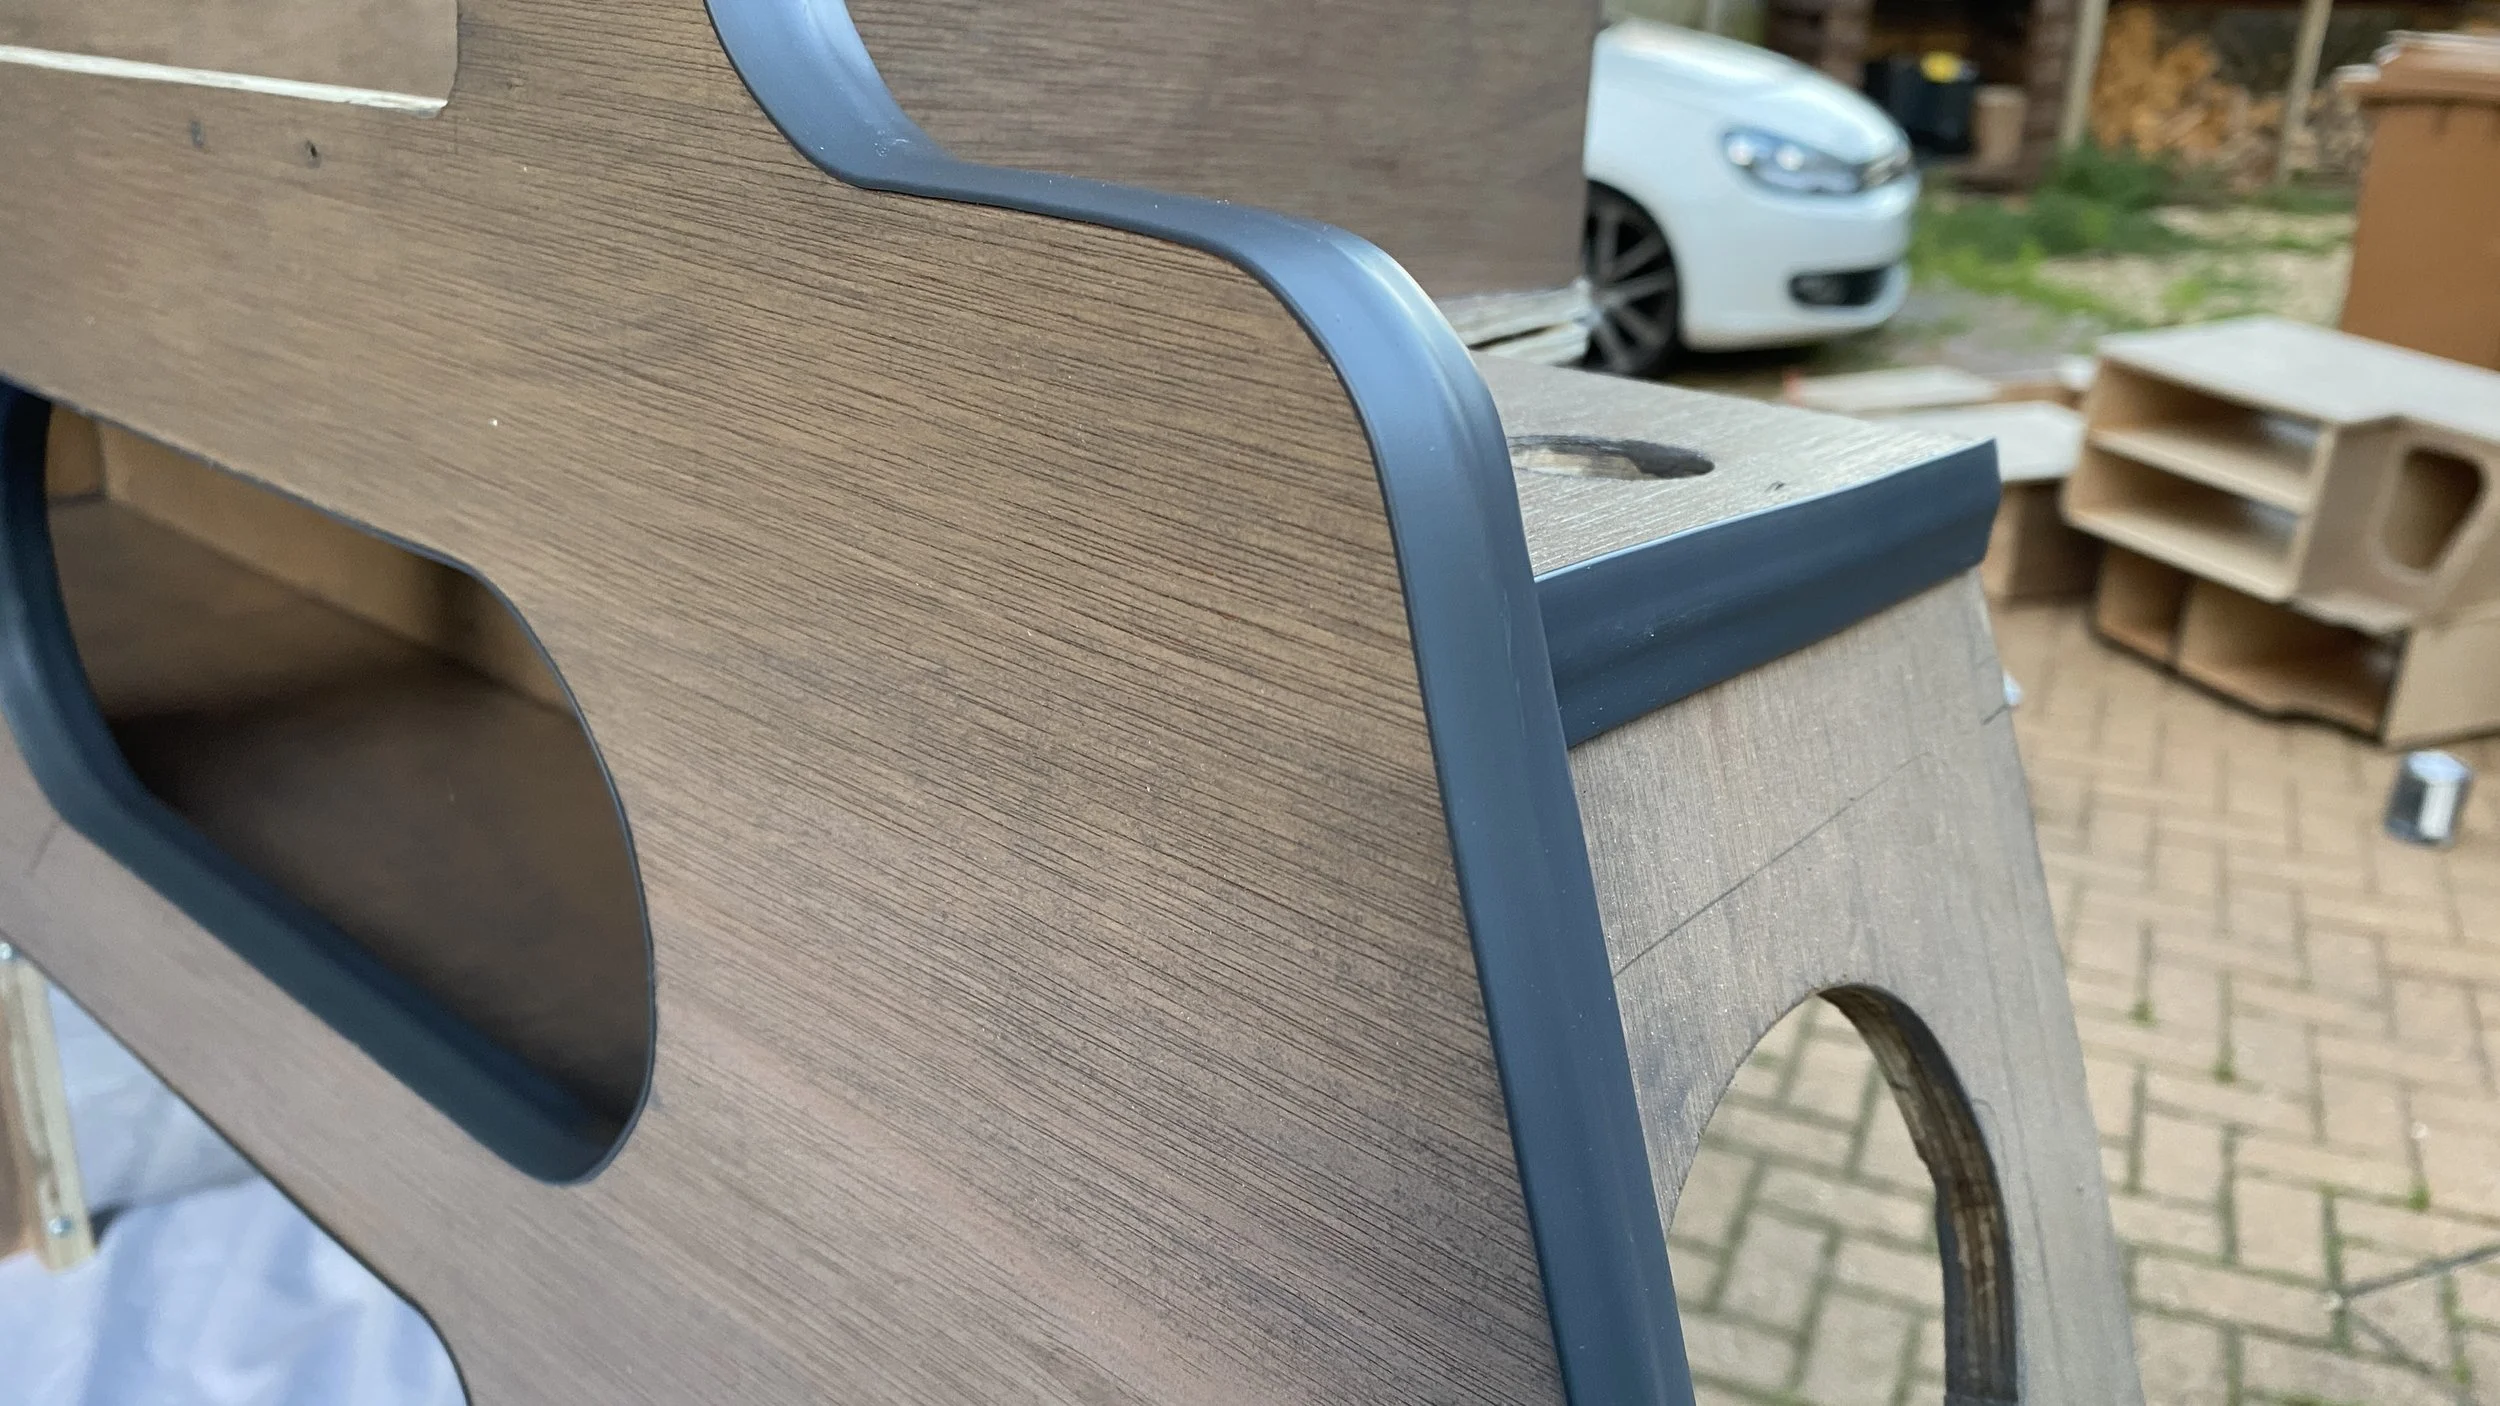
For the side storage areas, we initially planned to build simple cupboards from inside the boot windows, but quickly decided to use the space behind the plastic boot trims as well.
On one side bottom we placed the air compressor (modified T-Max), water pump, and plumbing system, fitted with two 3-way valves. This setup allows us to:
- Pump water from an external source into the tank
- Pump directly from an outside source to the tap or shower
- Or draw water from the tank to the tap and shower
We decided against adding a water heater to save weight and complexity. In summer, we’re perfectly fine with a cold or room-temperature shower. When we want warm water, we simply heat a few liters on the stove, campfire, or Jetboil, mix it to the right temperature in a small bucket, and pump it into the shower. We can easily shower with less than 5 liters of water -so a single 10-liter bucket is more than enough for two of us. At the front of this side unit, we also installed a water filler cap, so the tank can be refilled with a hose or watering can, bellow it another cavity storage for bits and bobs. In top section is water tap, storage for jetboil, and our Bar for few bottles and glasses.
On the opposite side, we placed all the wiring, fuses, switchboard, and system monitoring, safely separated from the water plumbing in case of any water leaks. Also another cupboard wit extra power outlets / so we can charge drone/cameras while storred and hidden. This side also houses a 5-liter air tank, connected to the compressor with a pressure switch (70/100 psi) and safety release valve (150psi). It has two outlets: one at the rear with a coiled hose and pressure gauge for inflating tyres, and another behind the driver’s seat with a hose and blow gun for cleaning and dusting gear. There is also nice long storage cavity where perfectly fits our amera tripod.
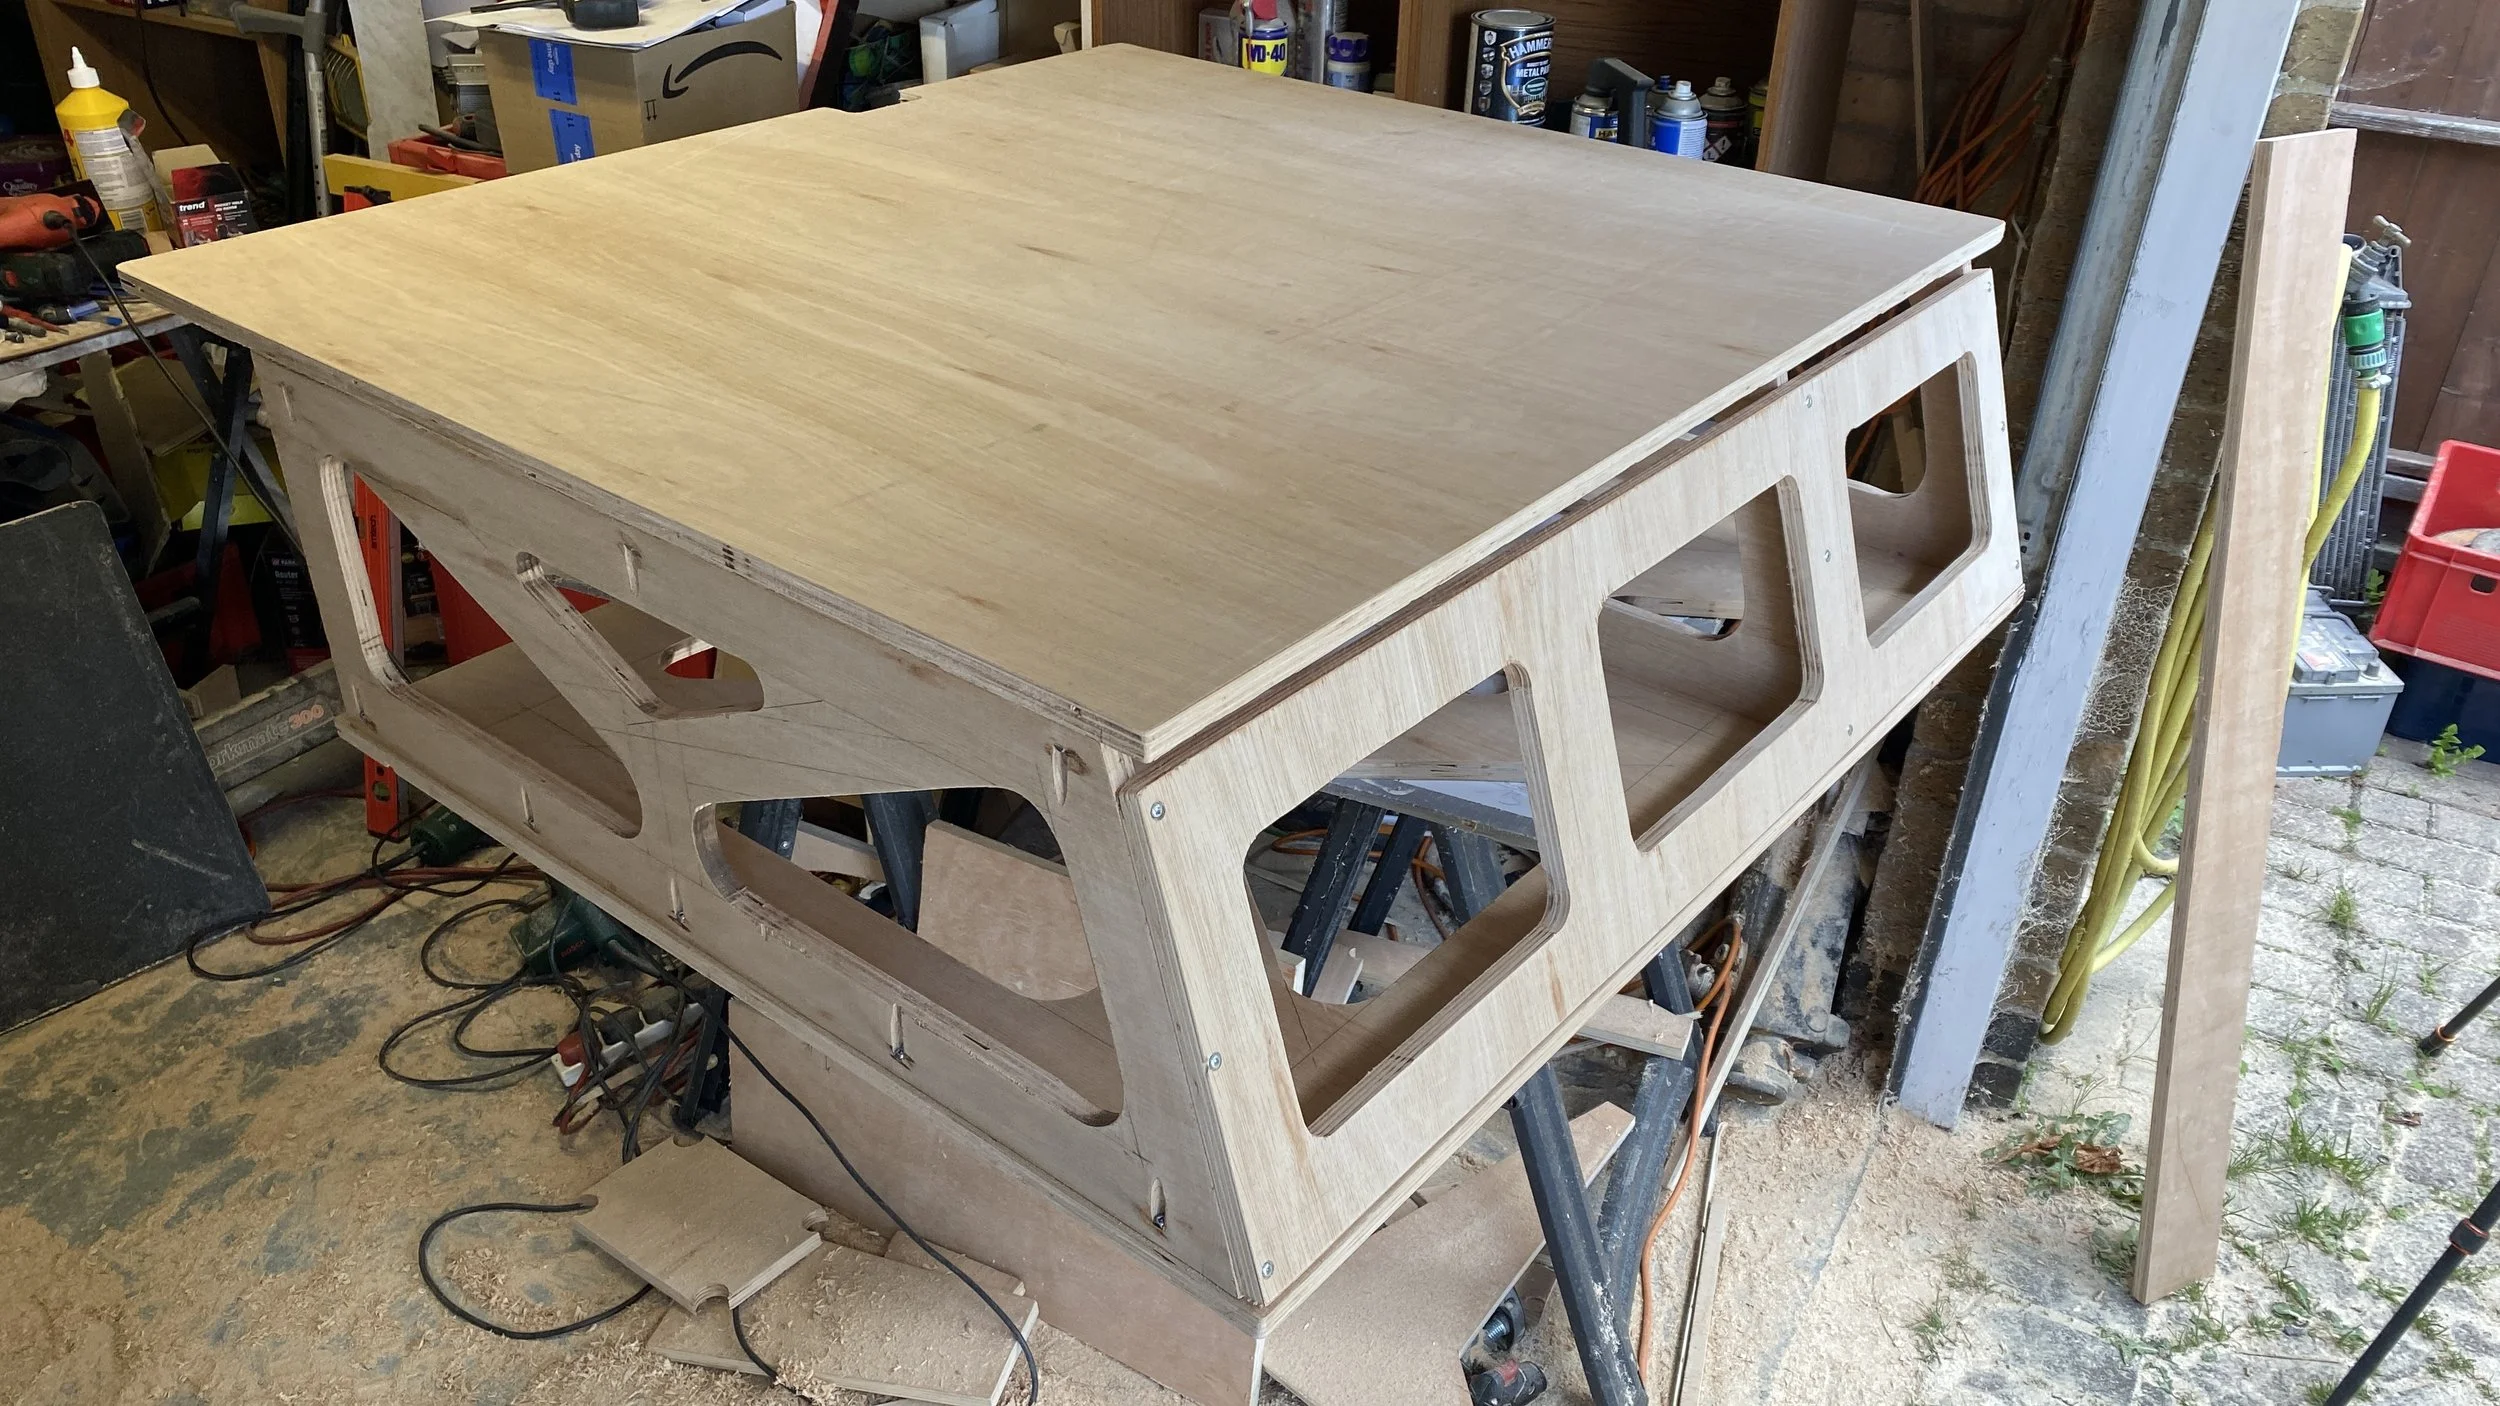
That was the idea - and now you can see how it all came together in the finished setup. See it all in more details in gallery here.